Indulge in the Marvel: A No-Bake Oreo Blackberry Tart! You’re Gorgeous, Yes You Are! Make this showstopper dessert today!

Gorgeous Easy No-Bake Oreo Blackberry Mousse Tart
Continue reading
0 Comments
A blog with a little bit of everything for parents
Indulge in the Marvel: A No-Bake Oreo Blackberry Tart! You’re Gorgeous, Yes You Are! Make this showstopper dessert today!
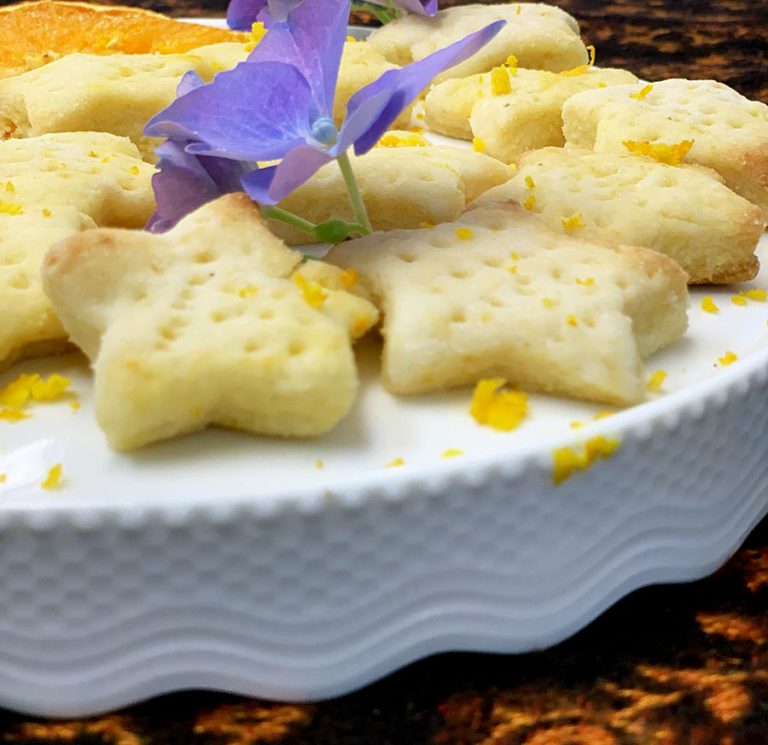
Want to add some sunshine to the traditional shortbread recipe? Just add Valencia orange juice and zest and enjoy zesty orange shortbread.
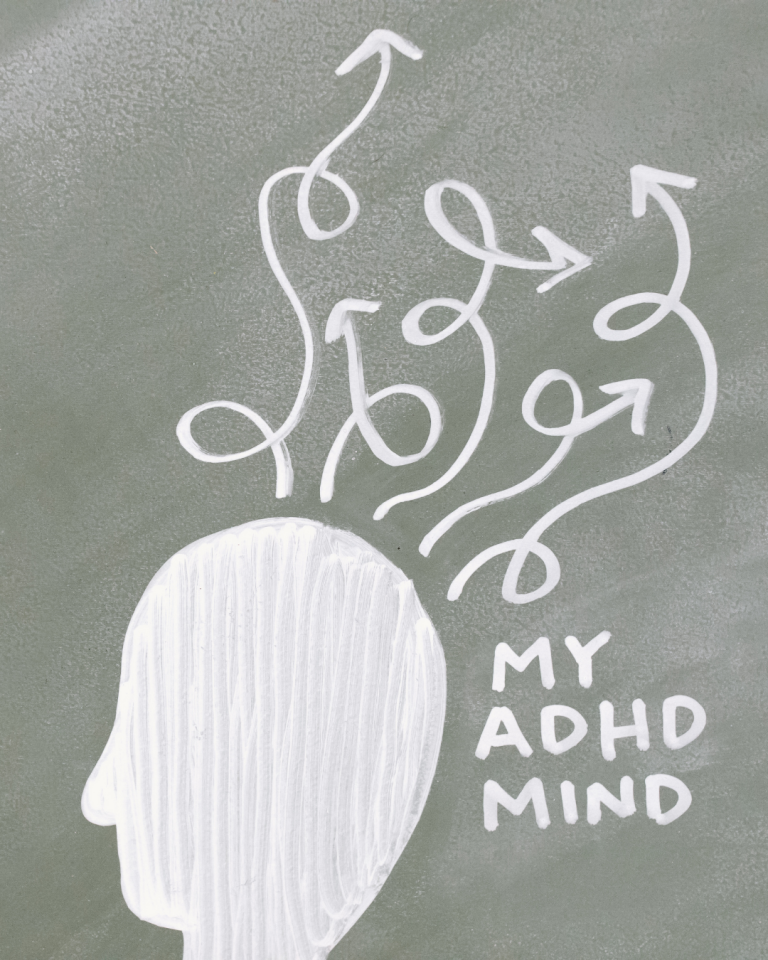
Okay, I know I’m late to ADHD Awareness Month — but when you’re parenting a little one with ADHD, life’s rarely on schedule! 💛 Here’s why I see my son’s ADHD as his superpower and some amazing advocates and resources that continue to inspire us every day.
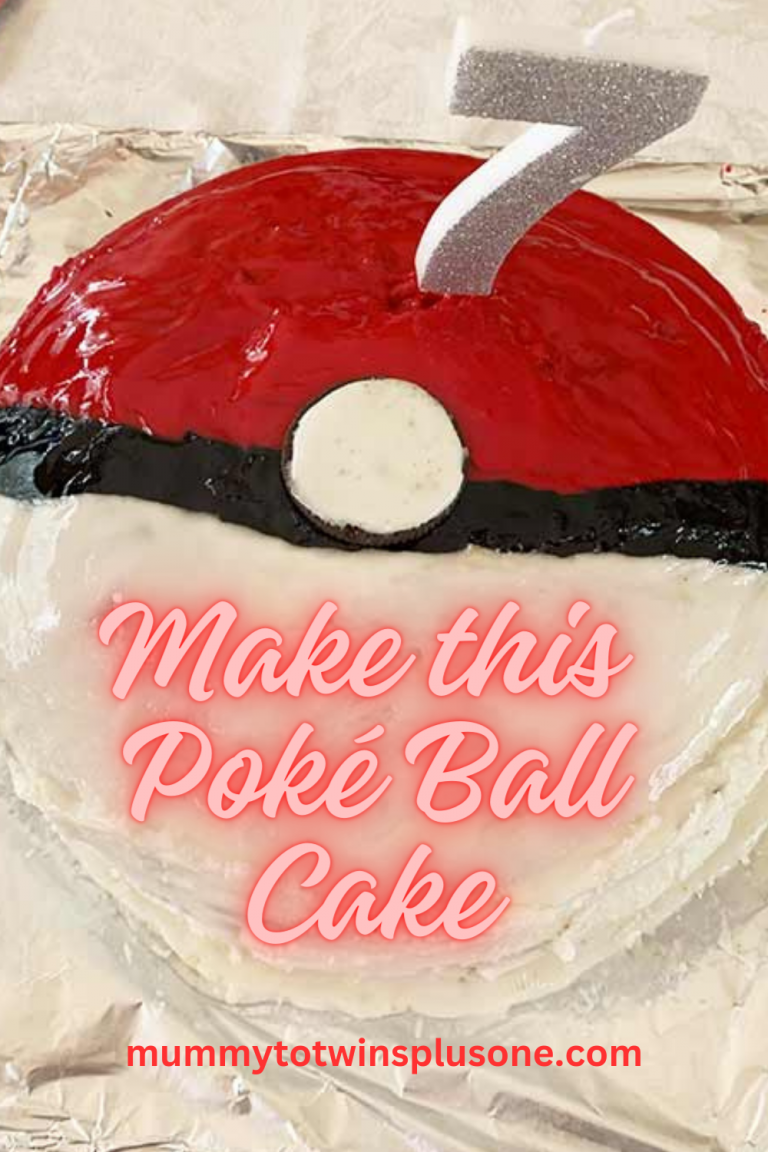
Got a Pokémon superfan in your life? Someone whose love for those pocket monsters knows no bounds, whether they’re a kid or a kid-at-heart adult? Make them an epic Poké Ball cake.

This Mother’s Day, swap the flowers for something she can sip and savour. Treat Mum to a Feeney’s G & Tea — a creamy, floral twist on the classic cocktail that’s as easy to make as it is to enjoy. With Feeney’s Irish Cream, a touch of Bloom Gin, and soothing chamomile tea, this indulgent drink is perfect for helping her unwind in style.

Hey parents, teachers, and little learners! 🌟 Are you ready to sprinkle some educational magic into this year’s back-to-school routine? 🚀✨ Look no further than Twinkl – your ultimate partner in making learning a joyous adventure! 🌈🎒
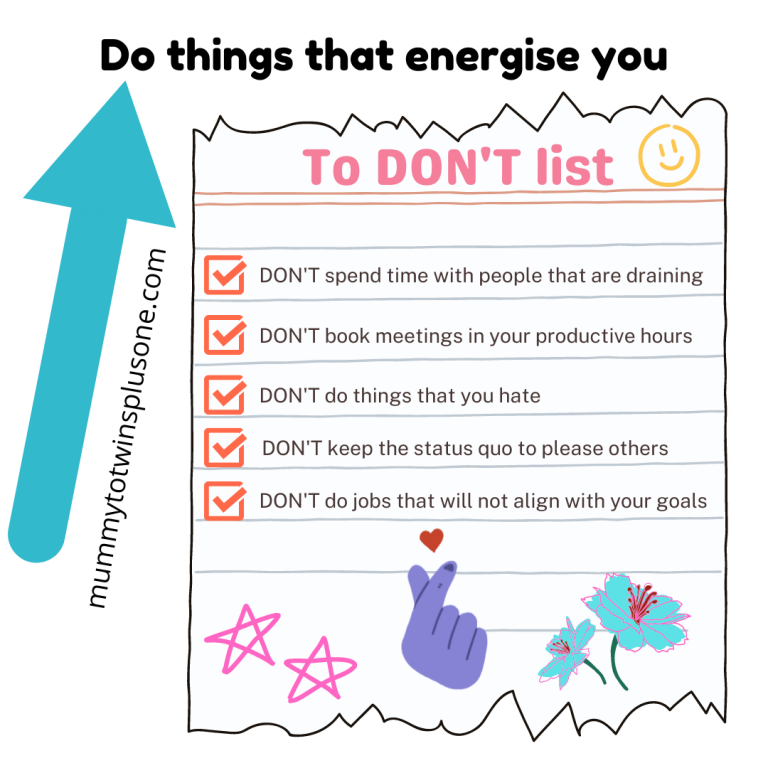
Have you made a ‘to don’t’ list yet? I am busy making mine. Oh creating a don’t do list frees you up to do more for you. Read on to find out more.

Get 5 tips to help you purchase gifts for twins and triplets. Make the next birthday party easy with this simple gift guide.
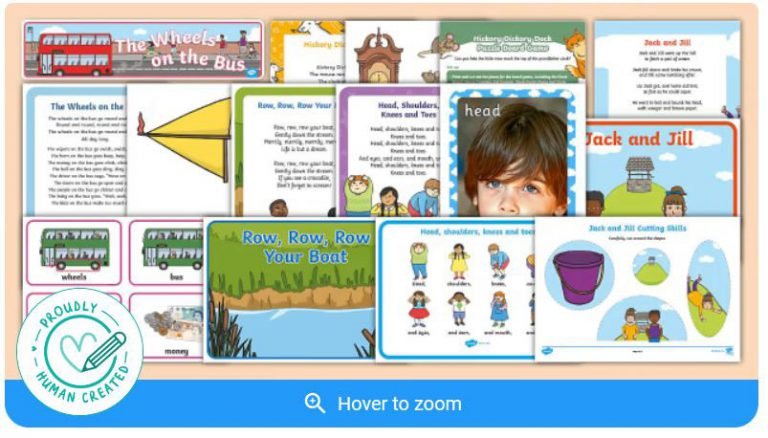
From November 11th-15th, dive into a week of fun and learning with Twinkl’s exciting resources! Sing, play, and create with nursery rhymes like “Wheels on the Bus” and “Hickory Dickory Dock.” Download crafts, games, and lesson ideas to make every day magical! Join the Rhyme A Day Challenge and let the learning begin—perfect for kids, parents, and teachers alike
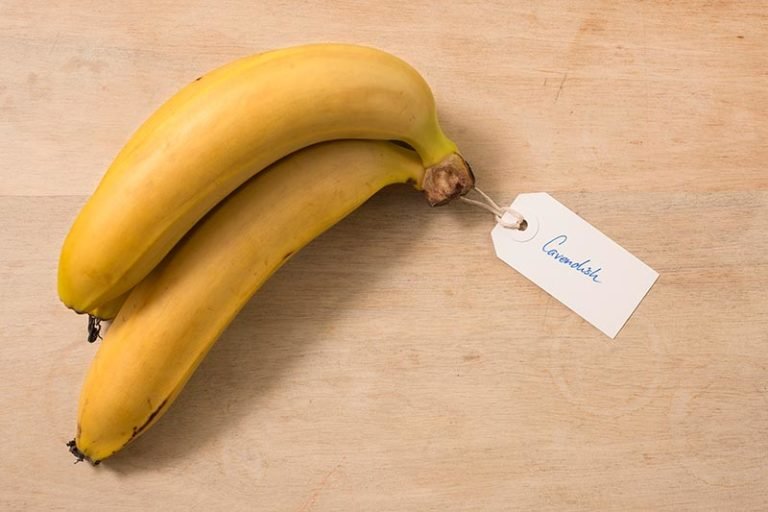
From the moment you realise you are going to be a mum until your child is getting dressed all by themselves, Australian bananas are the ideal addition to both your diets….

Make a cheap and easy Cakeover Wedding Cake. Learn how I created this pretty and tasty cake for a wedding.
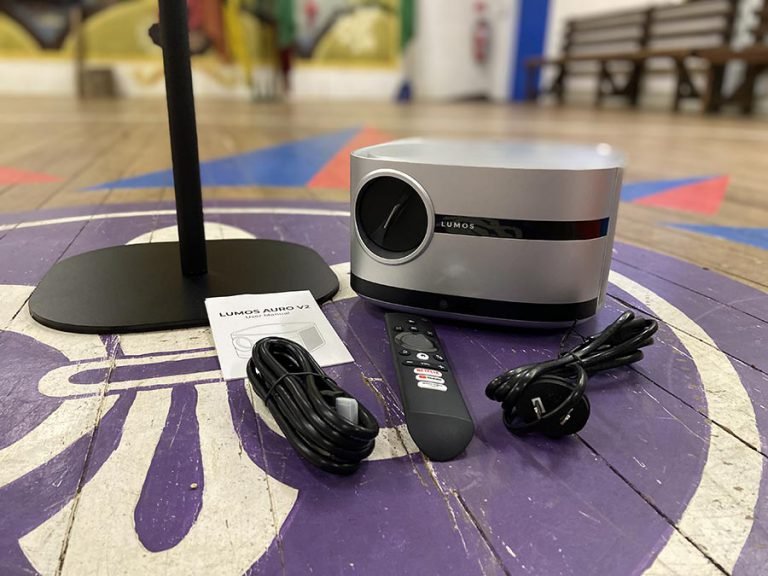
🎥✨ Anywhere can be a cinema with the LUMOS AURO V2 projector! Our Scout hall movie night was a blast with this game-changing projector. Easy setup, stunning visuals, and incredible sound! Read the full review, watch the YouTube video and make sure to scroll down to get the discount if you wish to grab a LUMOS projector too!

Make this amazing smelling raspberry play dough! It smells fabulous and is also so soft. Have fun with this great play dough recipe. Read my post to find out what the mystery ingredient is.

Dive into the colourful world of Dr. Seuss with Twinkl’s delightful resources! 🌈 From whimsical worksheets to Seussian storytime activities, unleash your inner child and spark your imagination with educational fun for all ages! 📚✨ Celebrate Dr. Seuss Day on March 2nd and make it an extra Seuss-tastic adventure!

🚀 Exposing the Real-Life Discrimination Mums Face in Job Hunting: It’s Time for Change! Dive into the Unfiltered Truths of Sexism and Postcode Discrimination. Let’s Break the Silence and Demand a Fair Shot for All! Click to Uncover the Reality. 💼🌟 #MumDiscrimination #MomDiscrimination #FairOpportunities #UnveilTheTruths

Get ready for the Year of the Wood Dragon! 🎉 Discover your horoscope for luck and learn how to celebrate the Lunar New Year in style. Gong Xi Fa Cai! 🐉🎊 #YearOfTheWoodDragon #LunarNewYear
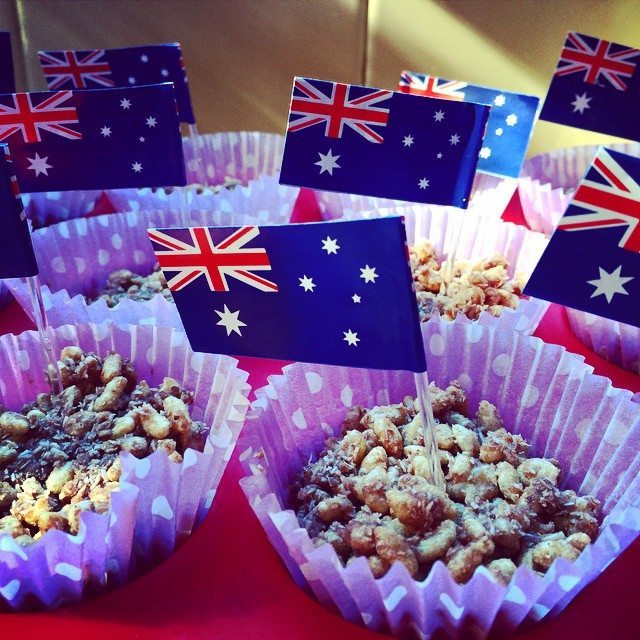
Need a quick item to create for Australia Day? How about Chocolate Crackles. It is an easy recipe and the kids will love it too!
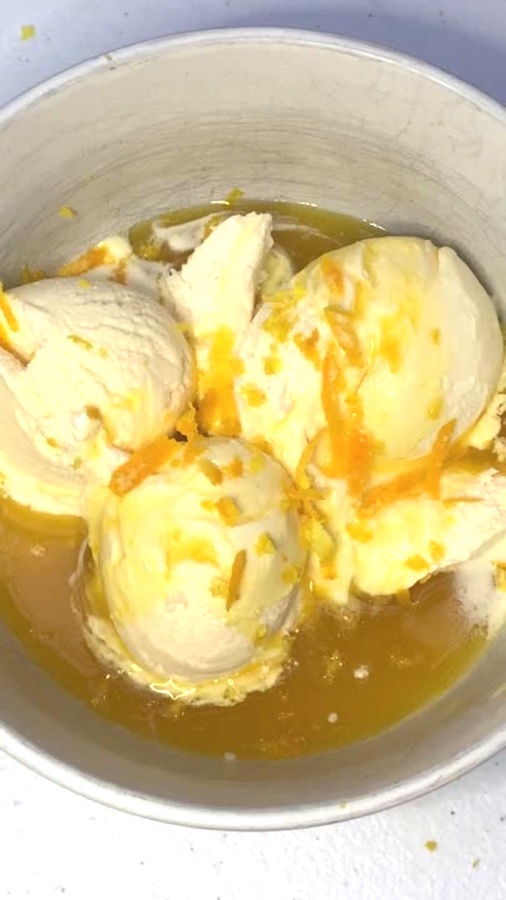
Did you know how easy it is to make orange syrup? How about making it even more orangey? Read on to see how I made orangey orange syrup.