Indulge in the Marvel: A No-Bake Oreo Blackberry Tart! You’re Gorgeous, Yes You Are! Make this showstopper dessert today!

Gorgeous Easy No-Bake Oreo Blackberry Mousse Tart
Continue reading
0 Comments
A blog with a little bit of everything for parents
Indulge in the Marvel: A No-Bake Oreo Blackberry Tart! You’re Gorgeous, Yes You Are! Make this showstopper dessert today!

Want to add some sunshine to the traditional shortbread recipe? Just add Valencia orange juice and zest and enjoy zesty orange shortbread.

Do you love to make Gingerbread? Would you like to have one of the yummiest recipes there is for gingerbread? Then read on to download the recipe and to see my versions that I created.

Oranges are bright, colourful and a happy fruit. Yes, fruit can be happy, especially when it reminds me of summer and holidays. Make Valencia Orange Sunset Pie and share the taste of summer.
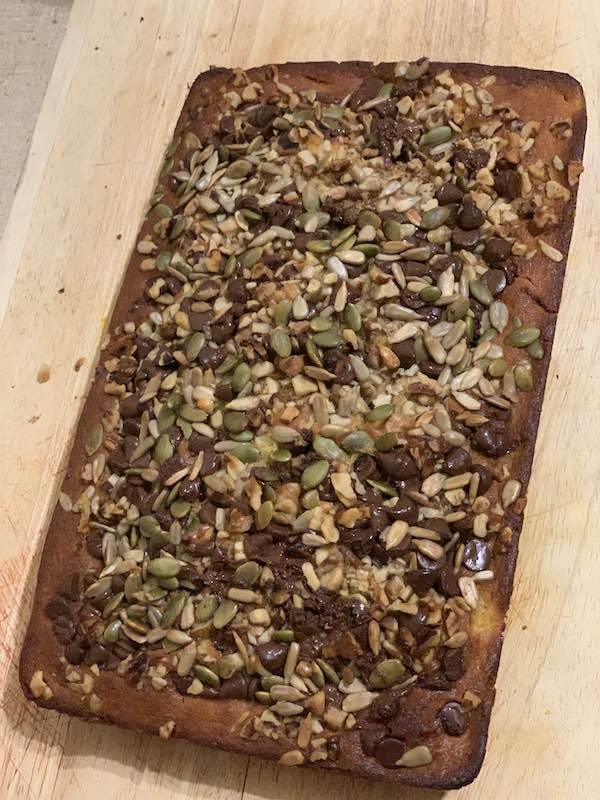
Make this yummy treat today – Choc Chip Pumpkin Bread is super easy to make and super yummy too. See the video on how easy it is to create.
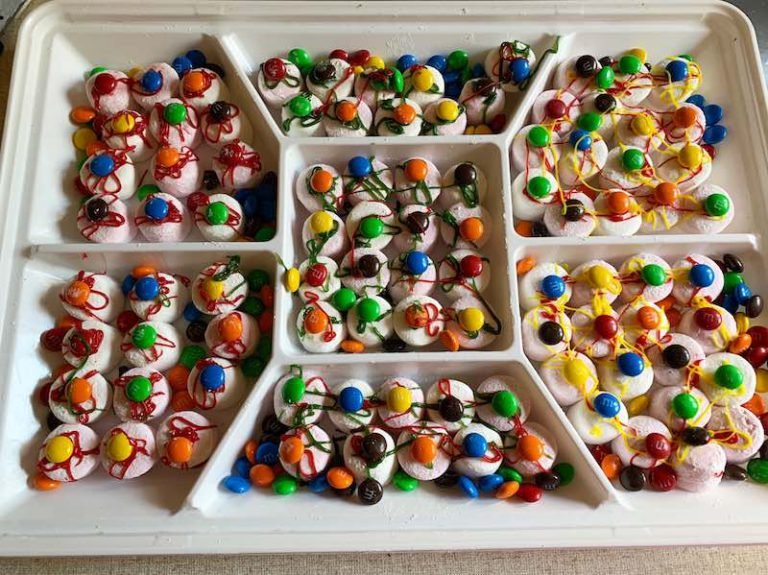
Make a quick no-bake spooky treat – Zombie Eyes! Make a batch today.
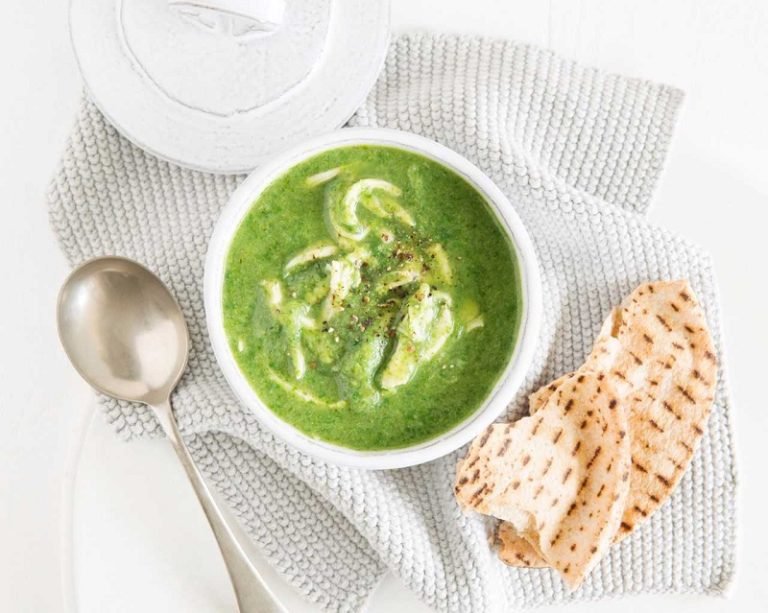
Warm up your chilly evenings with a vibrant and delicious Chicken & Broccoli Soup! It’s packed with nutrients and flavours that will make your nights cosier. Get the recipe now!
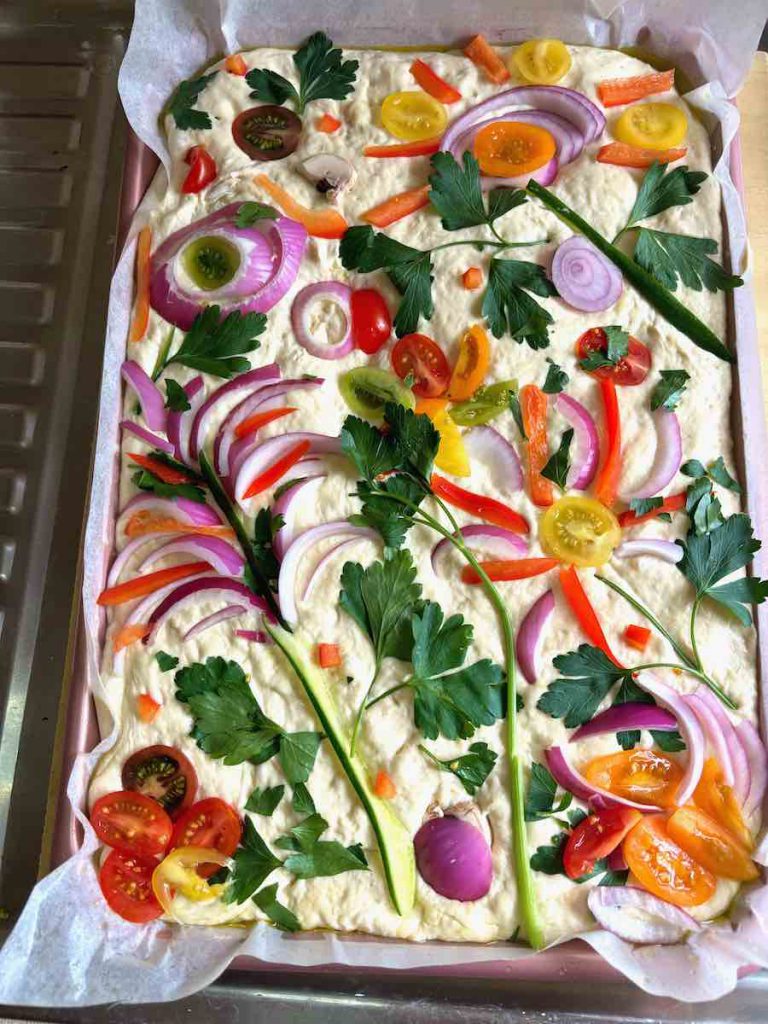
Get ready to bake the prettiest focaccia ever, complete with veggie flowers and garden-inspired decorations! This stunning, mouthwatering masterpiece is as fun to make as it is to eat. Perfect for impressing guests or treating yourself, this focaccia will have everyone asking for the recipe. Don’t miss out on this showstopper bread – your taste buds (and Instagram feed) will thank you!
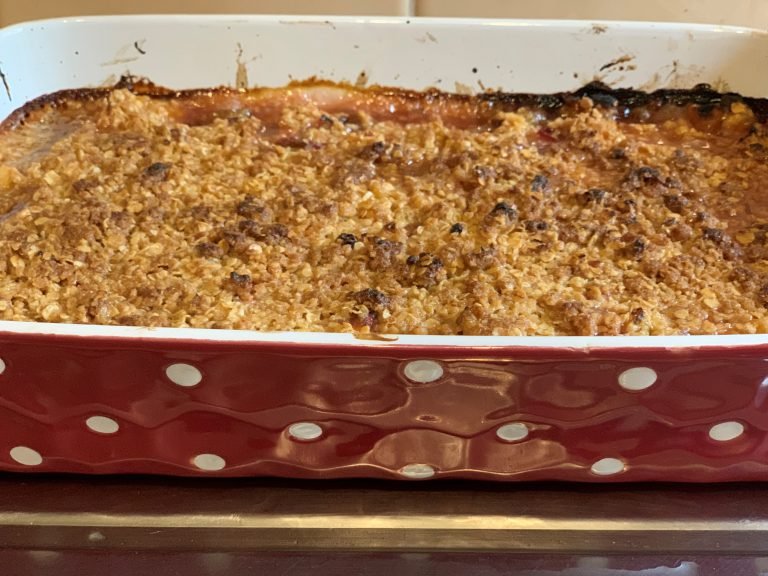
Make a yummy mandarin and rhubarb crumble today. Everyone will love it and it will certainly impress if you are having a dinner party. Easy and quick to make. Download the FREE recipe card as well to make cooking easier.
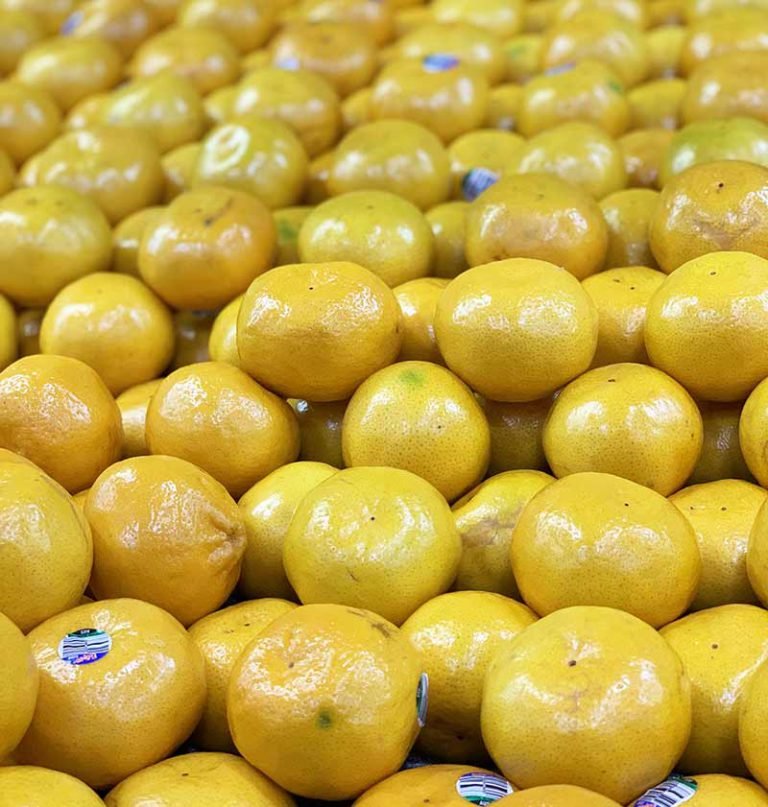
Cook some new and delicious dishes with Mandarins. Download the recipes for Mandarin Curd Tart and Spiced Mandarin Marinade.
Make this super yummy and quick to bake Orange & Poppy Seed Pound Cake. You’ll be amazed at how quick it is to make with the Philips XXL Airfryer, and how delicious it is! Make yours today.
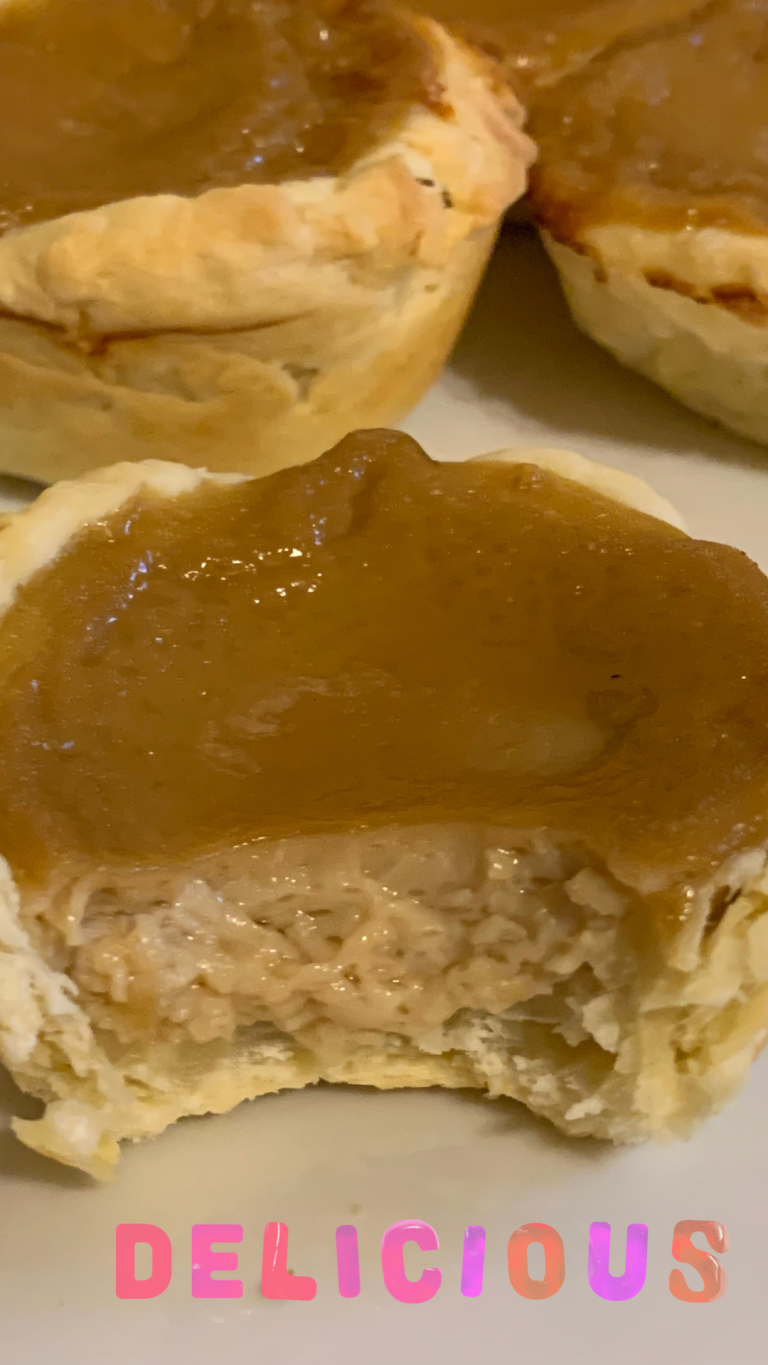
Make Hong Kong Egg Tarts to celebrate the Lunar New Year. I made mine with brown sugar so they look a little bit darker than the standard egg tart, but still taste amazing.

Craving a simple, healthy dinner? Try this warm chicken salad with veggies! With fresh ingredients and a zesty dressing, it’s perfect for a quick, nutritious meal. Give it a try tonight!

Ever wondered how to make a truly unique pizza? I had an idea for a Blackberry, Fetta, Sweet Chilli, Rocket, and Pistachio Pizza, and it turned out amazing! Follow the recipe, create your own dough, and you’ll be on your way to making this deliciously unexpected pizza that’s sure to impress!
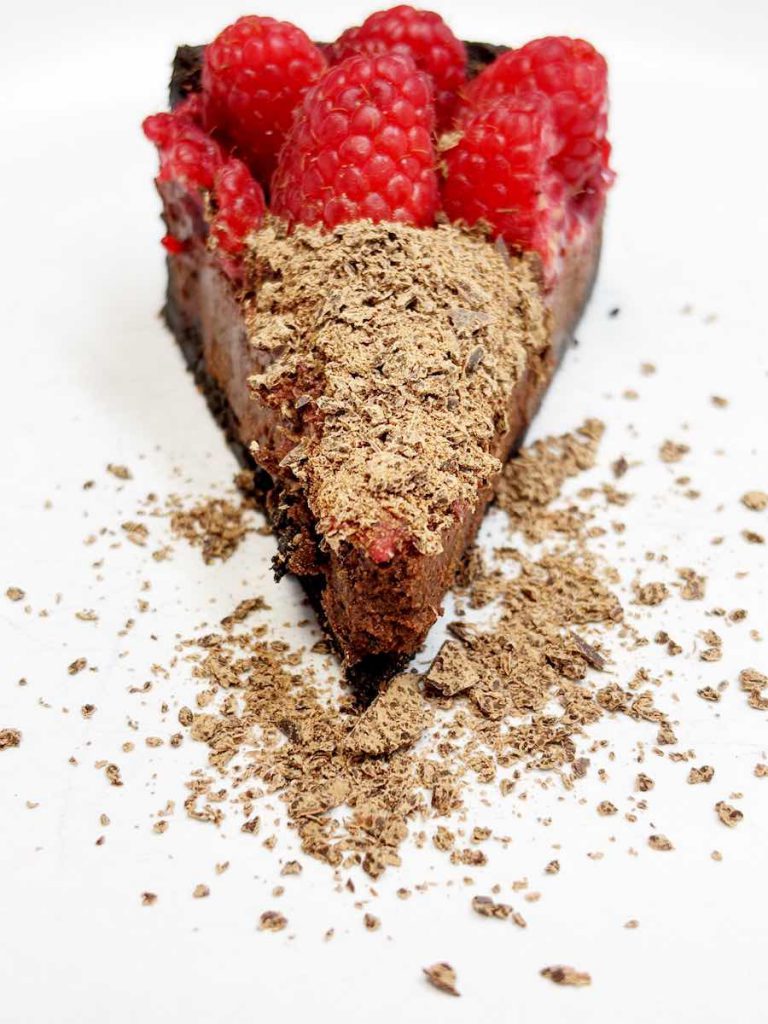
Ready to wow your guests with minimal effort? This tart is the secret weapon you’ve been waiting for! Think rich dark chocolate, zesty raspberries, and an Oreo crust that’s easier than pie. Whether you go big or mini, this dessert will steal the show at your next dinner party, birthday bash, or any special occasion. Trust us, you’ll want to make it again—and again!
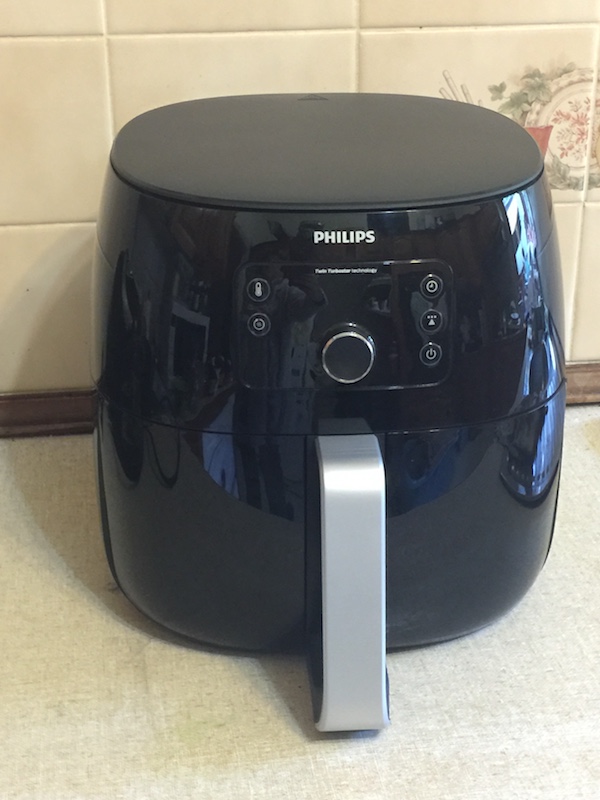
I was sent a Philips Airfryer XXL to test out. Read on to learn how to cook hot chips and lamb chops & veggies in the airfryer. Insert happy dance…
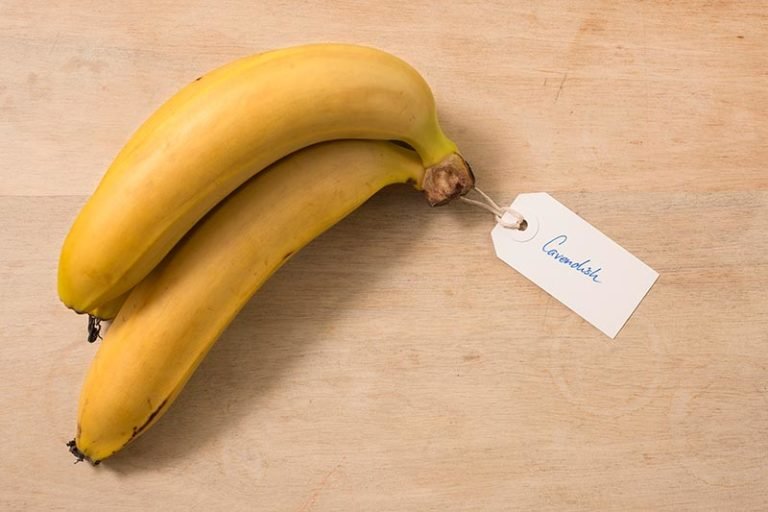
From the moment you realise you are going to be a mum until your child is getting dressed all by themselves, Australian bananas are the ideal addition to both your diets….
I love going to the Veggie Patch in Blackheath. As the name suggests they sell fresh produce: fruit and vegetables. However, they also sell pasta, sauces, and all sorts of…