Are you looking at something fun and different to do with the kids?
Why not take them Diamond or Crystal mining, or maybe both?
Would it surprise you that my four-year-old and I found diamonds and crystals (AKA Rocks) at our local park? I think you would be rather impressed.
It was a great time at the local park. My little boy rode his bike to the park and while there we searched for valuable crystals and diamonds.
Alexander found a few and made sure to put them safely in his pockets or if they didn’t fit my pockets. We took them home to wash them to allow us to inspect our haul of treasures.
I know that we didn’t collect actual crystals or diamonds but the hunt and chase for the real thing was super fun, plus after we were home water was involved to clean the rocks and this meant that Alex was then covered head to toe in the water and of course spent hours playing in the water and investigating his special treasures.
Stay current with all the things that are happening on Mummy to Twins Plus One. Don’t miss a thing by signing up for my newsletter. This newsletter will list all giveaways and fabulous things that are happening.
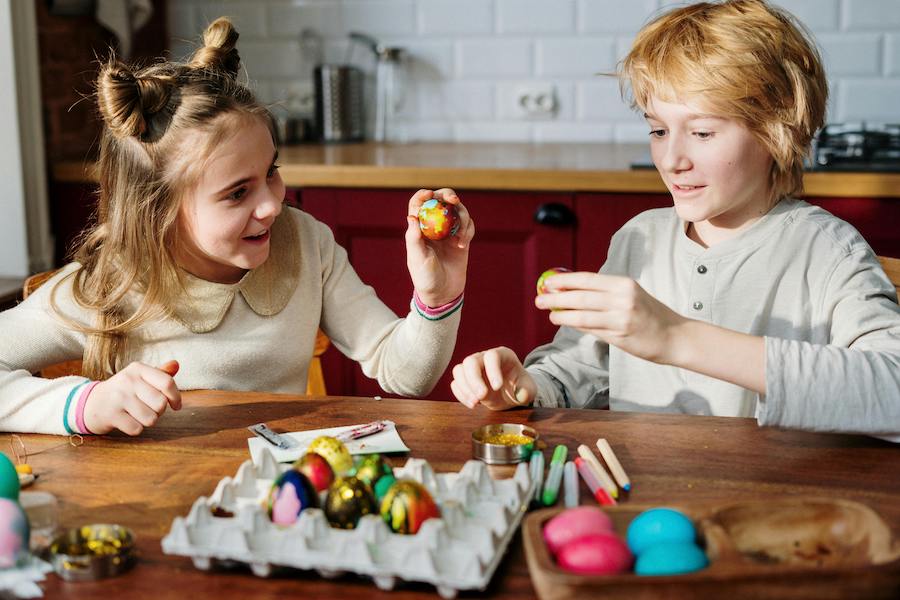
Photo by cottonbro studio: https://www.pexels.com/photo/childred-decorating-eggs-3972178/
Say goodbye to holiday boredom with Twinkl’s Epic Easter Adventures!
🌟 Dive into a wonderland of crafts, colours, science magic, and writing wonders that’ll keep kids of all ages smiling from ear to ear. 🎨🔬✏️ Discover the Joy of Learning with Twinkl’s Egg-citing Resources!
Join the Twinkl family today and unlock a world of fun and educational surprises that’ll make your kids think learning is the coolest game in town. 🚀 Don’t let boredom win this holiday—let Twinkl turn every moment into an Easter Extravaganza!
🐰🌷See a whole list of fun things below and get ready for an unforgettable Easter experience:
Photo by cottonbro studio: https://www.pexels.com/photo/childred-decorating-eggs-3972178/
Egg-cellent Easter Adventures Await with Twinkl’s Fun-Filled Activities!
Get ready to hop into the Easter Egg-stravaganza withTwinkl’s egg-cellent lineup of activitiesthat will make your celebration egg-ceptionally memorable! Whether you’re tracing patterns on Easter eggs or connecting the dots with bunnies, Twinkl’s got the creative juices flowing faster than a bunny on a sugar rush!
Feeling crafty? Dive into the Easter Bunny Basket crafting fun or leave Easter Bunny Footprints that will have everyone searching for the elusive bunny! And don’t forget to top it off with the Easter Hat Craft Activity Templates because every Easter celebration needs a touch of fabulousness!
If your brain’s craving a workout, dive into the Easter Differentiated Reading Comprehension Activity and hunt for Easter words like a pro in the F-2 Easter Word Search. Need a laugh? The Easter Joke Chatterbox is your go-to for egg-citing giggles and smiles!
With over 1,600 top-notch resources curated just for you, Twinkl ensures your Easter celebration is not just egg-straordinary but also egg-stremely fun and egg-ceptionally quirky! So grab your bunny ears and get ready for a cracking good time with Twinkl’s egg-citing lineup of Easter activities!
Hoppy Creations: Egg-citing Easter Hat Ideas & Templates from Twinkl!
Step into a world of egg-citement and Easter charm with Twinkl’s egg-stravagant collection of Easter Hat ideas and templates. Dive into a pool of creativity and let your imagination hop away with these whimsical designs that promise to make your Easter celebrations unforgettable.
Imagine donning an Aussie Easter Hat that with its vibrant colours and motifs, is guaranteed to turn heads and elicit smiles at every Easter gathering. With Twinkl’s Easter Hat Craft Activity Templates, you’re not just creating a hat; you’re crafting a piece of art that’s as unique and playful as the Easter bunny itself.
Feeling fancy? Add a touch of elegance with the EYLF Easter Bonnet Template Accessories, where delicate flowers, charming ribbons, and fancy embellishments transform a simple hat into a showstopper fit for an Easter parade runway!
But why stop there? Explore the world of bunnies with the Easter Bunny Headband and Bunny Ear Craft templates, perfect for adding a dash of whimsy and fun to your Easter attire. Whether you’re hunting for eggs or simply hopping around in style, these bunny-inspired accessories are sure to bring joy and laughter to your Easter festivities.
So, hop on over to Twinkl and unleash your inner Easter artist with their egg-citing collection of hats and templates. Get ready to egg-spress yourself in the most egg-ceptional way possible and make this Easter a truly egg-straordinary celebration!
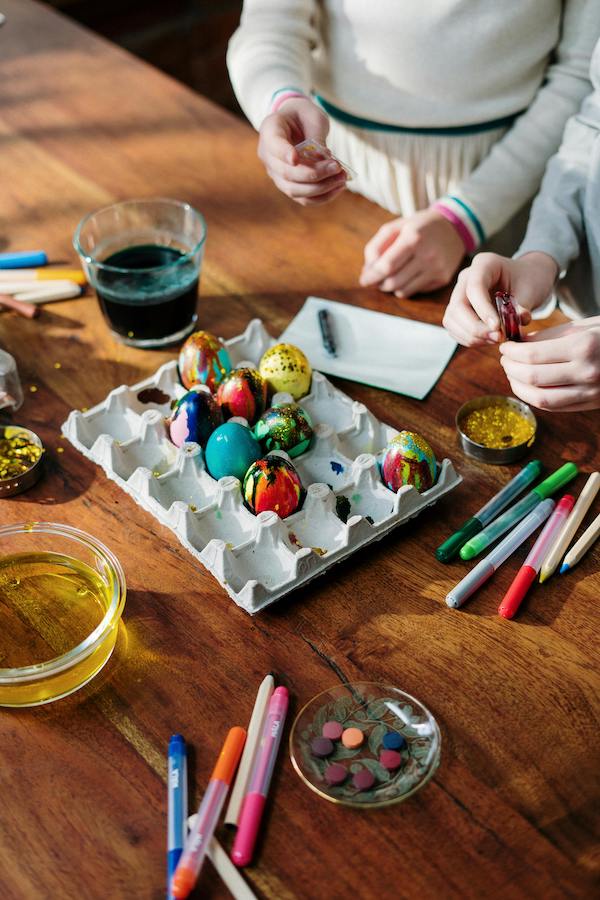
Photo by cottonbro studio: https://www.pexels.com/photo/photo-of-colored-eggs-3972137/
Spark Your Curiosity: Egg-ceptional Easter Science Experiments!
Are you ready to dive into a world of Easter excitement and scientific wonder? Twinkl’s Easter Science Experiments are here to sprinkle some fun and fizz into your learning adventures! Picture this: bubbling magic potions that make you feel like a wizard, shrinking balloons that defy gravity, and day and night experiments that illuminate your understanding!
Get ready to unleash your inner scientist with Twinkl’s creative concoctions. From conduction ice cube challenges to making gloop that’s gooey and glorious, each experiment is a journey into a world of colourful discovery. Imagine falling paper experiments that dance like confetti and ice cream in a bag recipes that are as cool as they are delicious!
But wait, there’s more! Explore potato starch slime that’s squishy and stretchy, or dive into the fizzy fun of candy crystals. Whether you’re a budding scientist or a seasoned explorer of the unknown, Twinkl’s Easter Science Experiments have something egg-citing for everyone!
So grab your lab coat (or apron), gather your materials, and let the Easter Science adventure begin! It’s time to mix, measure, and marvel at the magic of science with Twinkl’s quirky, upbeat, and fun-filled experiments that will have you saying, “Egg-cellent!
Easter Handwriting Eggstravaganza
Whether you’re a teacher, parent, or eager learner, Twinklhas something special for you this Easter. Immerse yourself into a world of colourful activities, engaging games, and delightful Easter-themed handwriting practice that will make learning a joyous adventure.
📚 Explore Twinkl’s handpicked selection of “Handwriting Easter” resources designed to spark creativity and improve penmanship skills. From Easter-themed handwriting lines to playful tracing activities featuring bunnies, eggs, and festive patterns, there’s plenty to keep little hands busy and minds inspired.
🎨 Let imaginations run wild with Twinkl’s Easter pencil control and letter formation activity booklets, perfect for early years and primary school learners. Encourage mindfulness and creativity with celebrations-themed handwriting and colouring booklets that blend learning with fun.
🐣 Dive deeper into the art of cursive writing with Twinkl’s Journey to Cursive series, featuring Easter-themed practice activities tailored for different age groups. From lowercase alphabet tracing to continuous cursive challenges, students will embark on a journey of skillful penmanship.
🌟 Don’t miss out on Twinkl’s Easter portrait page borders, pattern tracing activities, and engaging pencil control worksheets designed to save the day with Easter-themed learning adventures.
📚 Can’t find what you’re looking for? Explore Twinkl’s treasure trove of over 14 “Handwriting Easter” resources and discover a world of educational delights for teachers, parents, and pupils alike. 🌟
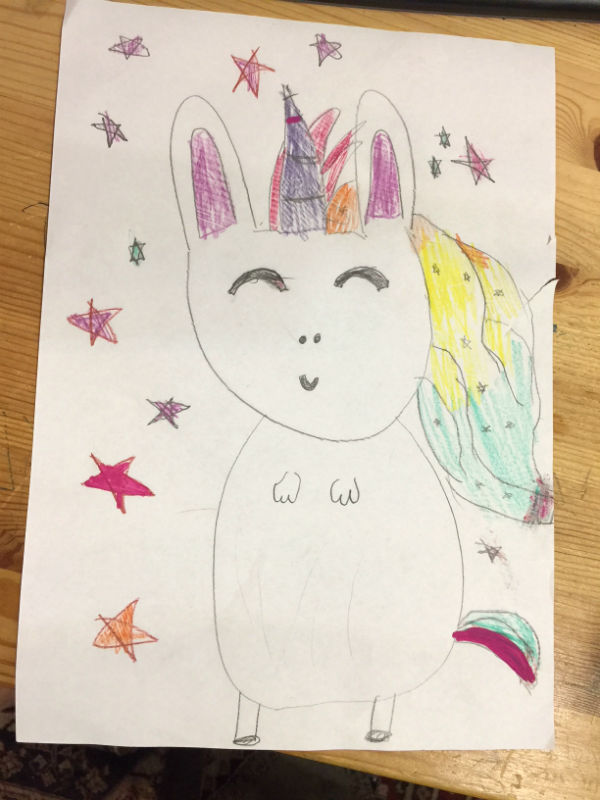
It is an animal that is a unicorn and bunny all in one.
I know many dear readers had no idea, but now you are aware of this magical creature, you will definitely keep an eye out for her next Easter. (Read the twins stories to learn more about the Unibunny)
This creature helps the Easter Bunny deliver eggs on Easter Sunday.
Julia dressed as The Unibunny.
I asked the girls to write their story of the Unibunny. Click on the girl’s names below to read the Unibunny stories.
The twins wrote each story yesterday on the computer with a little help from mummy and daddy. I hope you like them.
Stay current with all the things that are happening on Mummy to Twins Plus One. Don’t miss a thing by signing up for my newsletter. This newsletter will list all giveaways and fabulous things that are happening.
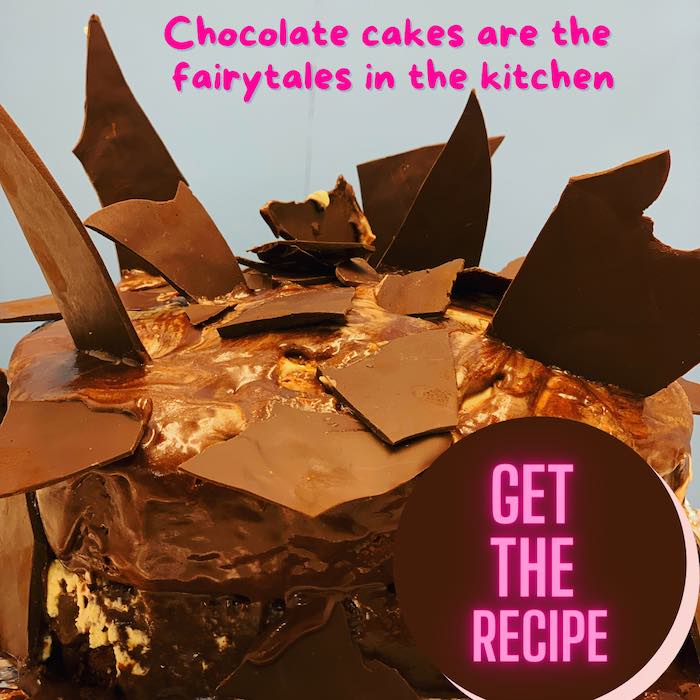
Have you been drooling and dreaming over a chocolate cake?
How about a chocolate cake that has dark chocolate icing?
Well, I have the cake for you… and it will definitely give you your chocolate fix. Plus there is afree printable recipe card to download.
Ingredients
1 vanilla cake mix
1 chocolate cake mix
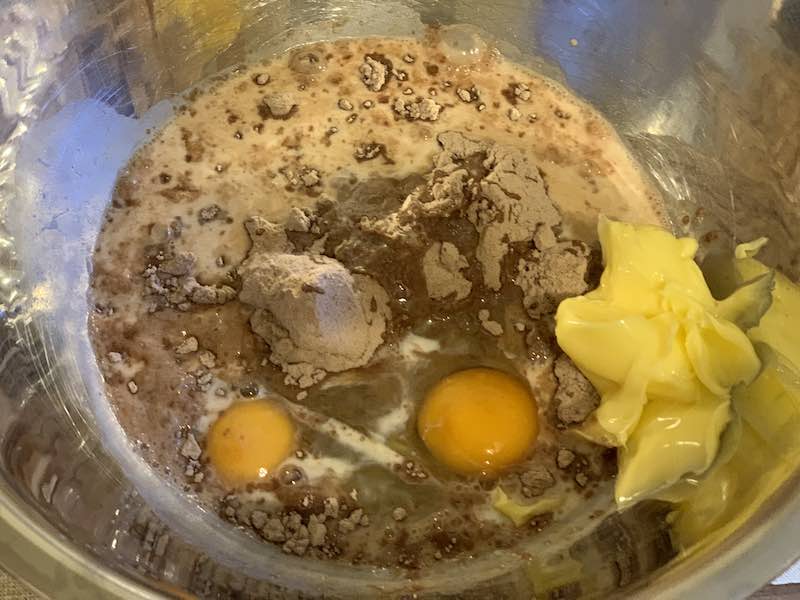
4 eggs (2 eggs per cake mix)
2 tablespoons of soft butter or oil for the cake ( 1 tablespoon per cake mix)
160ml of milk per cake mix (so times 2)
Whipping cream
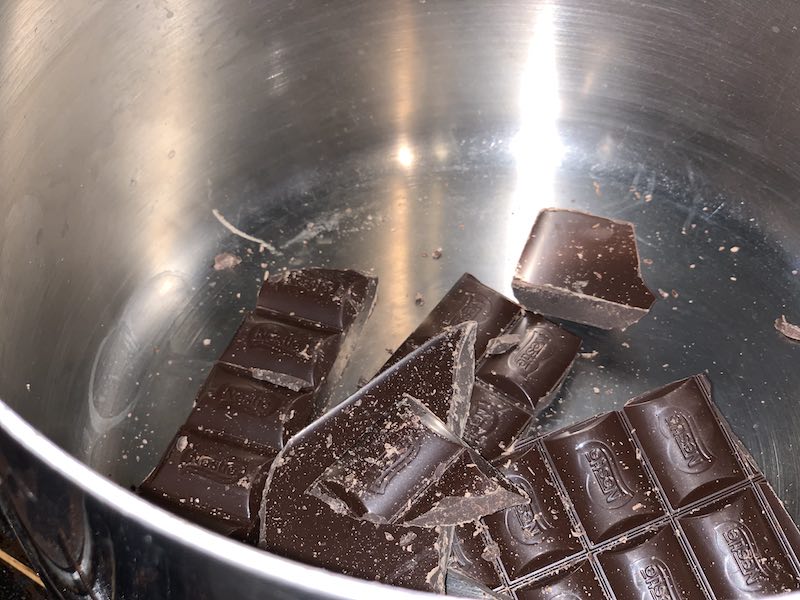
Dark chocolate for the decorations
6 teaspoons of dark chocolate cocoa for the icing
Soft icing sugar – I used half a small bag of CSR Soft Sugar Icing Mixture
Make sure that the oven is set to 180°C or 356°F
The chocolate cake mixtureDark chocolate melting in the saucepan to use for decorating
Method
Oil or add butter to the cake pans
Mix the vanilla cake mix
Mix the chocolate cake mix
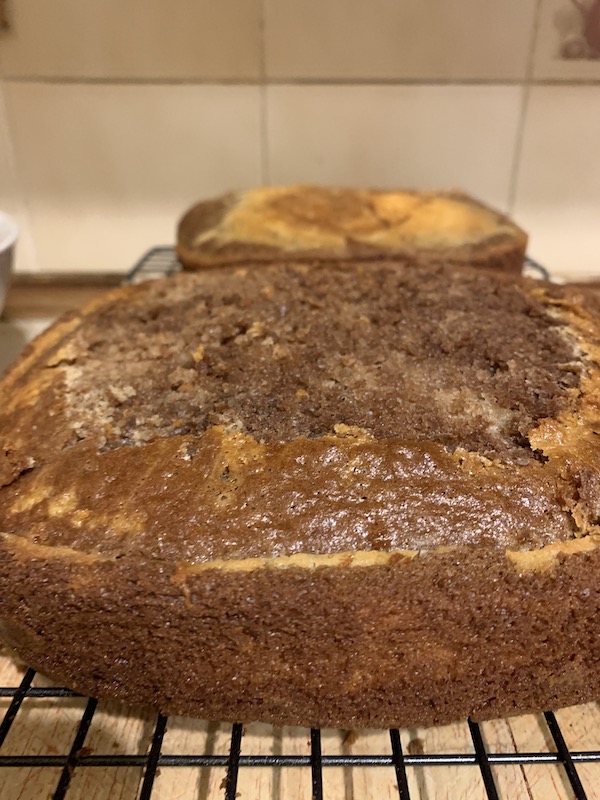
Half the cake mixtures and put a bit in each pan to create the marble effect
Cook the cakes for around 30 mins or until brown. If you put in a knife and it comes out clean it is done.
Melt the chocolate and pour the melted chocolate on a tray with baking paper. Add the tray to the fridge to set the chocolate.
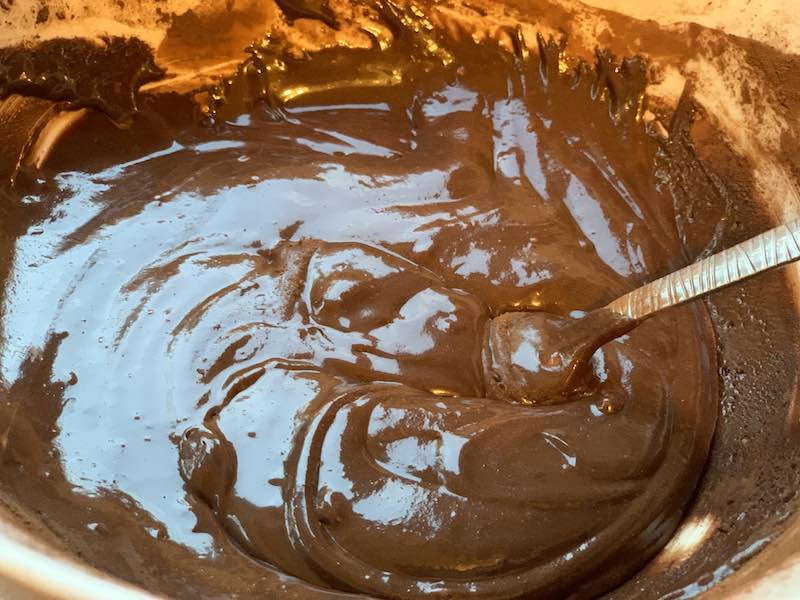
Add the icing sugar, 6 teaspoons of dark chocolate cocoa. Add a little water or lemon or apple juice to make the icing mix well.
To make the cheats whipped cream simply add the cream to a blender and choose the chop option. Continue until it looks thick. It will take a couple of minutes, you will be suprised at how quick it is, oh and how simple it is too.
When cakes are cooked and cooled add the whipped cream to the middle of the cake, add the top layer of cake.
Cover the cake with the dark chocolate icing
Break up the chocolate and make sure that it is in different sizes and shapes. Stick it to the top and side of the cake.
Now eat your very chocolatey marble cake.
The two marble cakes are ready to ice and decorateSuper dark chocolate icingLooking so chocolatey and delicious
Download the FREE Marble Chocolate Cake Recipe Card
Cut up and ready to eat, don’t you think it looks yummy!
Make sure to download the printable recipe card to make this super yummy very chocolatey cake.
Post Feast Review
I found this cake very easy to make and all elements came together really well. I did cheat a bit with packet cake mixes but when are a busy mummy this does help you out.
One element that I didn’t get 100% right was the whipped cream in the middle of the cake, I added some cream to the top of the cake but should have kept it all for the middle of the cake. After adding the very dark chocolate icing it did add to the marble effect of the cake.
Having the cream helped with the double layer and allowed a different texture and taste with the bitterness of the dark chocolate.
The addition of the broken dark chocolate shards really topped off the cake visually and also from a dark chocolate lover was a fabulous addition (and between hubby and kids the chocolate on top didn’t last long)
Will I make it again?
Yes, this is one cake that I would make again no questions asked. I would change it up a little bit and maybe add raspberries to the middle of the cake or possibly blueberries.
Sign up for my newsletter
Stay current with all the things that are happening on Mummy to Twins Plus One. Don’t miss a thing by signing up for my newsletter. This newsletter will list all giveaways and fabulous things that are happening.
This post has Affiliate Links
This post was originally published on August 26, 2021
Easter will soon be here and so will the Easter Hat parade at your local school.
If this is shocking, then I might have freaked you out. Breathe it is okay!
I will hand you a lovely cup of virtual coffee or tea depending on your preference, and you can have a little quiet time. This will allow you to process that it will soon be school holidays or the fact that kids will be hyperactive and high on chocolate due to the gifts from The Easter Bunny and a well-meaning family.
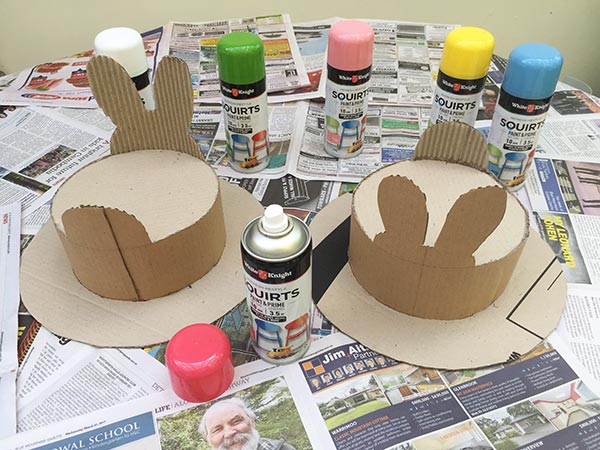
White Knight and Bear and Sparrow sent my girls some lovely Easter Hat kits. It was so much fun creating them and they look so good. Much better than I would have done on my own.
If you are like me, you failed badly at creating an Easter Hat for your kids. I ran out of time and purchased an oversized beach hat for each child. They were pink so I thought they would love them. However, as soon as decorations were added to these hats they immediately fell off and due to the size of the hat and the fact it had a very floppy rim the kids could not see very well while the hat was on. If you really must analyse how it went, it might be termed a complete disaster.
Hopefully, you are now feeling rested and relaxed after the virtual cuppa I gave you.
Now for my solution to make it all better for Easter, or the very least making the Easter Hat Parade stress free this year! Yes, it can be easier and your child will have one amazing rockstar of a hat.
White Knight Paints and Bear & Sparrow have teamed up to create to help parents take all the stress out of creating the Easter Hat.
“White Knight Paints has been a leading force in the specialty paint market for many years. When painting bathroom tiles, kitchen cabinets, metal fencing, your front porch or just indulging in a fun upcycling project, White Knight has an easy-to-use product for just about every DIY project, to help our consumers always achieve a professional result” says Brand Manager Dilani Fernando.
Bear and Sparrow is a registered Australian owned, boutique children’s decor business. They are based in Brisbane and have some lovely handmade wooden pieces.
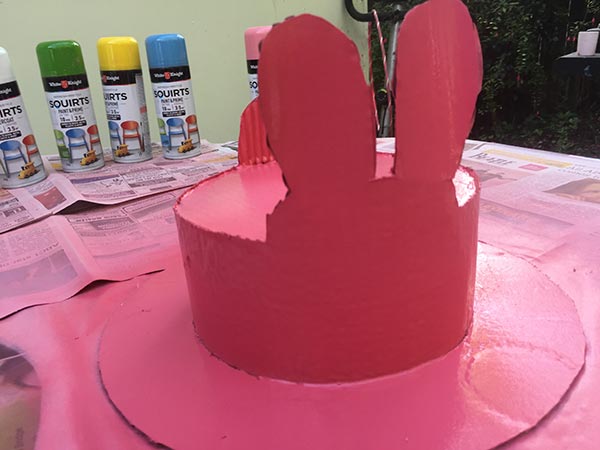
The Easter Hats use White Knight Squirt Spray Paints. They come in 43 different colours and the new formulation has a primer and topcoat all in one. This paint dries quickly and is touch dry in just 10 minutes. This is good for craft projects with kids, you know how keen they are to start using their creations.
All the components for making this fabulous Easter Hat can be purchased at the hardware store and craft store, all for under $40.
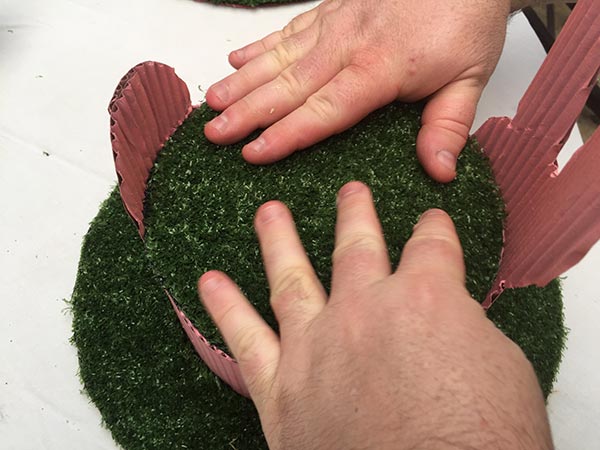
It should take about 1 hour to make, so that is not long at all. Check out the video and download the Easter Hat Instructions here.
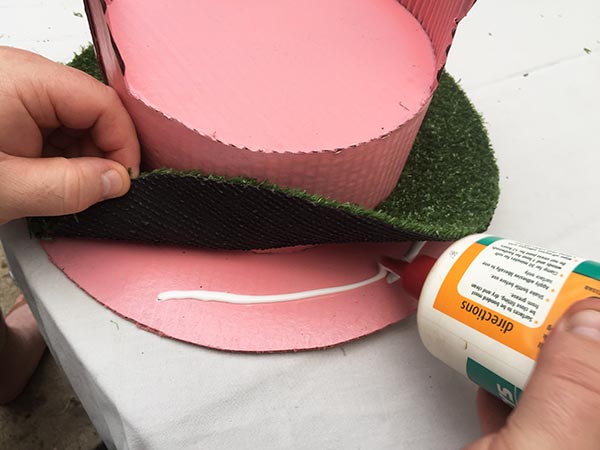
After your kids use their new groovy Easter Hats in the school parade you can also re-use it as a table decoration for family meals during Easter.
Make sure you tag your bunny project with #wkxbearsparrow, #wksquirts and #whiteknightpaints #mummytotwinsplusonecraft
Here are the girls finished hats. They look great, don’t they?
Lillian loves her new Easter Hat.
Julia being cheeky with her stylish Easter Hat.
The girls think their new hats will impress at the local school and also the Easter Bunny.
Check out the bunny tail on the back of the hat. Very cheeky indeed.
C’mon and hop off and create your own amazing Easter Hat as we did. You can download the Easter Hat Instructions here, and make sure to watch the video above if you get stuck.
I hope you have fun and enjoy this project as much as we did.
A HUGE thank you to White Knight Paintsand Bear & Sparrow for sending both my kids a kit each.
Oh, and the hat boxes are so nice and great for storing your finished hat in too. This will ensure that your stylish creation is not damaged.
Julia’s hat is all safe in the hat box.
You can add paper to make sure the hat does not move around.
The kids are super cute and young here, the reason is that this post was created on March 22, 2017. Still a great post and activity.
Paint to paint the wall any colour to fix it before you apply the blackboard paint
Plaster to fix any holes or uneven surfaces
Sandpaper to make sure all smooth if you have plastered
Chalkboard paint
Plastic sheets to ensure you have paint everywhere
Painter tape (you will be thankful you got it, trust me!)
Paint brushes
Chalk to use on the chalkboard
Kids who are keen to be artists and try out their new blackboard! I am sure you will be able to find this easily.
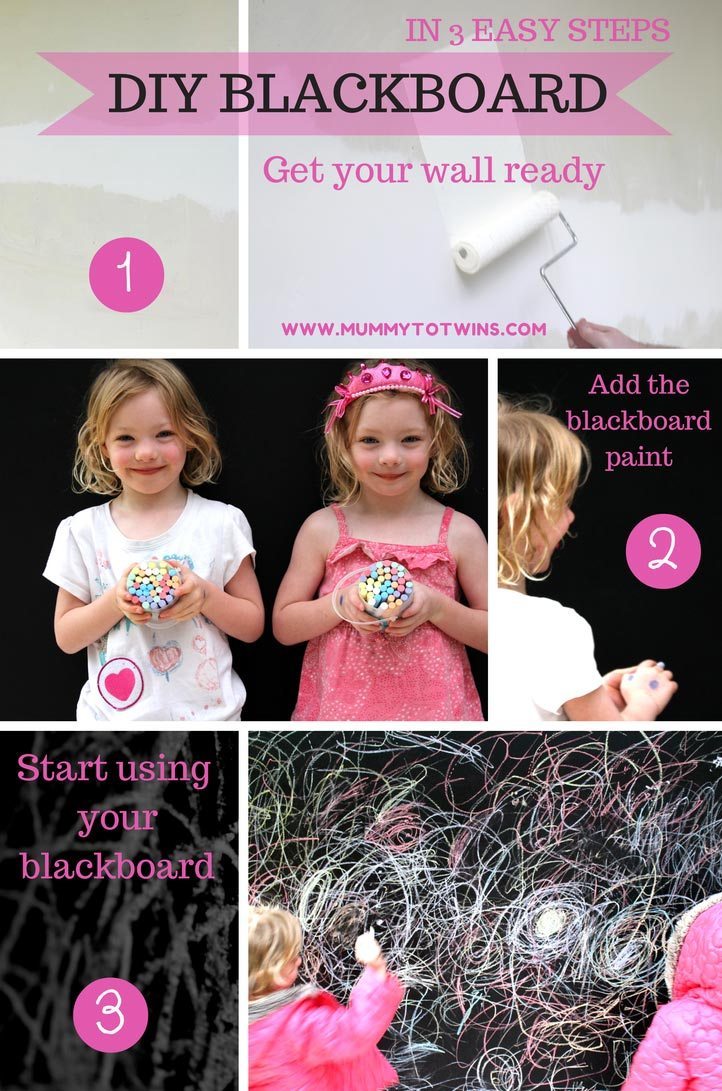
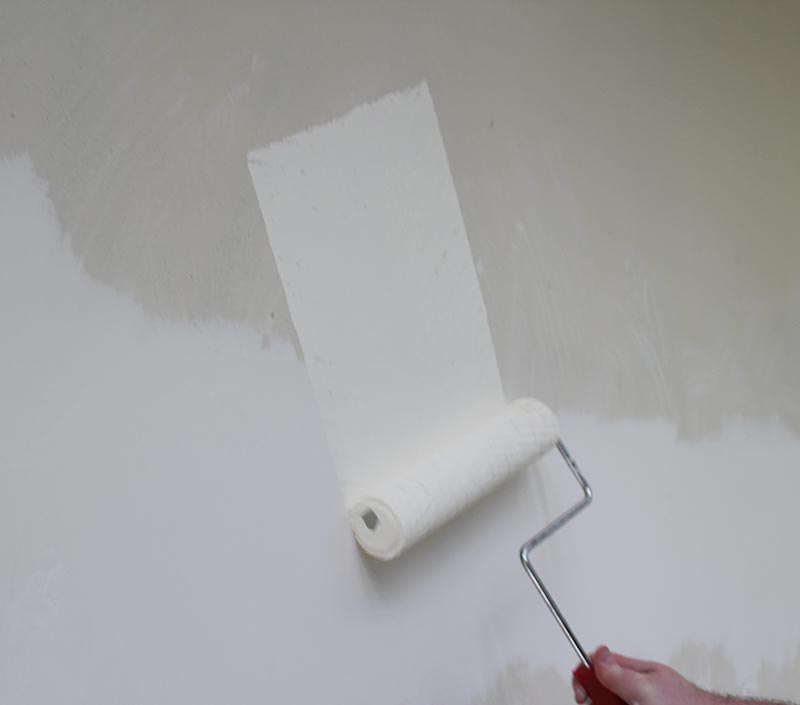
Step 1 – Prepare your wall
Make sure your surface is smooth and clean. My wall had to be patched up as it had some uneven parts. Once we re-plastered those, dried them and sanded them back the wall was painted all over with a white colour. The white colour got two coats and had to dry to make sure it was ready for the blackboard paint.
Wall plastered and sanded. Now ready for the white paint.Painting the wall white, before you add the blackboard paint.
Step 2 – Add the blackboard paint
Once all the wall is dry from the other paint you are now ready to add the blackboard paint. Make sure to place painter’s tape to mark the area where you would like to have the blackboard. This tape is a wonderful thing, it allows you to have great shapes that are neat and great lines and the tape just comes off after the paint is dry. It also helps you not go outside the lines. You don’t want to have black paint on the lovely white wall area. We did two layers for the blackboard paint and let it dry for a few days before we used it. Make sure to read the instructions on the tin.
Adding the blackboard paintThe blackboard is ready. Looking good! Can we use it now mummy?
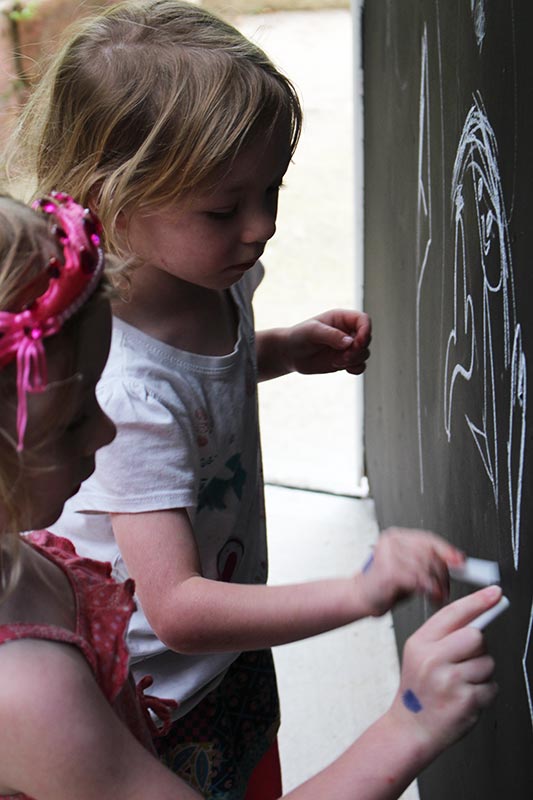
Step 3 – Test out your new blackboard. Have fun!
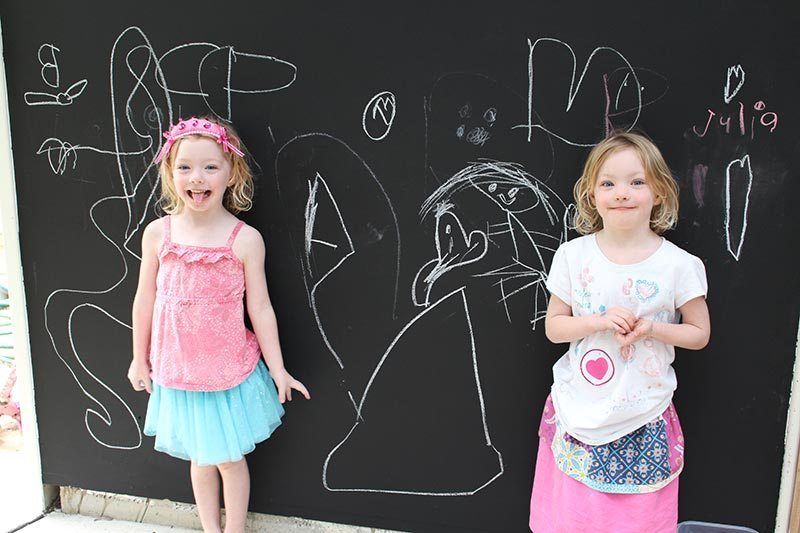
Julia very pleased with her new blackboard.
The girls are getting so good at writing and the first thing they both wanted to do was to write their names. As a proud mummy, I had to take pictures of how clever they were, and also due to the blackboard being a new addition to our house.
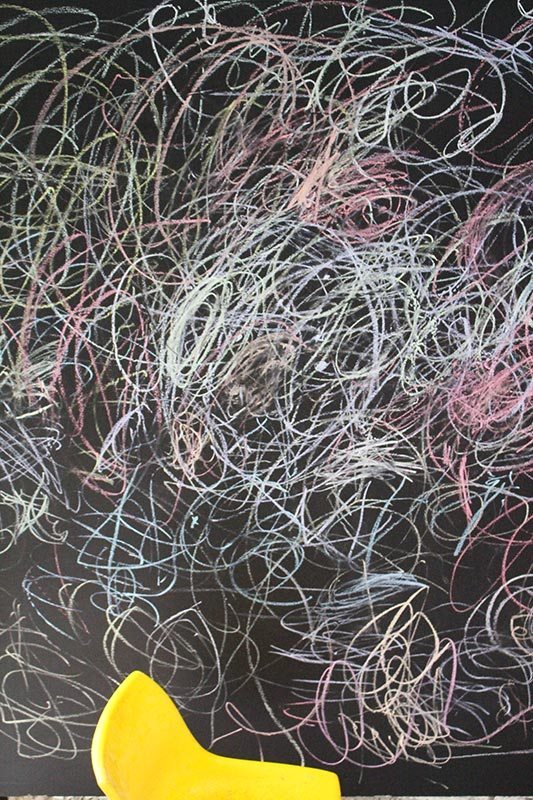
The art did not just remain with names or cute pictures it did get very wild and abstract. I was pleased and glad that the kids had fun. I like the idea that the blackboard is a place for the twins to express themselves and be creative.
Happy drawing away.The first art that graced the new blackboard, aside from the girls names.The creative art from the artists, Julia and Lillian.
Have you created a blackboard for the kids or yourself? Where did you put it? We made ours on the back wall of the house. This area is undercover and allows the kids to use the blackboard even if it is raining.
Now you see you can have a blackboard in 3 easy steps, why not give it a go? It is a great weekend project. Enjoy and have fun.
March 2nd is a day bursting with joy and imagination—it’s Dr. Seuss Day!
We’re celebrating the birthday of the one and only Theodore Geisel, better known as Dr. Seuss, whose whimsical tales and colourful characters have enchanted readers for generations.
Happy Birthday Dr. Seuss!
🎉📚 Oh, hooray, hooray, it’s Dr. Seuss Day today! A day filled with whimsy, laughter, and play. So gather ’round, dear friends, come one, come all, Let’s celebrate Seuss, the greatest of all!
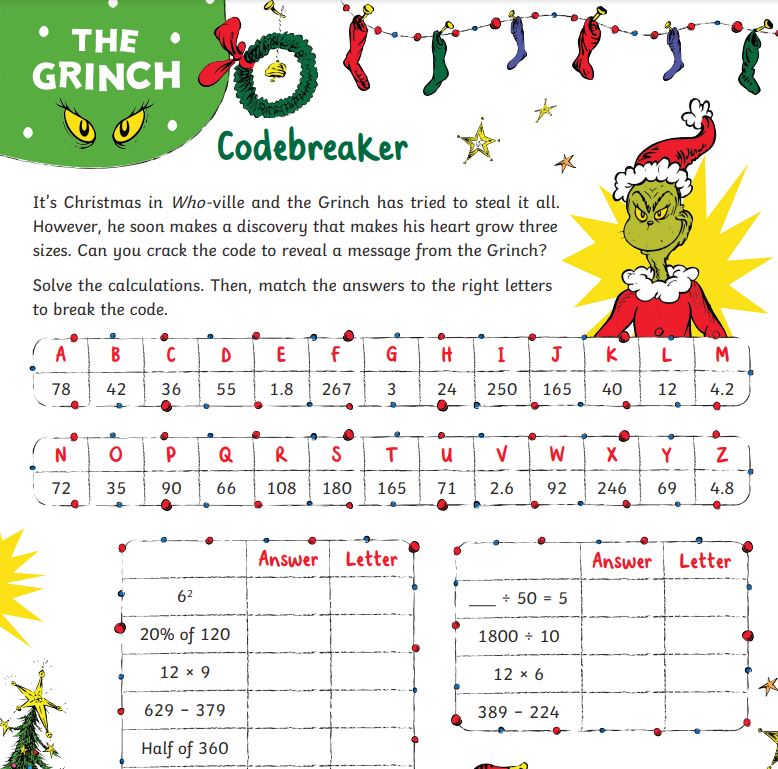
With rhymes that dance and colours that pop, Dr. Seuss’s stories never do stop! From Horton’s big ears to the Grinch’s small heart, His characters leap off the page, each one a work of art.
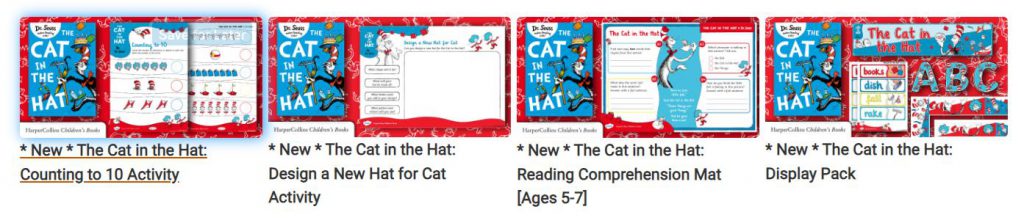
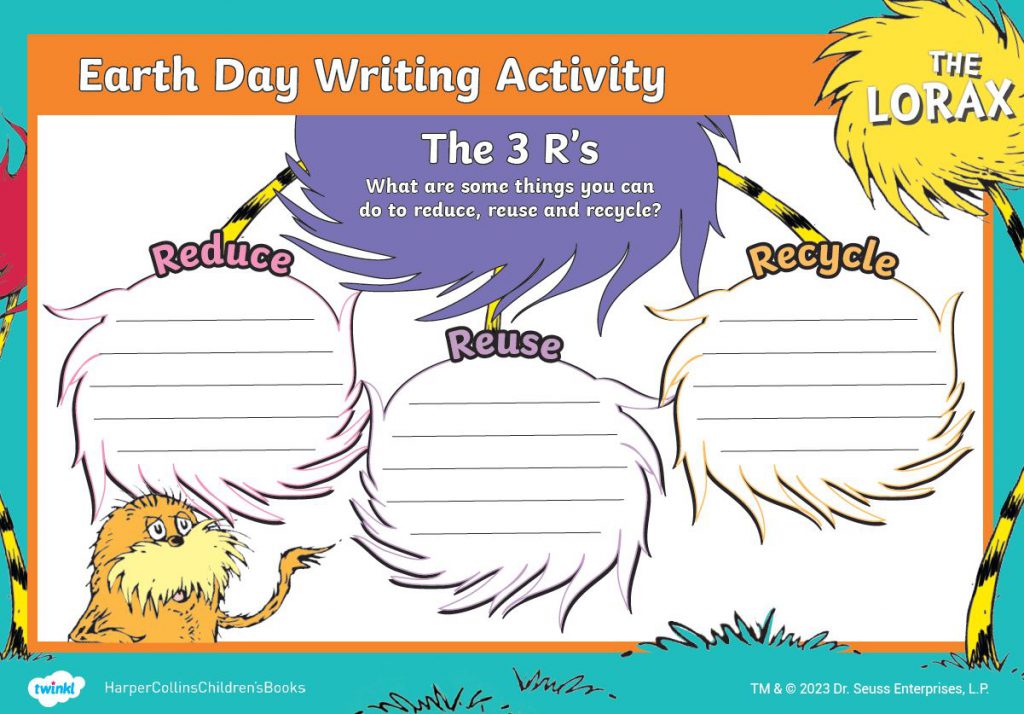
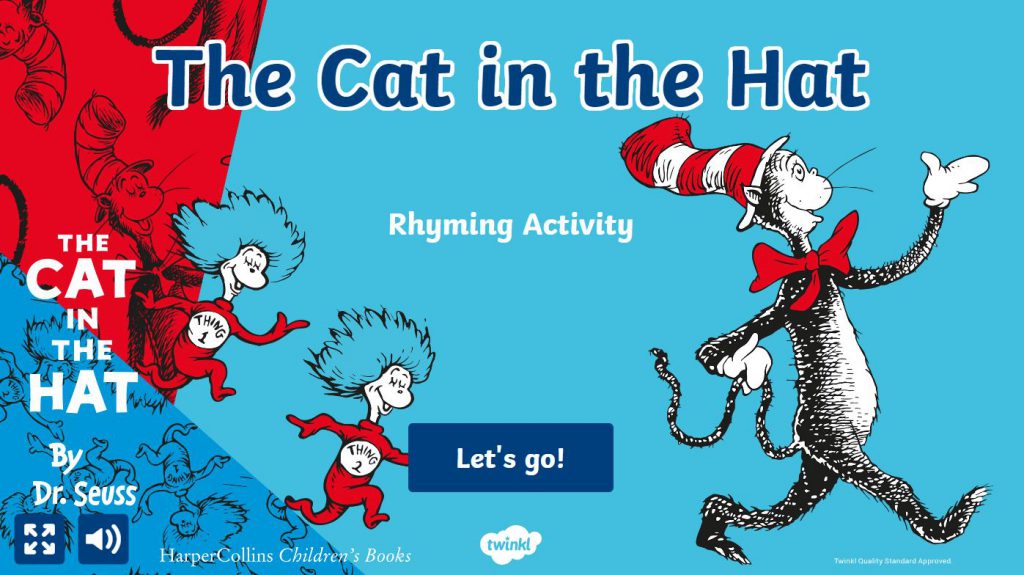
Oh, how I adore his fantastical tales, They spark imagination that never fails. From the Cat in the Hat causing chaos anew, To the Lorax who speaks for the trees, it’s true!
But it’s not just the stories that make me cheer, It’s Seuss’s spirit, so bold and sincere. He taught us to dream and to think beyond measure, To stand up for what’s right, to treasure each treasure.
His artwork, oh my, it’s a feast for the eyes, With colours so vibrant, they light up the skies. His style was unique, ahead of its time, A true visionary, his work truly sublime.
So let’s raise a toast to the man of the hour, Whose legacy grows with each passing flower. On this Dr. Seuss Day, let’s read and let’s play, And honour the genius of Seuss in every way!
So grab a book, anyone will do, And let’s celebrate Seuss, oh the places we’ll go! Happy Dr. Seuss Day, to one and to all, Let’s make this day Seuss-tastic, big and small! 🎈📖
Twinkl’s Truffula Treasure Trove: Explore Dr. Seuss Spectaculars:
Dr. Seuss’s creativity and whimsy are truly inspiring. Embracing his style can add a touch of magic to any endeavour. Whether it’s writing rhymes, crafting colourful characters, or simply thinking outside the box, channelling your inner Seuss can infuse your work with joy and imagination.
So let your creativity soar like a Sneetch with a star, and remember, “You have brains in your head. You have feet in your shoes. You can steer yourself any direction you choose!”
Sign up for my newsletter
Stay current with all the things that are happening on Mummy to Twins Plus One. Don’t miss a thing by signing up for my newsletter.
Hey there, time travellers and calendar aficionados! Every four years, like clockwork (well, sort of), we get to experience a delightful anomaly in our calendars: the addition of a bonus day, February 29th, also known as Leap Day. It’s like a little gift from the cosmos to keep us on our toes and our calendars in sync with the dance of the Earth around the sun.
Now, let’s dive into some fascinating facts about Leap Day and the quirks of timekeeping throughout history!
1. Leap Months and Intercalary Shenanigans
Did you know that many ancient calendars had their own creative solutions for keeping time in check? Take the Hebrew, Chinese, and Buddhist calendars, for instance. These ingenious systems weren’t just about counting days—they factored in lunar cycles too. To stay aligned with both the sun and the moon, they occasionally threw in extra months, aptly named intercalary months. It’s like adding a little seasoning to your calendar stew to keep it flavorful!
And then there’s the ancient Romans and their baffling calendar system. Picture this: ten months, a fuzzy winter period, and a sprinkle of uncertainty. Yep, that was their calendar before Julius Caesar swooped in with his grand redesign.
2. Caesar’s Calendar Overhaul
Ah, Julius Caesar—conqueror of lands, shaper of empires, and apparently, a stickler for punctuality. During his Egyptian escapades, Caesar got a taste of the Egyptian solar calendar, which seemed a tad more organized than Rome’s chaotic timekeeping. Teaming up with the brainiac Sosigenes of Alexandria, they cooked up a plan: add a day every fourth year. Voilà! Leap Day was born, snugly tucked into February like a surprise party in the shortest month of the year.
3. Leap Year Redux: Enter Pope Gregory XIII
Fast forward to the 16th century, when scholars noticed time was still slipping through their fingers like sand in an hourglass. Caesar’s calculation wasn’t spot-on—it overestimated the solar year by a smidge. Cue Pope Gregory XIII and his squad of calendar fixers. They introduced the Gregorian Calendar, fine-tuning Leap Day’s frequency to keep Easter and other festivities in line with the celestial ballet. It’s like a precision dance routine choreographed by the Pope himself!
4. Leap Day Romance and Gender Role Flips
Ah, love is in the air—especially on Leap Day! In ancient Irish lore, St. Bridget and St. Patrick cooked up a scheme to give women a chance to pop the question on this elusive day. Bachelor’s Day was born, complete with a quirky twist: if a man said no, he’d better have some fancy gloves handy to soften the blow. Meanwhile, in Greece, marrying on Leap Day was a big no-no, shrouded in superstition thicker than a Greek yogurt parfait.
5. Meet the Leaplings
Last but certainly not least, let’s raise a toast to the Leaplings—the rare gems born on February 29th! With only about 5 million of them worldwide, they’re as elusive as a shooting star on a moonless night. Sure, they might only celebrate birthdays once every four years, but hey, they get to be part of an exclusive club with the likes of Dinah Shore, Tony Robbins, and Ja Rule. Talk about star-studded!
So here’s to Leap Day, the quirky, charming anomaly that keeps our calendars exciting and our hearts aflutter. Whether you’re a Leapling celebrating a once-in-four-years birthday or just someone enjoying the novelty of an extra day, let’s make the most of this cosmic bonus round! Cheers to timekeeping, traditions, and the delightful surprises that leap years bring into our lives. Happy Leap Day, everyone! 🎉✨
I’ve recently been on the job hunt. It was stressful and very depressing.
Why you ask?
Well, I was getting questions that shouldn’t be asked at all. The questions fell into the following topics:
Parental status inquiries: Seriously, why is this even a thing? Last time I checked, my ability to do the job wasn’t determined by my offspring count.
Postcode obsession: Just to be clear, when I mention my postcode, I’m not sending out invites for a neighbourhood block party. Let’s keep the focus where it belongs—on my qualifications, not my street address.
The sad reality of job hunting for women: It’s like navigating a minefield of sexism and discrimination at every turn. From biased questions to unequal treatment, it’s a frustrating journey.
It all boils down to one thing: Can you do the job, rock those skills, and bring a can-do attitude? Not your sex, postcode, or parental status matters here.
“If you exclude 50% of the talent pool, it’s no wonder you find yourself in a war for talent.” Theresa J. Whitmarsh, Executive Director of the Washington State Investment Board. Image sourced from https://www.weforum.org/agenda/2016/03/quotes-on-women-at-work/
Ah, picture this scenario: Imagine being nestled amidst the serene beauty of the Blue Mountains, where kangaroos might just be your neighbours and the sound of a kookaburra’s laugh is your morning alarm. That’s where our story begins!
So, there I was, having a chat with a recruiter who seemed to think that commuting from the tranquil mountains to bustling North Sydney was like attempting to teleport to Mars. “Sorry, darling, but that commute just ain’t happening!” she exclaimed as if the concept of travel beyond the hills was a mythical tale.
And oh, the fun didn’t stop there! The recruiter, bless her heart, seemed convinced that being a mum meant I could only handle jobs on a part-time basis, as if my superpower was limited to juggling the house and kids instead of full-time work. But hey, I proudly declared, “Yes, I am on the lookout for a full-time gig!”
I even tried to reassure her that hopping on a train was as easy as snagging the last lamington at a bake sale, but she just couldn’t let go of her travel woes. It was like convincing a koala that eucalyptus leaves are so last season!
Then came the kicker: the whole “working from home” debate. When I floated the idea, it was like suggesting we paint the Sydney Opera House hot pink – a firm no-go. But lo and behold, after bidding adieu and sending a polite email, suddenly the tune changed. Flexibility? In this economy? Who would’ve thought!
But alas, despite the picturesque backdrop of the mountains and the potential for work-life balance, something just didn’t sit right. Call it intuition or maybe just good old-fashioned common sense, but diving deeper into the interview process only led to a virtual face-off with the rudest of interviewers.
This Zoom encounter felt more like a scene from a comedy of errors, with the interviewer tossing insults and criticisms like confetti at a parade. It was as if she couldn’t fathom that a mountain mum could also be a professional powerhouse. But hey, I stood my ground, reminding her that qualifications and skills don’t come with a gender bias.
In the end, it was a tale of mismatched expectations, a dash of rudeness, discrimination and a sprinkle of disbelief – all served with a side of resilience and a reminder to always trust your gut, especially when it’s screaming, “Abort mission!”
Why is my family life and travel situation suddenly in the spotlight? It is off-topic, wouldn’t you say?
“Any society that fails to harness the energy and creativity of its women is at a huge disadvantage in the modern world.” Tian Wei, CCTV News. Image sourced from https://www.weforum.org/agenda/2016/03/quotes-on-women-at-work/
Not only was the job opportunity in North Sydney glaringly misrepresented, but it also turned out to be a bit of a unicorn hunt. You see, they advertised for a Marketing Manager, but what they really needed was a Chief Marketing Officer to build everything from scratch. Now, that could’ve been an exciting challenge, but the interviewer seemed more interested in building barriers than bridges. The phone interview felt like a rollercoaster of aggression and discrimination, leaving me absolutely certain that if I were offered the position, I’d politely decline.
Now, onto the next adventure in job hunting! This time, the opportunity was in Western Sydney, and I was totally fine with that. I knew I’d have to make the trek to the office, but they did offer some work-from-home days, which was a nice touch. However, the interviewer, another woman (go figure!), seemed to think I needed a geography lesson. She bombarded me with emails and calls, listing off the exact mileage between my home and the office, as if I hadn’t already scoped it out before applying. I mean, seriously, why the obsession with my commute?
Despite assuring her that I was perfectly content with the travel arrangements, she just wouldn’t drop it. It felt like everyone was making a mountain out of a molehill! And don’t even get me started on the recurring theme of being judged based on where I live and the fact that I’m a mother. It’s like people have this preconceived notion that being a mum means you can’t possibly handle a full-time gig in the office. Newsflash: I’m more than capable, thank you very much!
Fast forward to another opportunity: after enduring a marathon second interview that lasted nearly three hours, I was later told that I didn’t “fit the business” due to my location and family situation. Can you believe it? Talk about a real slap in the face!
But wait, there’s more. They even threw in some extra feedback for good measure: You had some B2B experience (they knew this and liked my strategy examples and how to change focus for different products and drive sales) “Your interview was solid, but additional concerns were raised over this being a full-time, office-based role, and travel, and the potential impact this may have on your long-term employment.”
I don’t believe that my location was asked at the first interview and this made them decide to not hire me when they found out where I lived. It’s beyond frustrating to witness how outdated attitudes still hold sway over who gets a shot at what roles. And don’t even get me started on the absurdity of postcode discrimination – it’s enough to make your blood boil!
I found a fabulous and fantastic job. The team have been welcoming and friendly, they are family friendly, and I work 1 day a week in the office and the rest of the week from home. I am grateful beyond words that the universe made this happen and thankful that the offer that I got is a place that fits in with my family and allows me to contribute to the business and my career.
Ah, you know what? Looking back, I’m actually thankful I didn’t land that job. It’s like the universe had other plans in store for me, leading me straight to the wonderful opportunity I’ve recently embarked on. It’s funny how things work out sometimes, isn’t it? (I am very happy with my new job and glad that I kissed a lot of frogs to land a prince of a placement).
As the world gradually scales back on remote work options, it’s becoming increasingly clear that women will bear the brunt of this shift. With fewer opportunities for flexible arrangements, many are finding themselves trapped in a conundrum where finding suitable employment becomes a Herculean task. This not only impacts their ability to earn a living and contribute to their financial security but also restricts their freedom to navigate life’s challenges, such as leaving a relationship while maintaining stability.
While COVID-19 brought about myriad challenges, one silver lining was the widespread acceptance and success of remote work. Leveraging technology, we witnessed how seamlessly many roles adapted to remote setups, fostering productivity and work-life balance. So, why backtrack on this progress? Insisting on in-office presence as a measure of productivity feels archaic, reminiscent of a bygone era when physical presence equated to commitment.
Yet, my encounters weren’t isolated incidents. Almost every interview was marred by intrusive, sexist inquiries that left me seething with frustration. I vividly recall a particularly exasperating exchange with a young recruiter who seemed fixated on my ability to balance work and motherhood. Despite demonstrating my capability and track record, I was continually prodded about childcare arrangements as if my gender predetermined my competence.
And the irony? These interrogations occurred for roles explicitly advertised as remote, underscoring the absurdity of it all. The disparity in treatment between men and women in the hiring process is glaring, perpetuating age-old stereotypes and hindering progress towards gender equality.
The ramifications extend beyond mere inconvenience; they threaten to exacerbate existing inequalities in earning potential and financial security. Women, already burdened by the gender pay gap, now face the added hurdle of limited job opportunities. This not only jeopardises their present but also casts a shadow on their future, especially concerning retirement planning and financial independence.
With two daughters poised to enter the workforce, I can’t help but feel disheartened by the persisting barriers they’ll encounter.
Questions loom large:
When will women be judged on their merits alone?
Why are skills and abilities overshadowed by archaic notions of gender roles?
And why do women continue to face discrimination at the hands of their own gender?
These questions demand answers. It’s time to dismantle the barriers that confine women to outdated stereotypes and unequal treatment. After all, the strength of our workforce lies in diversity, and it’s high time we embraced it fully.”
If I was a man, how different would my working life be?
As I reminisce about my youthful days, envisioning a dynamic mid 20-something with aspirations as vast as the moon itself, I recall taking a bold leap towards an exciting opportunity in film production. Picture me, filled with starry-eyed enthusiasm, when suddenly, I’m hit with the age-old question: “Are you planning on having kids?” Swiftly, I respond, “Perhaps someday, but let’s hit pause on that topic for now,” followed by a playful reality check to the interviewer, questioning the relevance of such a query.
But alas, did my honesty strike a dissonant chord? Spoiler alert: I didn’t secure the position. This led me to ponder whether I deviated from their expected narrative, or perhaps—here’s the kicker—that question should have been omitted entirely, particularly when posed to women whose talents extend far beyond maternal considerations.
It’s akin to a broken record, isn’t it? The familiar refrain of sexist and impertinent inquiries that echo through countless interviews. I can’t help but wonder, if I were a man, would they have refrained from delving into personal matters? Would my calling out of the off-key note prompt a swift acknowledgment and a change in direction? Or perhaps, in an alternate reality, such questions wouldn’t even warrant consideration.
At times, I find myself daydreaming about a male iteration of myself. Would the spotlight cast a different glow? Would I find myself juggling a plethora of opportunities? It’s a thought-provoking notion, one that may evoke a mixture of contemplation and frustration.
And here’s the kicker: my husband has never faced the same line of questioning in his professional endeavours, nor have my male friends. It begs the question: why the discrepancy? Why are women subjected to inquiries that their male counterparts don’t encounter?
Have you ever pondered how different the lyrics of your life’s soundtrack would be if you were a man? It’s a compelling question, inviting reflection on the complexities of privilege and perspective.
Women are still undervalued and underpaid. I cannot believe that is still happening.
“Australia’s national gender pay gap is 12 per cent. As of November 2023, the full-time adult average weekly ordinary time earnings across all industries and occupations was $1982.80 for men and $1744.80 for women. For every dollar on average men earned, women earned 88 cents. That’s $238 less than men each week.” https://www.wgea.gov.au/
If I were to don the hat of a man, would I still find myself precariously perched on the edge of a weekly fiscal cliff, facing a deficit of $238, dancing precariously close to an annual loss of $6,188? It’s a thought that sets my instincts ablaze, sparking a rebellion against the injustice that demands swift redress. Employment practices persist in squeezing every last cent, and unfortunately, it’s us women who often find ourselves bearing the brunt of these financial pinches.
In my recent jaunt through the job market, I encountered a relentless barrage of forms prodding for my current salary—a figure as irrelevant to the potential new role as a fish on a bicycle.
Would sticking to my guns as a woman in these negotiations mean resigning myself to settling for less? Or under a different set of societal expectations, would they have gladly offered up the industry-standard salary without batting an eyelid? It’s a question that haunts me, one I’m unable to answer as I remain firmly on the side of the gender coin labelled ‘female’.
Echoes of “The Man” ricochet around my mind as I contemplate the state of my superannuation—what whimsical twists of fate might await me had I navigated this world sporting a gentleman’s guise, free from the gaping maw of the gender pay gap?
Have you wondered what your life and career would be like if you were a man?
How about getting treated the same for pay, career opportunities and more?
Sign up for my newsletter
Stay current with all the things that are happening on Mummy to Twins Plus One. Don’t miss a thing by signing up for my newsletter.
I always thought adding wallpaper to your walls was super hard.
That you had to have special skills or qualifications to add it to your walls.
I had no idea that it was so easy to add wallpaper to a room and in turn that it is really simple to easily transform your space.
Wallpaper nowadays comes in so many different patterns, images as well and of course traditional flower and geometric shapes too. You can even upload your own image to create a unique one of a kind wallpaper. Some of the wallpaper is better described as wall murals or artwork as it is more like images stuck to the wall, but as wallpaper.
Where do you get this amazing wallpaper from?
Photowall is where I purchased my wallpaper and they have so many amazing designs to choose from. I got lost in the possibilities and the wonder of what each would look like in my house. I am now tempted to put wallpaper in all my rooms now!
If you need inspiration, Photowall has plenty to give you. Just check out all the different collections, suggestions on what is popular and other ideas from the Photowall website.
Does Photowall just sell wallpaper?
Photowall also has prints and canvases as well. You can purchase the prints on their own or get them with a frame as well, or add your own image to a print or canvas.
If you are looking for a gift Photowall has prints that you can get framed and also wallpaper to instantly transform your space super quick.
Smoothing out the joins with the seam roller – We found this tool really handy and it works so much better than your hands
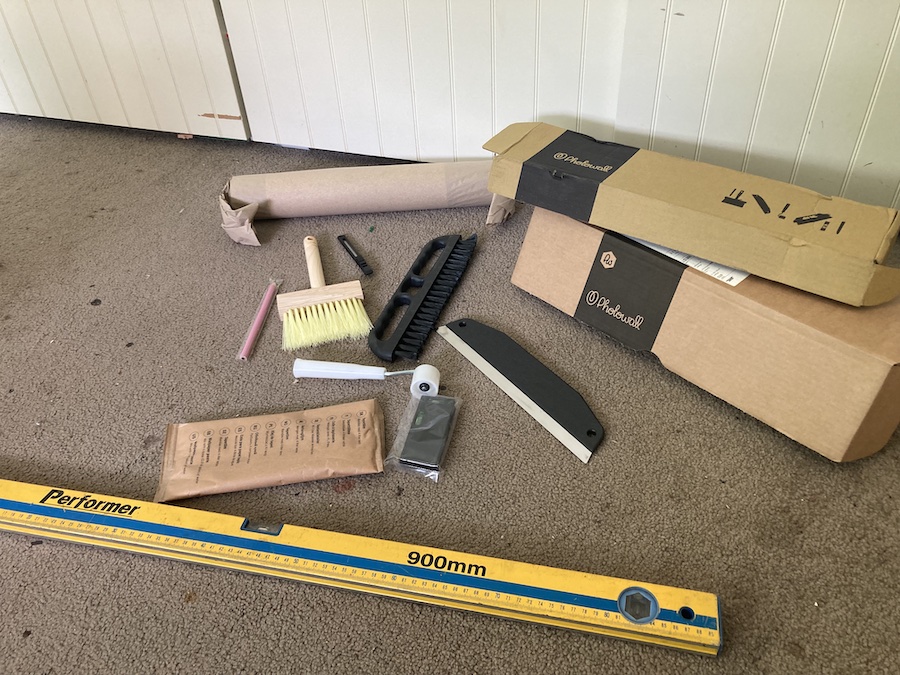
Except for our own level, the picture shows all items that you get in the Wallpaper Kit
Make sure you get the Wallpaper Kit
Make sure that you add the wallpaper kit when you purchase your wallpaper. It really helped us. However, the one item that we used that was ours was our own level (which is shown in yellow in the above image). The wallpaper kit comes with a level but ours was better for the job.
The kit comes with the following items:
A brush for applying glue, a seam roller for making the seams invisible, a paper hanging brush for smoothing the strips, a knife and cutting guide for trimming excess wallpaper, plus a spirit level, a pencil and a tape measure. It is only $26 but well worth every cent, it is a must-have to make the whole process easier.
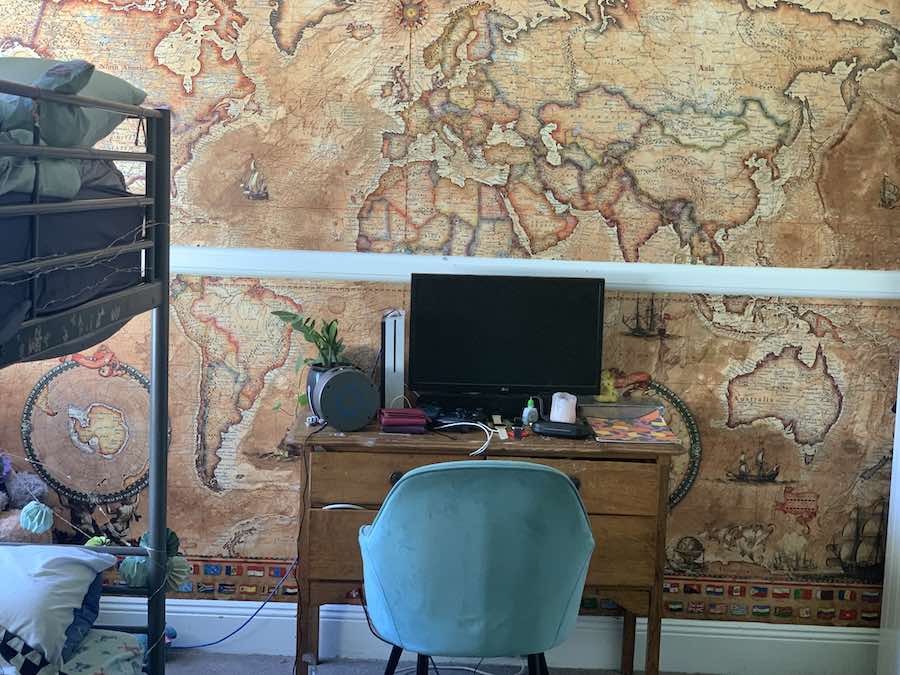
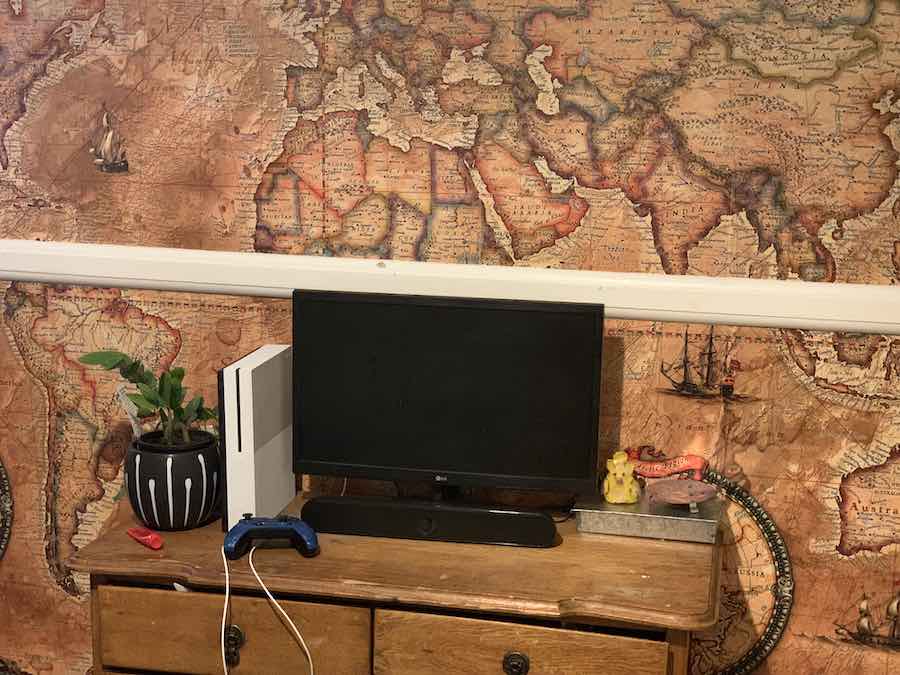
Pergament Map – This stunning vintage world map is now on my girl’s bedroom wall. It has really changed the space for the better.
What did I order?
The map makes the room look so much more grown up now
We had to make sure that we could easily see Australia on the map
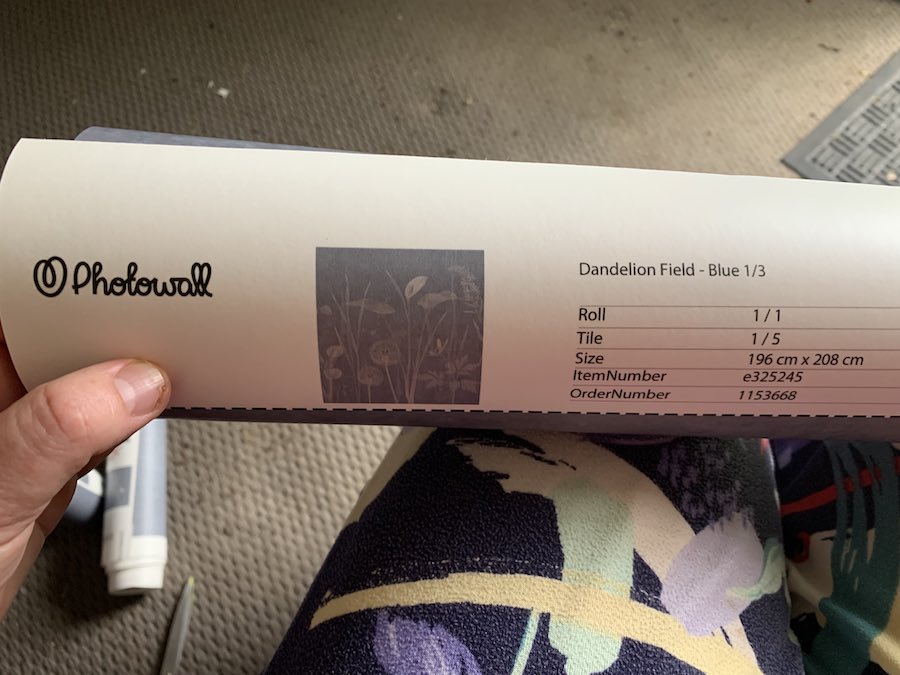
This wallpaper was for my office. I measured just one part of the wall to add interest in the room. Before it had the Dandelion Field Blue wallpaper it was just painted white. One end of my office has a blue wall, the other end has a blackboard and the rest is painted white. I thought due to the blue in the room and it being my favourite colour the Dandelion Field Blue wallpaper was a good choice. I did look at some very bright and colourful wallpaper but decided on a muted tone for my office. It has really changed the room and space and added more warmth and texture to a previously white and bright area. As a creative person it has also given me a different backdrop for photos and creating more content.
Each roll is numbered so that you know what part to put on at what time… super easy and helpful
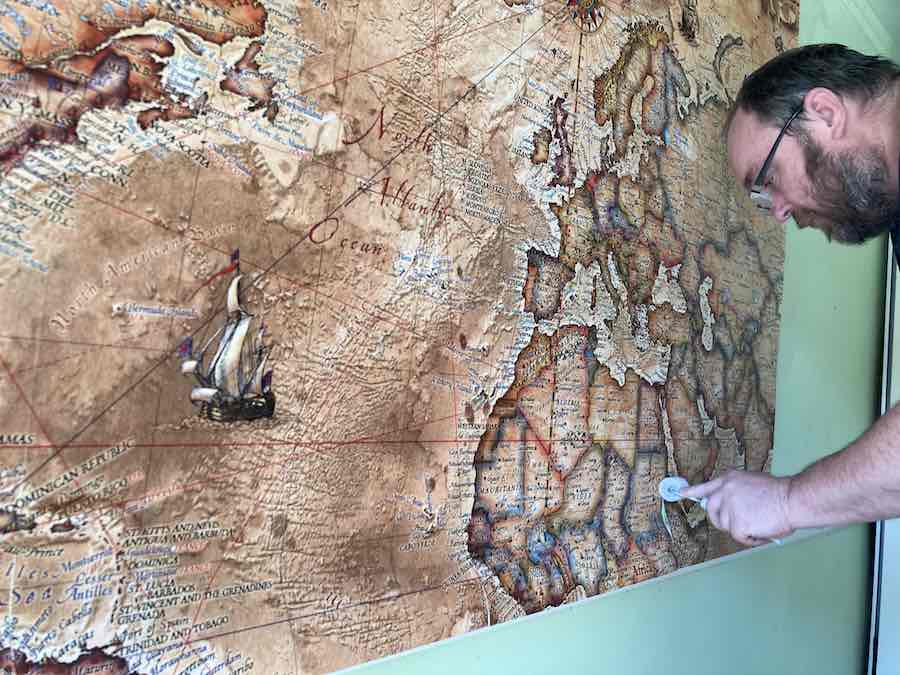
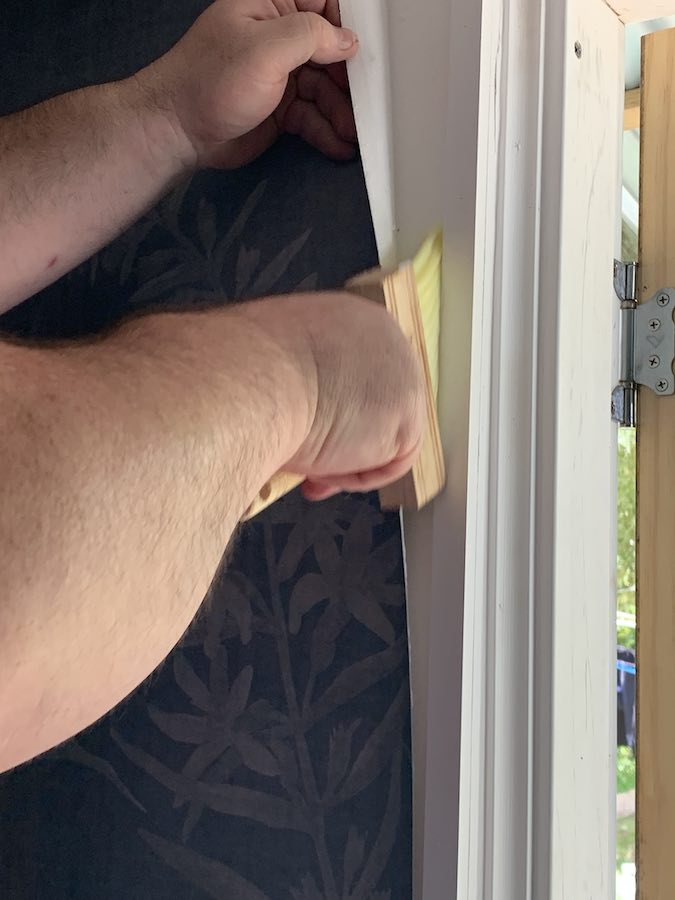
Adding more glue to the sides and making sure it is all sitting right.
Dandelion Field Blue wallpaper all completed and looking fantastic
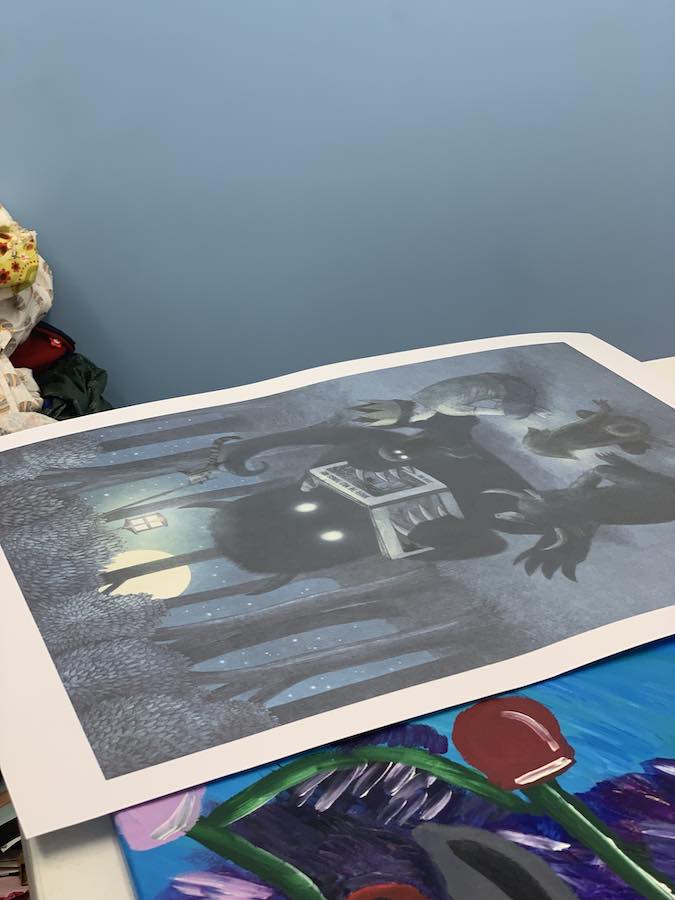
Getting ready to frame the Reading Circle Poster – The monster from Where the Wild Things Are reading to the characters in the book.
This poster made me laugh. It is the monster from the book, “Where the Wild Things Are” and the monster is reading “Where the Wild Things Are” to the kids in the story. I loved this book as a kid and it still has a special place in my heart and when I saw this poster, I had to had have it. I made sure to get the poster and a black frame to allow me to hang it right away in my office.
This poster is from an old company called the “Alexander Drug and Seed Co”, it is the cover of their Summer and Fall Catalogue 1899. I loved it due to the fact that I have a person called Alexander and that it is lovely vintage art. The company was from Augusta Georgia sold seeds by mail subscription.
This poster is from a company called the “Alexander Drug and Seed Co”, it is the company’s summer offer for 1898. It was for their Early Trucker Cabbage, Buncombe Cabbage and Mammoth Purple Globe Turnip”. I love the artwork and again as we have an Alexander I thought it was interesting. The company sells seeds by mail order and they are from Augusta Georgia.
What did I think of Photowall?
I was super impressed by the shopping experience on their website, the customer service and the quality of their products. Not to mention the quick delivery of all my goodies to my front door. I didn’t even have to leave the house, it got magically delivered to me and that is amazing as I am hours away from the capital city. If they can deliver to me they can deliver to anyone! I would recommend giving Photowall a go, I am sure you will love their products as much as I do. After you wallpaper one of your rooms you will catch the decorating bug and be planning what to do in other areas of your house.
Make sure if you have ordered prints with frames, the prints are not in the frame but sitting on top of them. If you rip the packaging open you might damage your print so be extra careful.
NOTE: This post is a collaboration with Photowall, they allowed me to pick my products and try them out to share with my readers. I loved it so much that I think you will be amazed at how easy it is to redo any room in your house.
A BIG thank you to Photowall for sending me the products to test out and to showcase on my website and also for the discount for my readers for December.
I hope you all have a prosperous, healthy and happy new year.
What Chinese animal are you?
I for one am an Ox, hubby is a Monkey, my girls are Rats and my little boy is a Goat/Sheep.
Would you like to find out what Chinese horoscope you are?Chinese Astrology Online has some great horoscopes and information.
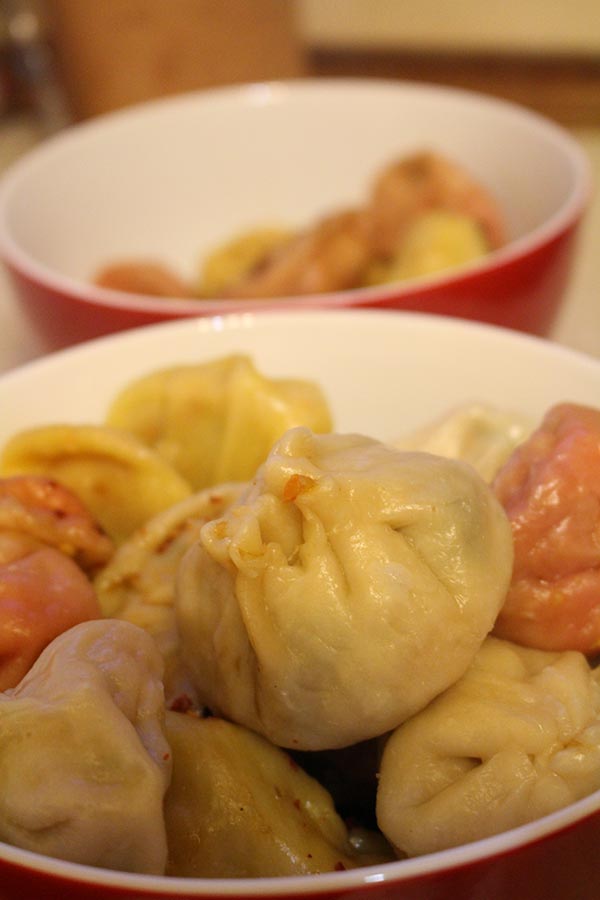
Since it is Chinese New Year what better way to celebrate than dumplings!
Have you thought of making your very own? It is easy but time-consuming so don’t think it will be quick to organise. Making the dough, and getting the stuffing is easy, it just takes ages to put it all together. It is worth the effort as homemade dumplings are tasty and made just as you like them.
I was so happy to sit down and drink after I finished. I then left the steaming and organising to hubby as I had enough and was ready to eat my wonderful colourful creations.
Colourful dumplings waiting to be cooked
Ingredients to make the wrapper:
3 cups of plain flour
1 teaspoon of oil
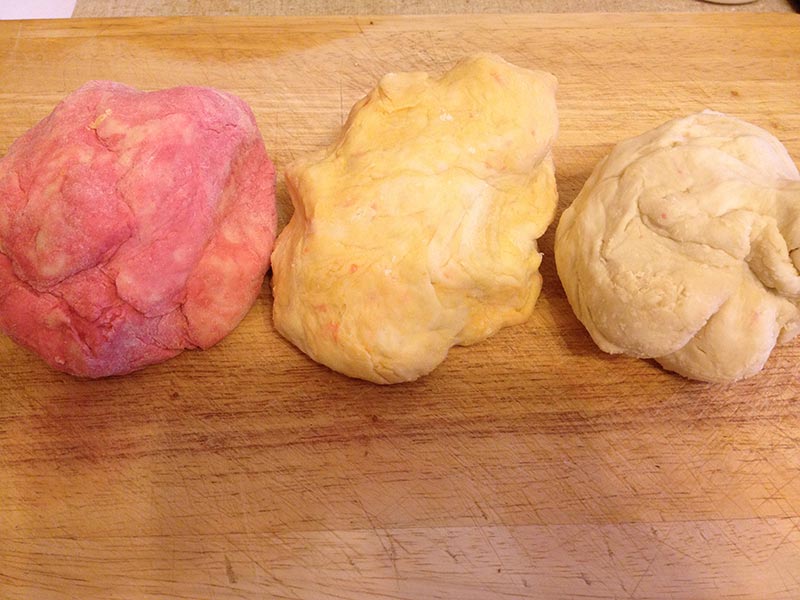
2-3 cups of water. 1 cup hot and the others lukewarm. If you wish to add colour to the dough make the water be carrot juice or beetroot juice. I made the dough and separated it into 3 lots, so to have different colours. In hindsight, I should have done smaller batches of the dough and made the colour from scratch while making the dough. Doing it the long way round meant having to add more flour and most likely weaker colours. My dough from the carrot juice was more yellow and not orange, and the beetroot one was more of a pink, not a deep reddish colour.
My different coloured dough for the wrappers. Beetroot on left, Carrot in middle and Plain on right
Ingredients for the stuffing of the dumpling:
Chicken Mince if you would like them to be meat-based, if not just add vegetables.
1 Carrot & 1 cucumber grated or finely chopped. I chose to grate them as it gives a finer consistency and allows them to fit better in the wrapper.
Finely sliced shallots
Some coriander, just a sprinkling to give a bit of flavour
Soy Sauce
Chilli flakes
A little bit of cornflour to hold the mixture together. Say a spoonful or so. Mix it and see if it needs a bit more.
If you fancy other things to add to the mixture give it a go. You can be creative as you like and if you have certain things in the fridge use them and see what you can create.
Sauce
Soy Sauce
Dumpling Sauce
Rice wine vinegar
Chilli flakes or fresh-cut chillies
Method
Make the dough, then get the stuffing organised. Make sure to have a cool tea towel over the dough so it does not dry out. Once ready, section off parts of the dough and create little pancakes ready for the stuffing to sit into. See the image below.
Adding the stuffing to the wrapper
Once you have the right amount on the wrapper, pull the end up and tweak it so it becomes a little parcel. I am not the best at doing this and my dumplings are not all the same size as you are meant to do. Although it did not cause a problem. The only thing that can go wrong is that ingredients might not cook and it could be too doughy due to it being too big. So be careful.
Once all done I lined them up on greaseproof paper on a tray to make life easier. Once all were complete they were then transferred to the steaming pots.
Waiting to be cooked. I’m super hungry now after making them.
All cooked and ready to eat.
I hope you enjoy your Chinese New Year meals and maybe this has inspired you to cook your own dumplings. Enjoy!
For your Chinese New Year Celebration you can also make the following:
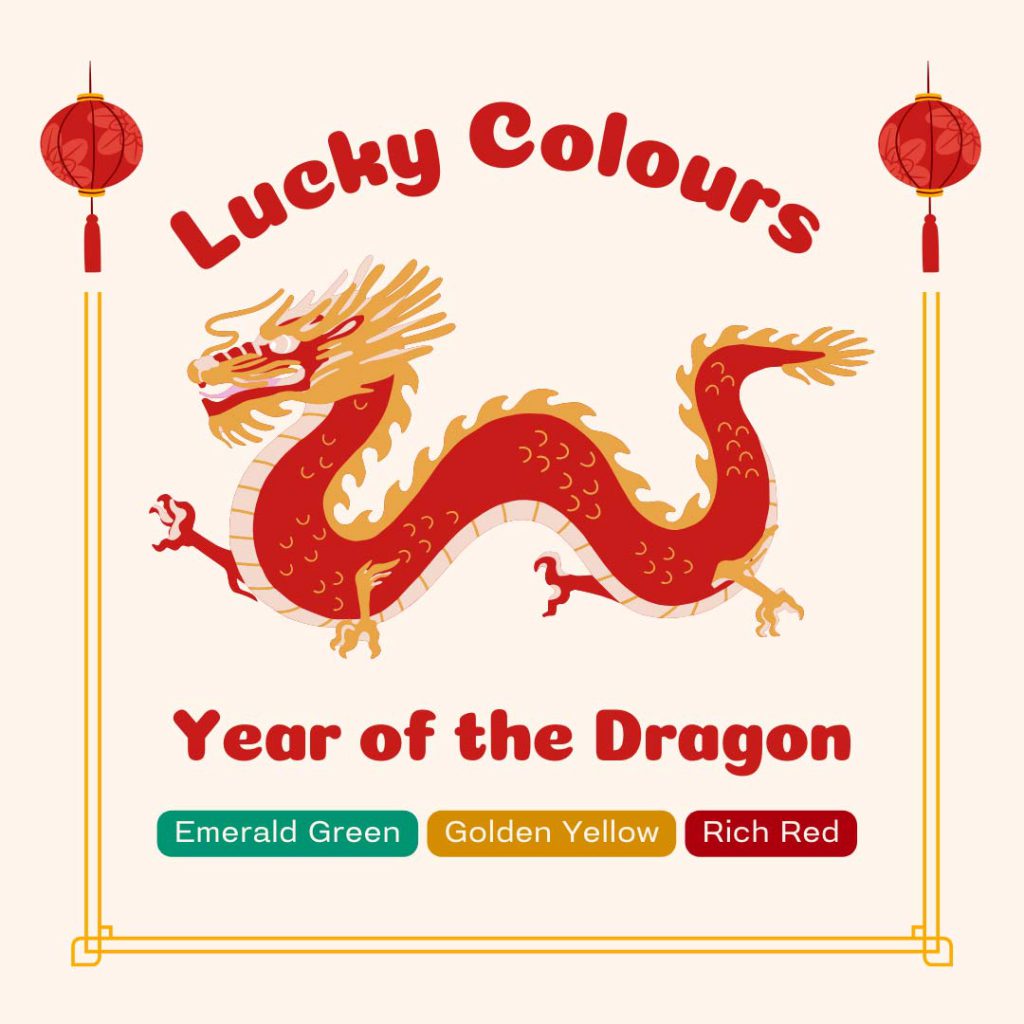
As the lunar calendar flips its pages, get ready to dive into the vibrant whirlwind of Chinese New Year festivities! 🌟 This annual extravaganza is not just a celebration but a joyous reunion of tradition, symbolism, and cultural flair! And in 2024, we’re rolling out the red carpet for the majestic Year of the Dragon—a symbol of power, prosperity, and all-around good vibes! 🐉💰
Gong Xi Fa Cai
Chinese New Year starts on Saturday, February 10th 2024 and ends on January 28, 2025. The Dragon is the 5th animal in the 12-year cycle, and this year the symbol is wood, so it is known as the year of the Wood Dragon.
“The Wood Dragon is the most creative and visionary of the dragons. They are optimistic, ambitious and adventurous. They like to explore new ideas and challenge themselves. They are also generous, compassionate and loyal to their friends.
Therefore, the Year of the Dragon in 2024 is expected to be a time of visionary leaders, innovators and problem solvers. 2024 is also predicted to be a great year to start new projects, explore new opportunities and create value for yourself and others.”
Unveiling the Magic of Chinese New Year: Chinese New Year, also known as the Spring Festival, isn’t just any old celebration—it’s a blockbuster event that ignites hearts and minds across the globe! 🎆 Rooted in centuries-old customs and beliefs, this festival is the ultimate ode to family, feasting, and paying homage to our ancestors.
What’s the Buzz about the Year of the Dragon? Hold onto your hats because 2024 is bringing in the big guns with the Year of the Dragon! 🚀 Symbolising strength, courage, and success, those born under this fire-breathing sign are destined for greatness! 🔥 And as the Dragon takes centre stage, get ready for a rollercoaster ride of prosperity, good fortune, and brand-spanking-new opportunities!
Let’s Celebrate in Full Swing: Embracing the Year of the Dragon 2024 with Zest and Zing! 🐲🎉
Reunion Rendezvous: Gather your tribe for a feast fit for kings and queens! 🍜 Dive into dumplings, slurp up some longevity noodles, and feast like there’s no tomorrow! It’s all about abundance and living the good life! 🥟
Lion and Dragon Shenanigans: Brace yourself for a jaw-dropping spectacle as lion and dragon dances take over the streets! 🦁💃 With drums pounding and cymbals clanging, these performances are not just about warding off evil spirits but about unleashing a tidal wave of prosperity and positivity!
Red Envelopes Bonanza: Get ready to play Santa Claus with those lucky red envelopes filled with cash surprises! 💸 Spread the love, share the wealth, and watch the good karma come rolling in! 💌💰 Grab red envelopes and other decorations here
Fireworks Frenzy & Lantern Love: Light up the night sky with a kaleidoscope of colours and watch those evil spirits scurry away! 🎇 Let your wishes soar high with every flicker of the flame and every flick of the lantern! 🏮
Temple Visits: Pay homage to ancestors and seek blessings for the year ahead by visiting temples and making offerings. Lighting incense, burning paper offerings, and praying for prosperity are common rituals during this time. 🙏 Light some incense, make a wish or two, and soak in the good vibes—it’s a spiritual journey like no other! 🕯️
Dress to Impress: Dust off those traditional threads and strut your stuff like a superstar! 👘 Whether you’re rocking a cheongsam, it’s all about embracing your inner fashionista and owning the spotlight! 💃🕺
Events around Australia to celebrate Chinese New Year:
As we bid adieu to the old and embrace the new, let’s welcome the Year of the Dragon with open arms and hearts full of hope, joy, and endless possibilities!
🎉 May this year be filled with prosperity, success, and happiness galore! Gong Xi Fa Cai! (Wishing you prosperity) 🎆✨
Sign up for my newsletter
Stay current with all the things that are happening on Mummy to Twins Plus One. Don’t miss a thing by signing up for my newsletter. This newsletter will list all giveaways and fabulous things that are happening.
Do you make something special for Australia Day? What is it you like to create to celebrate? Or do you just have a BBQ and some cold drinks with mates and that is your celebration?
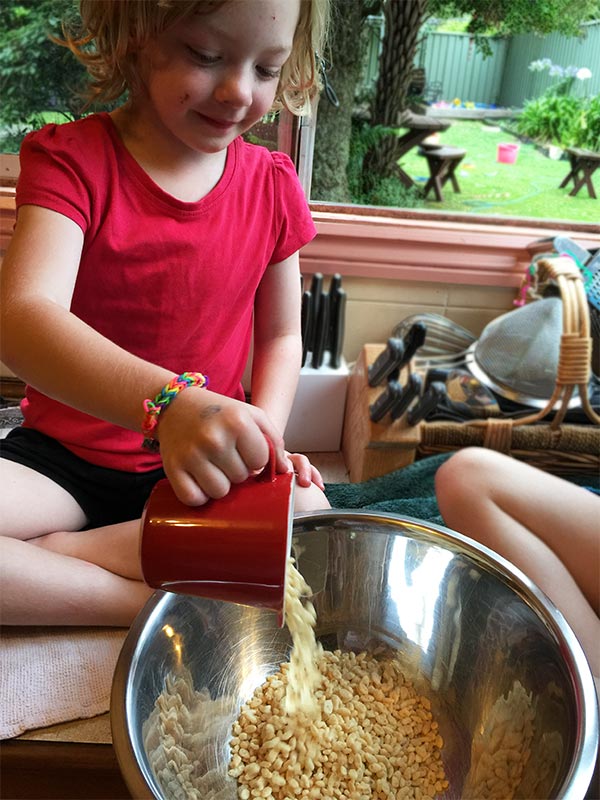
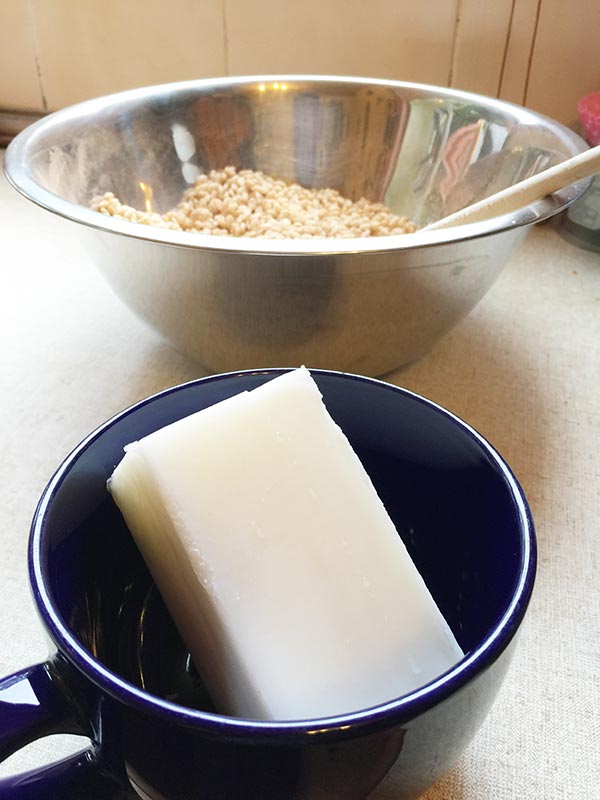
This year I decided to make Chocolate Crackles with the twins. I used the recipe from the Rice Bubble box and it brings back memories of making them with my mum.
The ingredients to make chocolate crackles, but I was missing one ingredient. The icing sugar. I ended up using caster sugar and put it in a pestle and mortar to get the sugar finer. I only had icing mixture not the sugar so this was the best option.
The girls were super excited to help and they did a great job. I had them on the kitchen counter so that they could be near the bowls and help out easily.
The ingredients you need:
4 cups Kellogg’s® Rice Bubbles®
1 cup icing sugar
1 cup desiccated coconut
3 Tbsp cocoa
250g copha®*, chopped
Happy to be making chocolate crackles with mummy and sister.
Step 1
In a large bowl mix all the dry ingredients: rice bubbles, icing sugar, coconut and the cocoa. Note: If you use organic cocoa from the health food shop the crackles do not work out well. I tried it for the kids sixth birthday party and they did not set properly and did not taste the same. I used Cadbury’s Cocoa this time and they worked out the way they should. I am not sure why this would create such a difference but thought it best to point it out.
Adding the rice bubbles
As mentioned I stuffed up and did not have icing sugar. I thought I did! Yes silly I should have checked the pantry better, but it all got fixed. I used caster sugar but had to put it in a pestle and mortar to get the sugar to a finer and softer consistency. It worked a treat but took a bit of time to get it done.
Step 2
Melt the copha. I did not chop it up, although the instructions say to. I put mine in a bowl and the microwave melted it for me. You can chop it up and put it in a saucepan and melt it that way. Either way is fine. It took about 2 and half minutes to get it all melted. Could be a little more depending on how your microwave works.
Copha ready to be melted in the microwave
Step 3
Add the melted copha to the dry indgredients and mix well.
Step 4
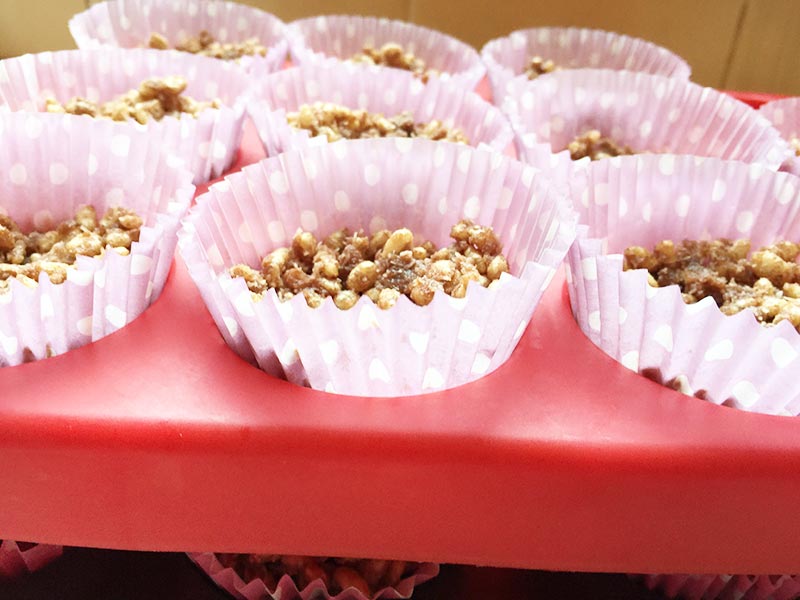
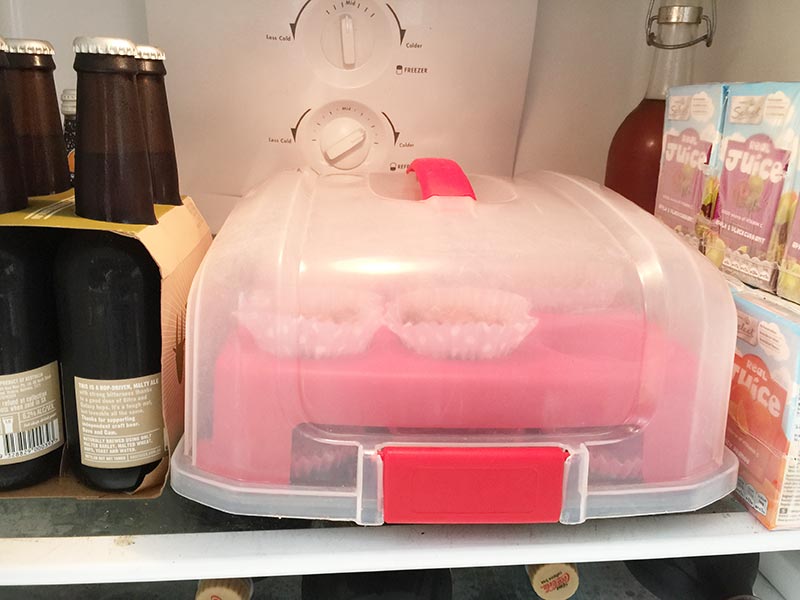
Spoon the mixture into patty pans, and then put in the fridge to set. It is best to do it overnight to make sure they are hard and fully set.
Ready to go into the fridge to set In the fridge setting. Note the beer and drinks all ready for Australia Day!
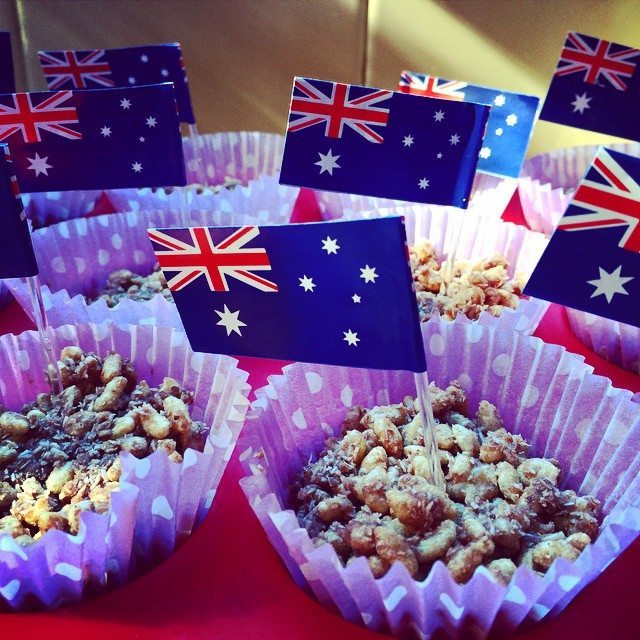
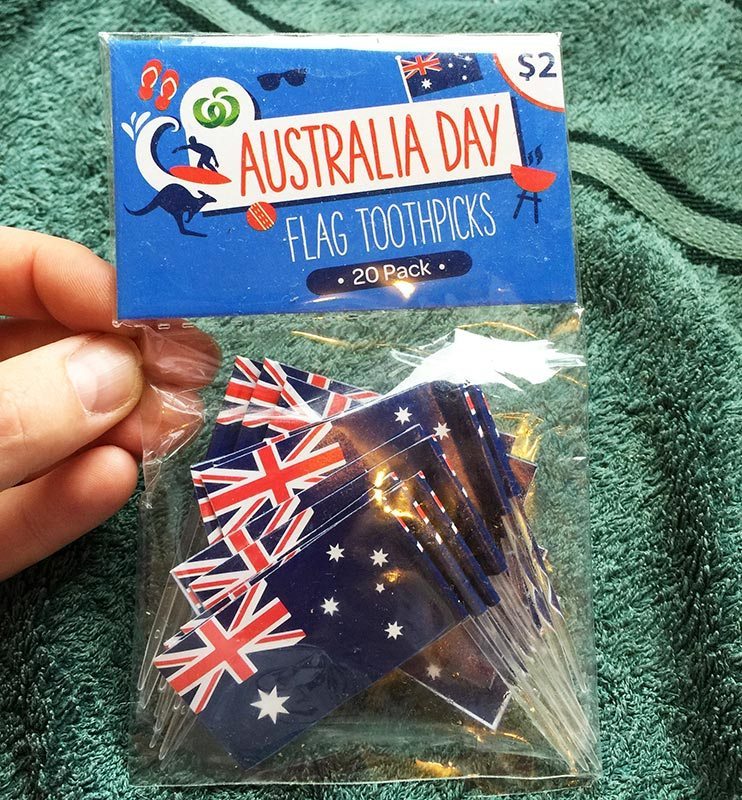
Since we are celebrating Australia Day tomorrow I wanted to add the Australian Flag to the chocolate crackles. Note: Adding the Australian Flag after the crackles have set is harder than you think.
Australian Flags for our Chocolate Crackles. I picked these up for $2.00 at the local supermarket.
And now for the finished product!
My finished chocolate crackles are all ready for Australia Day. Yum!
Have a great Australia Day and long weekend. Hope you are having a nice relaxing time. Enjoy your chocolate crackles if you make some and your time with your mates and family.
Note: This post was posted originally on January 25th 2015, and it was when the twins were much younger.
I had such lovely Valencia oranges from Todarello’s Katoomba Village Fruit Marketand thought why not try making orange syrup? How about making it even more orangey, so that each bite just screams summer oranges, even the smell instantly makes you know that it is orange.
Looking online for recipes for orange syrup, all the recipes tell you to use the juice and not pulp. Why not use the pulp? Why not use the super fresh orange puree to ensure your orange syrup is like eating a fresh orange?
Wouldn’t this be AMAZING to have a syrup that just screams tangy fresh tasty juicy oranges?
So how did I make this extremely yummy orange syrup?
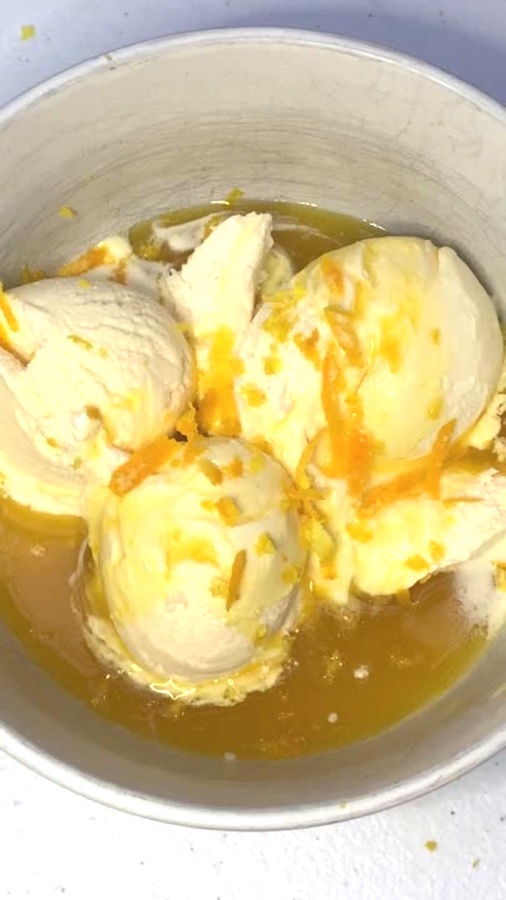
This orange syrup can be used for cocktails, refreshing drinks (plain water and sparkling), syrup over ice cream, and also sauce to bind cakes together for a creative cake creation.
INGREDIENTS
2 Valencia Oranges = 1 cup of orange puree
1 cup of water
1 and a half cups of sugar
Orange skin (Use the skin of the 2 Valencia oranges so that it infuses the orange flavour).
All the oranges before they went into the blender
METHOD
This recipe takes around 20 minutes to make. Not long to then enjoy your orange syrup.
Step 1: Cut up the 2 Valencia oranges, remove the skin and just leave the flesh of the orange. Put all the orange flesh into a blender and make sure it is thoroughly pureed. Pour out into a measuring cup, you should have 1 cup.
Step 2: Put the orange puree, water, and sugar into a saucepan. Melt the sugar and wait till the mixture thickens up a little. Depending on the amount of sugar added depends on how thick the syrup gets, if you wish to have a thicker syrup you can add more sugar. (I put my syrup in the fridge and it thickened up a bit more after a few days.)
Step 3: Add the orange rind to the mixture so that the orange flavour gets stronger. I cut up all the orange skin and added it all.
Step 4: Once cooked to your desired consistency strain the mixture and once cool put it in a jar/jug and then in the fridge. The syrup will keep in the fridge for around a month.
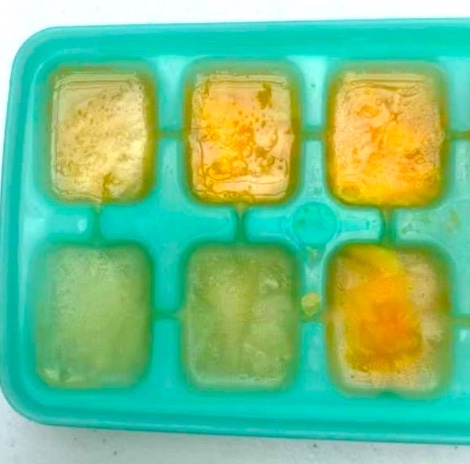
I added orange juice and orange to ice cubes – It made my orange syrup gin drink taste amazing!
POST FEAST REVIEW
I had no idea that fruit syrup was really easy to make. The syrup had a nice caramel taste when it was added to vanilla ice cream. I added orange zest for taste and decoration, the zest added bursts of flavour.
Having the syrup in the fridge for a few days allowed it to thicken up a little more. It was a better consistency after about 3 days in the fridge.
There is an amazing amount of uses for orange syrup, drinks, cakes, ice cream, and desserts.
Now that I know how easy it is to make, I will make different types of syrup for desserts. How about raspberry, blueberry or mandarin syrup? I am now thinking about another ingredient could be syrup.
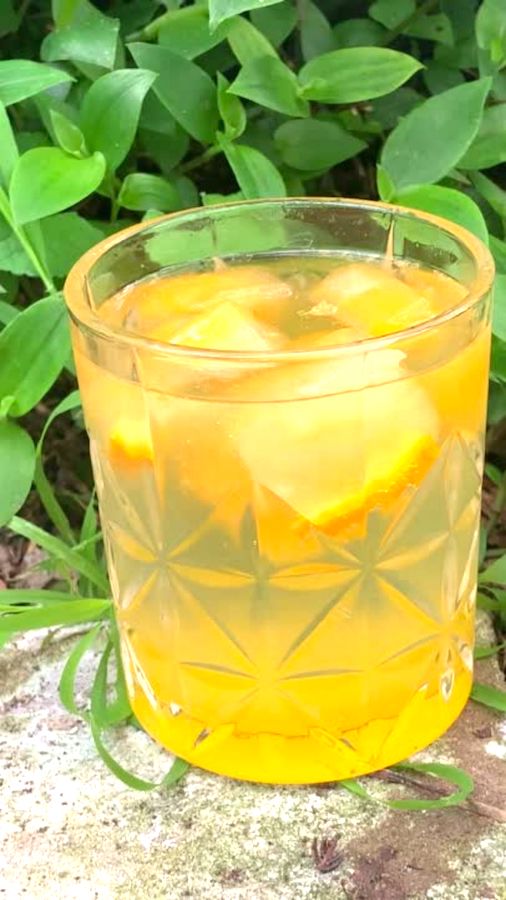
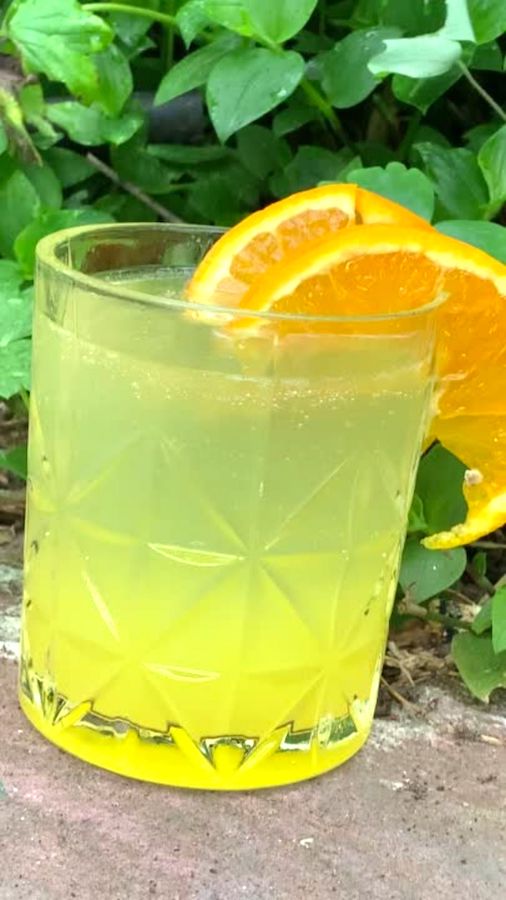
So refreshing with fresh orange syrupYou can add a little or a lot depending on your taste
WOULD I MAKE THIS AGAIN?
Yes, I would make this again, however, I would make some changes when making it next. I would add more orange and up the sugar a bit. Creating a thicker syrup that is more like an orange concentrate from fresh oranges. Adding the zest to the syrup would be a great addition as well, this way there is a different texture for taste and it will look amazing too.
SIGN UP FOR MY NEWSLETTER
Don’t miss a thing by signing up for my newsletter. The newsletter will list all giveaways and fabulous things that are happening. Stay current with all the things that are happening on Mummy to Twins Plus One.
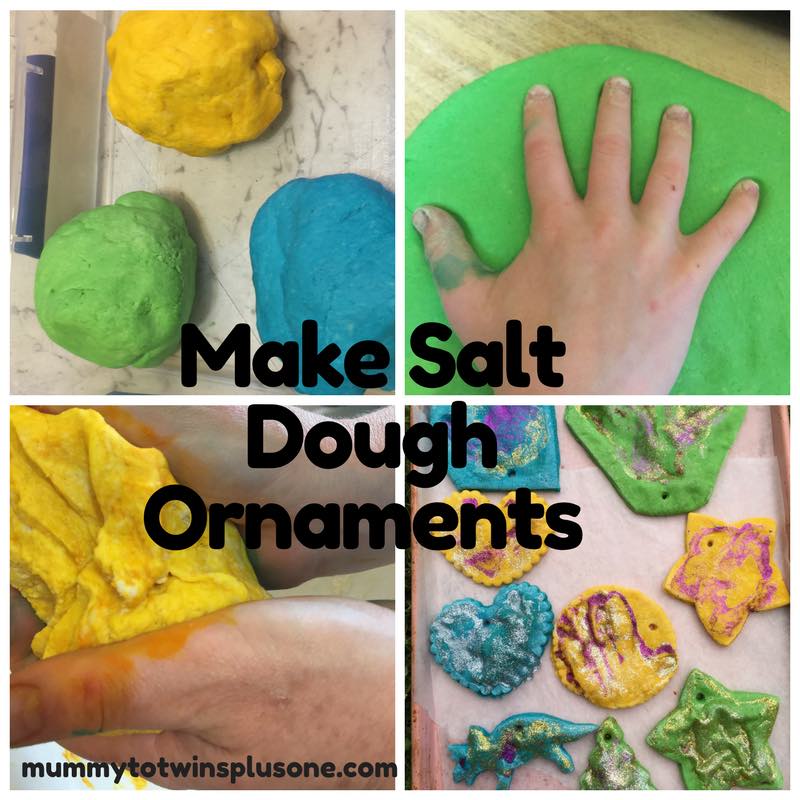
Salt Dough Ornaments are a perfect craft project to do with the kids.
They are fun and you can make whatever your heart desires. Your imagination can run wild.
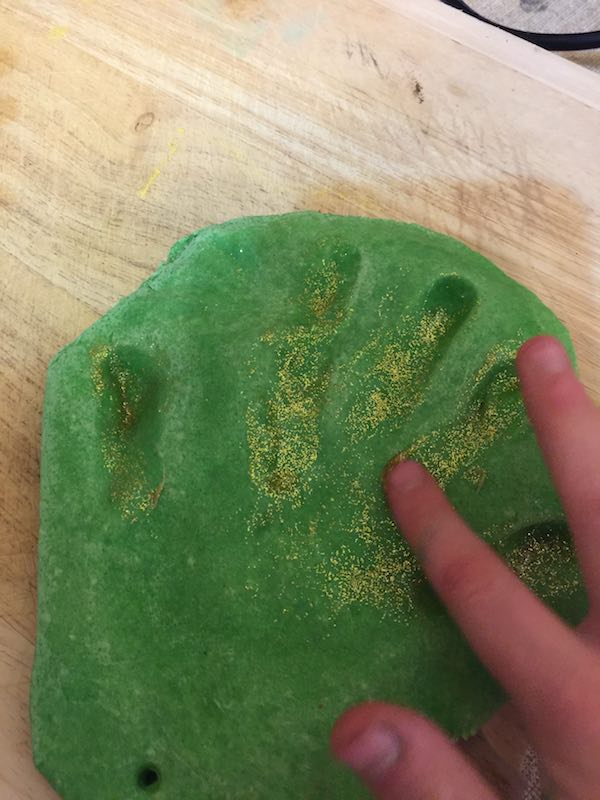
My kids wanted to create different animals and I made them do handprints as well. You can do feet prints if you wish.
The kids will love to see their creations hanging from the tree, or on the doorknobs of cupboards and doors.
You can make these decorations for any celebration. Easter, Birthdays and more!
Make Salt Dough Ornaments today with the kids
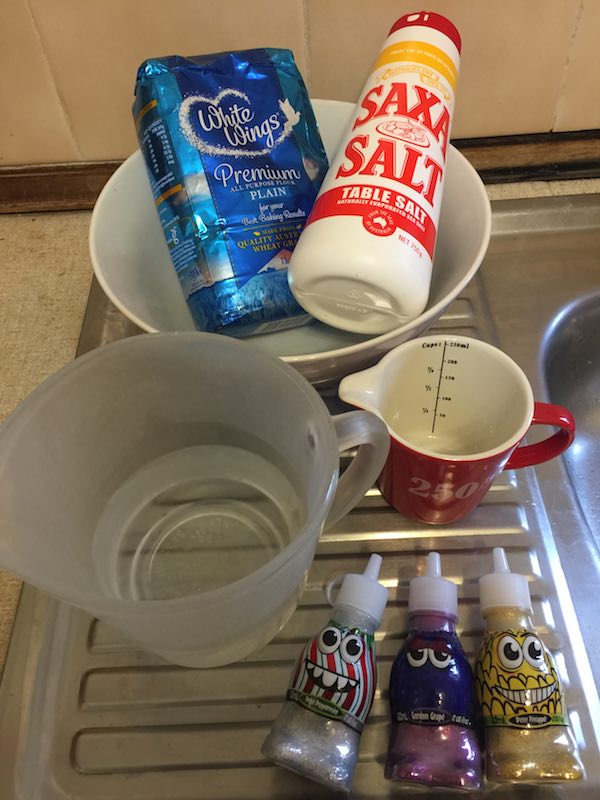
Ingredients
4 cups of plain flour
1 cup of salt
1 and a half cups of water
Food dye (whatever colour you wish to create)
Paint if you wish to paint the ornaments rather than colour with food dye.
Glue
Glitter or Glitter Glue
Ribbon or string to thread through the ornament.
Chopstick or another item to make the hole to hang the decoration on the tree.
All my ingredients aside from the food dye to colour the dough.
Method
Mix all the ingredients together.
Add the food dye and mix some more to make sure that it is the right colour.
I separated the dough into three different batches. I made different colours for each child. This is a good way to ensure you know who’s decorations are whos.
Mixing the blue dough.All three coloured salt dough.
Roll out the dough so it is not too thick and not too thin. (I made some of ours too thick and it has taken a while to dry)
Cut out the shapes with the cookie cutters and then press handprints or footprints on the decorations.
Adding the hole so you can hang your ornament. Make sure to do this before you bake the ornaments.
Make sure to add a hole to put the string or ribbon into the decoration. Don’t forget to do this. Once dry it will be next to impossible to add the hole for the ribbon to tie onto the tree. We used the end of a chopstick.
Put the decorations on a tray with baking paper and then bake in the oven.
Bake in the oven for 1-2 hours at 100°C. or 200 °F. Time might vary depending on how thick the dough is for your decorations.
If the ornaments are still doughy you can put them back into the oven, or maybe leave them out to firm up before you decorate them.
Once the ornaments are dry you can decorate them.
The saltdough creature is ready to bake now. You can clearly see the hole that will allow you to put string/ribbon to allow you to hang up your decoration.
Add glue to the areas you wish to add glitter then sprinkle the glitter. Make your decoration sparkle! (I ended up buying glitter glue instead of just glitter. This saved me from adding the glue and then the glitter.)
Add ribbon or string to thread through the hole that you have added to the ornament to allow you to hang on the Christmas Tree or elsewhere.
Decorating the Salt Dough Ornaments with Glitter Glue.The finished Salt Dough Ornaments. Some were harder than others as they were not as thick as the others. The thicker ones need more time. If I was to do it again I would make them a bit thinner.
I hope this helps you create your own wonderful salt dough masterpieces.
Sign up for my newsletter
Stay current with all the things that are happening on Mummy to Twins Plus One? Don’t miss a thing by signing up to my newsletter. This newsletter will list all giveaways and fabulous things that are happening.
Happy Halloween! I hope you have a fun and spooky time.
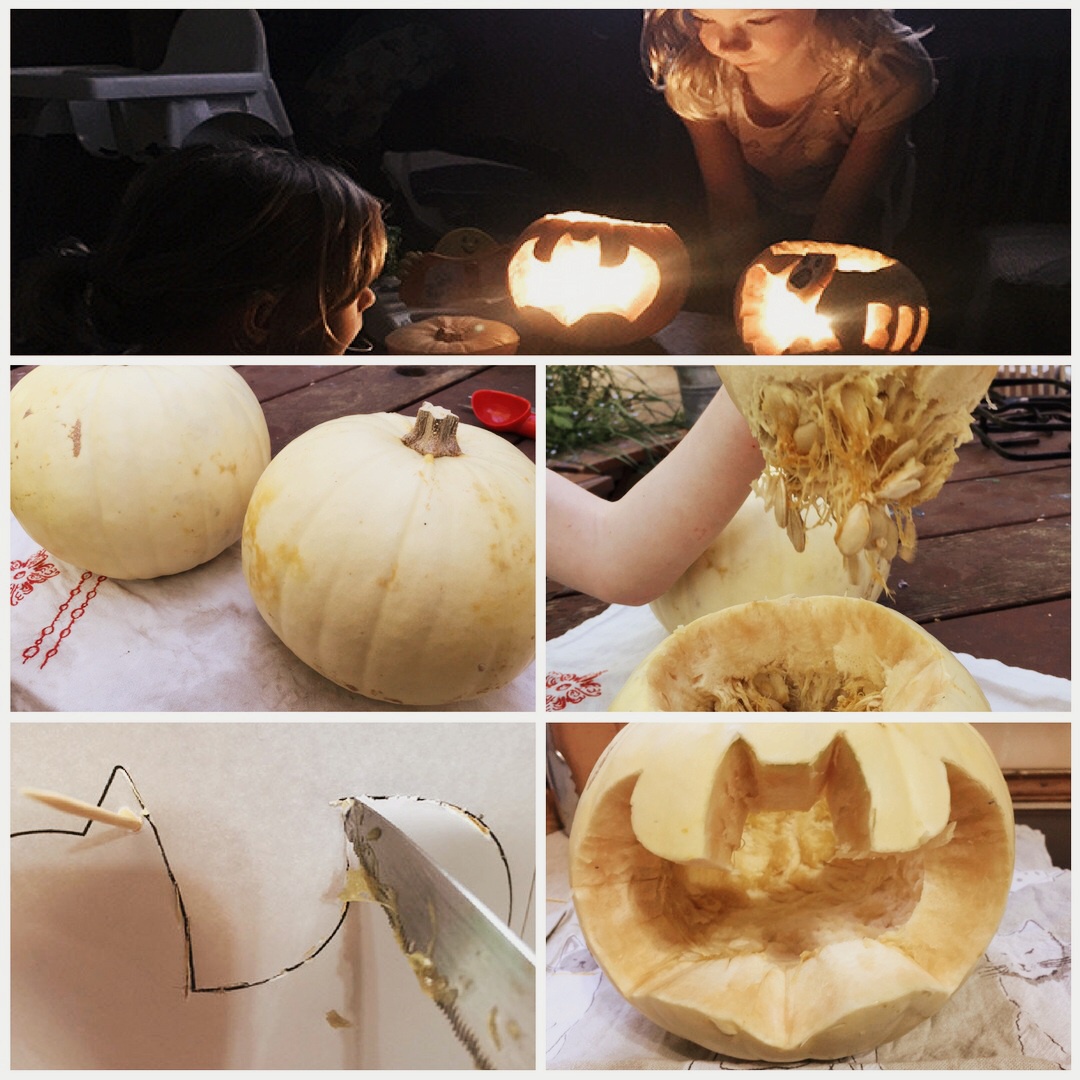
Have you created your Ghost Pumpkin or otherwise known as a Ghost jack-o’-lantern yet?
You might be wondering why I am referring to the pumpkins as Ghost pumpkins. Well, Coles was selling lightly coloured pumpkins as Ghost Pumpkins and I thought how cool. I have never seen a pumpkin that is not orange. I thought it would be fun for a change and also loved the genius from the Coles marketing department by labelling them Ghost Pumpkins.
We were carving our Ghost Pumpkins for Halloween. We did one bat and one ghost.
You can just picture the conversation around the board room…. it might have gone something like this.
“We have a whole batch of pale coloured pumpkins”
“Geez, how are we going to sell them?”
“Halloween is coming up, if we call them ‘Ghost Pumpkins’ they will fly off the shelves!”
I really don’t know what was said behind the closed doors of Coles and especially from the marketing team but maybe it did go down as I suggested. I went back the other day and they seemed to have sold out of these Ghost Pumpkins so calling them ghost pumpkins was a brilliant idea.
Since I purchased the pumpkins at Coles they also said that they had more info on how to decorate them on their website. I downloaded the Halloween Stencils to allow me to create the correct shapes and pictures. Do you use stencils or do you just create something on the fly? We have done a bit of both over the last few years so thought I would give the more complicated pictures on pumpkins a go.
What do you need to carve a pumpkin
A pumpkin or two. Yes, I know it is obvious you need to have a pumpkin to carve it.
An ice cream scoop helped us clean out the inside of the pumpkin and made it so much easier.
A couple of very sharp knives. You might want to have a bigger one to do the initial cutting of the top of the pumpkin and a smaller one for the actual carving of your design. (THIS IS SOMETHING THAT AN ADULT SHOULD DO AS KNIVES ARE DANGEROUS AND YOU DON’T WANT TO HAVE YOUR OWN REAL-LIFE SPOOKY ACCIDENT HAPPEN. I am sure you can live without this added drama)
Know the design you wish to create for your pumpkin. It helps to have an idea of what you would like to create, you will be less annoyed afterwards if you have a plan.
If you are not excellent at cutting pumpkins and need to have a guide for the shapes it is an excellent idea to have a stencil to work with. You can trace the outline and then use this to cut out the shape.
To help attach the stencil to the pumpkin I used toothpicks. I put the toothpicks into the area of the pumpkin that would be cut out.
How do you carve a pumpkin?
Step 1: You need to get the top off the pumpkin first. It is best to create an outline with your knife and go over it, again and again, to work it loose.
The top with the cuts around it to help get the top off.
Now the top is off, the inside of the pumpkin needs cleaning out. You can also keep the pumpkin seeds and roast them to add to meals or snacks.
Step 2: Clean out the inside of the pumpkin. This might take a while and it is recommended to dry it out. If you are in a rush and would like to use the pumpkin that day and not wait too long to dry you can put it on the trays in front of the oven to get the heat but not cook it.
Cleaning out the inside of our Ghost Pumpkins.
Using an ice cream scoop was a great idea as it made the job so much easier.
Step 3: Once you have cleaned and dried out the pumpkin it is now ready to carve. Remember it is best to have a good idea of what you are going to do. If you make a mistake you will have to start all over again with a new pumpkin.
I used stencils from Coles this time and they helped me get the right shapes for the characters. However, with the ghost, I should have made it smaller or put it on the bigger pumpkin (this was not possible due to one child claiming the bigger pumpkin and wanting the bat on it, I could not tell her otherwise) due to the fact that the head was missing and I thought it would not be an issue. I did think that a headless ghost would be great but it did not give you an idea of the character. I ended up adding a new head with the cut out from the stencil for the eyes and mouth.
Now the stencil is attached to the pumpkin you can use the knife to mark the lines of the bat. Once you have all the lines there you can remove the stencil and start to create the bat.
I did the same for the ghost, although I needed to make the image smaller or find a bigger pumpkin. Make sure your design fits perfectly on the pumpkin.
See here I’m tracing the lines with the knife. This is not to difficult but it does take some time. Don’t worry if you cut through the paper as this will just end up in the recycling anyway.
See the lines on the pumpkin is now in the shape of the bat that was on the stencil. The next step is to cut out the bat shape and reveal the bat so you can light it up for Halloween.
Step 4: Now you have the outline the work begins to cut out the bat image from the pumpkin
Getting there. It is partially cut out and on its way to being a nice-looking bat. Just take care of the knives and don’t hurt yourself. Remember it is for an adult to do this so that little fingers don’t get hurt.
Step 5: After cutting out for a bit and removing the excess pumpkin a bat is born!
Our ghost pumpkin bat. I think it looks amazing. Using the stencils really helped get the right shapes for the bat’s wings and ears. What do you think?
So now both the pumpkins are complete and the girls were keen to see them with candles in.
Our wonderful bat and ghost pumpkins are now all complete and lit up with a candle each.
I even added a little bit extra to the ghost one. I put the word BOO! Not my best work but it was done freehand and I thought it might turn out better than it did. Still does a good job and gives a nice spooky impression.
The ghost pumpkin with added head due to smaller pumpkin.
The word “BOO!” on the side of the ghost.
If you don’t have a ghost pumpkin just use a regular orange one.
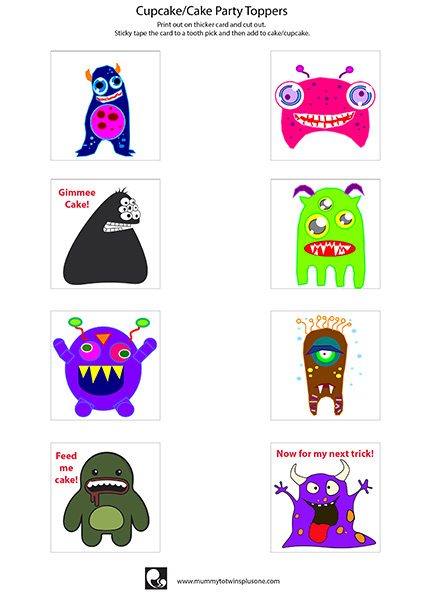
Download this amazing printable to decorate your cupcakes. Perfect for Halloween or birthday parties. Spooky monsters will make you giggle while you eat your sweets.
Stay current with all the things that are happening on Mummy to Twins Plus One. Don’t miss a thing by signing up for my newsletter. This newsletter will list all giveaways and fabulous things that are happening.
If you are like me you sometimes run out of things for dinners. Yes sad but true. This tasty recipe that I’m about to share only uses some items from the pantry, fridge and takes no time at all to cook.
It is easy, quick to make and of course super yummy, that said you need to like chilli’s. I do love chilli so therefore this is not an issue. If you don’t you can substitute another type of flavour to not have it as spicy. Remember this recipe is flexible so you can amend it to suit your tastes.
Ingredients
2 x John West Tuna Tempters Chilli 95g. I was only cooking for myself so 2 cans were ample, however if you needed more spice or sauce you might find you need to add more cans, say 3 or 4.
Bok Choy
Capcisum
Onion
Udon Noodles
Carrot
Champignons/mushrooms (As I had the champignons in the pantry these were used. If I had fresh mushrooms I would have used them.)
Sesame Seeds for sprinkling on the noodles if you wish or you can crush up some almonds and use them for some extra crunch.
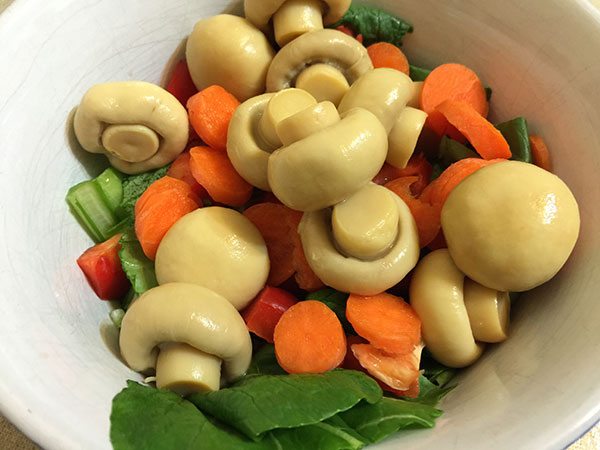
All the vegetables cut and ready to be added to the meal.
Method
I got all my vegetables chopped and ready, all aside from the onion were put in a bowl.
Put on a pot of water to boil. Once boiling add the udon noodles. These should cook for about 5 mins. I like mine soft so I might cook mine a little longer. If they are nearly to the softness I like I take the pot off the heat and leave them in the hot water until I’m ready to serve. This way the noodles are hot and just the way I like them.
The udon noodles cooking away.
When a pan was heated up with some olive oil I cooked the onion until it was translucent.
Cooking the onions.
Now add the other vegetables to the pan and have them simmer a while until they are partly cooked. I like to have the bok choy mix around in the olive oil to add a bit of flavour. I leave it for about 5 mins or so.
It is now time to add the chill tuna. To make the most out the sauce you need to make sure you get everything out of the tin. I like to add a little water that allows tuna that has stuck to the bottom and edges to dislodge and the water adds to the sauce. This is when you will know if you need an extra tin or so for the sauce. It does depend on how many will be eating but you can adjust this so don’t worry.
I’ve added the tuna and now getting the rest out of the tin by adding some water. The addition of water also helps with making more of the sauce.
Remove the noodles from the water if they are still there. Split up the noodles into warm bowls.
If you would like sesame seeds/almonds sprinkled over the noodles now is the time to do this. You also could add a little soy sauce to the noodles for flavour, but not too much or it gets too salty.
Your sauce is now ready with the vegetables. Add it to the bowl with the noodles.
Your meal is ready and you can now eat! If you wish you can also to garnish it with parsley/coriander.
Your quick and easy dinner is now ready to eat. Chilli Tuna Veggie Noodles you will find so good that you will add it to your meal plans.
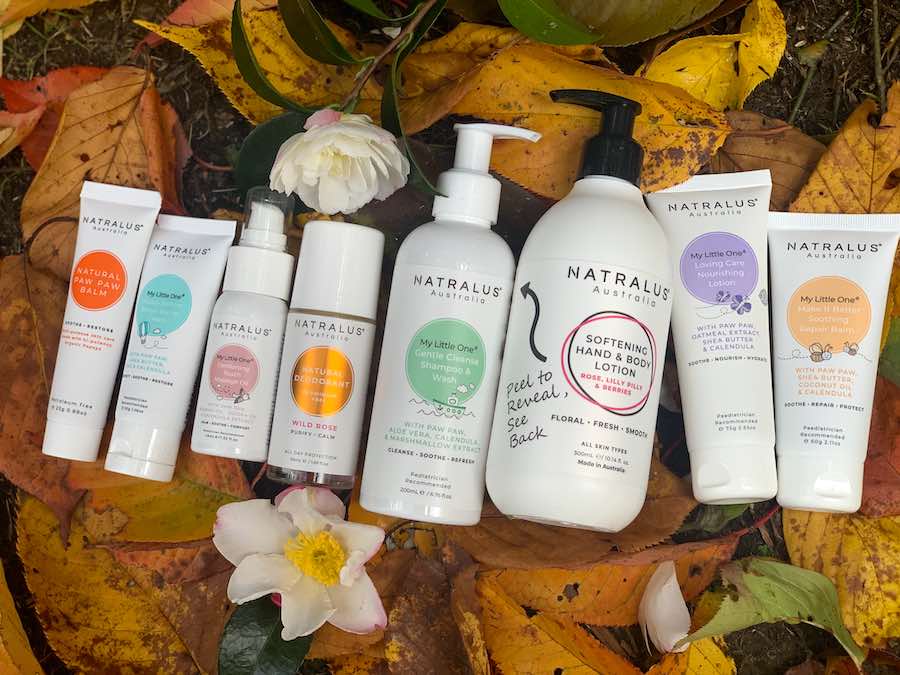
If you are like me you love receiving gifts and especially if they are ones that allow you to pamper yourself. I recently received a box of Natralus Australia skincare products to test out and share my thoughts with you my lovely readers.
My skin always gets so dry in autumn and winter so having a good quality moisturiser on hand is essential. The weather in the mountains during the colder months means my skin deals with harsh winds, cold temperatures, warm heating, and of course layers and layers of clothing too that don’t help with dry skin.
The wonderful smelling Hand & Body Lotion – Rose, Lilly Pilly & Berries
NATURAL DEODORANT – WILD ROSE This deodorant is so wonderful and makes me smell like a rose all day long. It is not a strong scent, in fact, it is more a subtle rose that makes you feel like you are on holiday or it is summer still. You can get natural deodorants in Cool Spice, Lemon Myrtle, Zesty Citrus, Citrus Spring, and Sea Berry.
NATRALUS NATURAL PAW PAW BALM This natural paw paw balm is so moisturising and stays on your lips for ages. It is thicker and really helps keeps my lips feeling good and also looking amazing. I think you will be super amazed at the quality of this paw paw balm and it will soon be a firm favourite for you too.
This is my favourite item and a must-havefor anyone… you seriously need to get yourself some Natrualus Natural Paw Paw Balm today!
All the amazing natural products from Natralus Australia
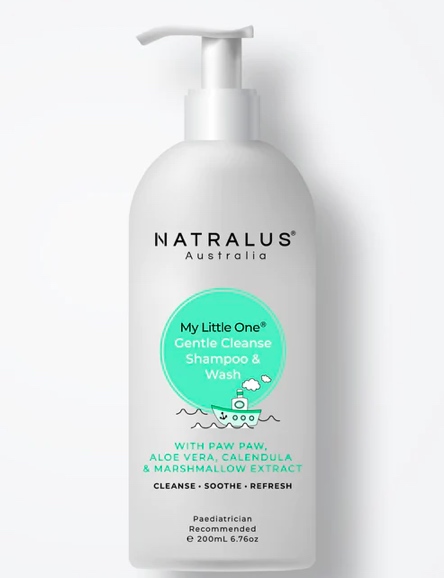
Natralus My Little One Gentle Cleanse Shampoo & Wash smells so good, so marshmallowy!
Natralus My Little One Rangecovers all stages of care for children, including lotions, cleansers, and shampoo/conditioners. The creams and washes are so gentle, moisturising and soothing for babies’ and kids’ skin.
We loved the My Little One Gentle Cleanse Shampoo & Wash, it was like a big bunch of crushed-up marshmallows, My Little One Comforting Touch Massage Oil helps protect bubs skin, you can also use the massage oil during pregnancy and post-pregnancy for your skin too.
The oil is “enriched with paw paw to help nourish and protect delicate skin, Rosehip oil to deeply moisture and help support your little one’s skin natural elasticity, Jojoba oil, is gentle and easily absorbed, helps to prevent dryness and leaves skin silky-smooth. Calendula, known for its calming and soothing properties.”
Thanks to Naturalus Australia for sending me such amazing products to try.
I loved them and will definitely recommend them to friends and family. If you are looking for some amazing natural products, make sure to check out Naturalus Australia.