Categories
Recipes

20 Reasons Why Bananas Are Great For Mum and Little Ones

From the moment you realise you are going to be a mum until your child is getting dressed all by themselves, Australian bananas are the ideal addition to both your diets. Accredited Practising Dietitian, Glenn Cardwell provides 20 reasons why:

Cavendish Bananas
Cavendish Bananas


Pregnant & New Mums

Pregnancy is the time to pamper your body and understand the impact of your eating – especially since you are dining for two. One way to give your diet a pinch of powerful production is to add nature’s non-stop energy snack, bananas.

Circular Flour-less White Chocolate Cake with Orange Blossom and Banana

Bananas are excellent when you are expecting because they not only contain essential nutrients for the healthy growth of your bundle of joy, but they are also good for managing morning sickness and constipation that sometimes come with having a baby on board.

  1. Relieving Your Heaving

Thankfully, morning sickness usually only lasts the first trimester but that doesn’t make it fun (however if you are like me pregnancy makes you sick all the time. Bananas have been helping me feel better for breakfast now that I’m in my 3rd trimester.) Eating dry crackers, toast or a piece of fruit like a banana in the morning before you get out of bed, and having small snacks frequently through the day can help as it keeps the stomach from being empty, which can make you feel unwell. Avoiding spicy and fatty foods can sometimes help ease nausea as well.

  1. Reduce Constipation

As the muscles in the intestine lose some of their tone during pregnancy, foods pass more slowly through the gut. The pressure of the baby on the mother’s intestines can also slow down the passage of food and waste, resulting in constipation. The solution is copious amounts of fibre, which bananas provide aplenty, fluids and physical activity. Although the banana is an obvious choice to boost your fibre intake, other fruits, wholegrain breads and cereals and legumes are good options.

  1. Energy to Burn

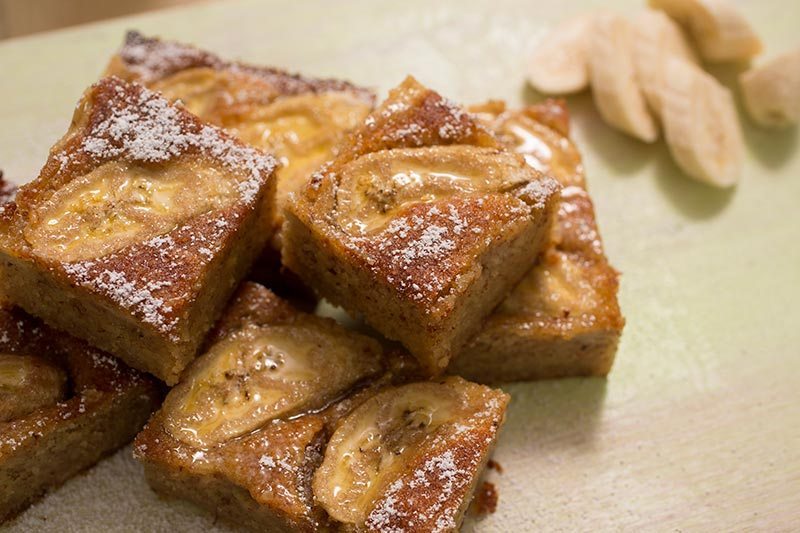
Bananas are an excellent source of carbohydrate energy in the form of natural sugars and starch. It’s no wonder they call it nature’s non-stop energy snack.

  1. Protect Against Spinal Cord Defects

Folate is vital in the development of a baby’s spinal cord in the womb. It is so critical that the vitamin is recommended to women considering pregnancy. An overwhelming body of evidence has linked folate deficiency in early pregnancy to increased risk of neural tube defects, most commonly known as spina bifida, in infants. One banana will provide about 10 per cent of your folate needs each day.

  1. Form Strong Gums

Extra Ascorbic acid (vitamin C) is required for forming new blood vessels, skin, gums, and other tissues, and even bones. One or two bananas each day will provide valuable vitamin C, as will other fruit, fruit juice and salad vegetables.

Banana and Coconut Milk Pops
  1. Absorb Your Iron

In order for a healthy amount of oxygen to reach your baby via the placenta, your body (and your blood) needs about 50 per cent more iron than usual. Although a banana provides only a little iron, its vitamin C greatly helps with iron absorption from other foods. Iron supplements (usually with folate) are commonly recommended during pregnancy.

  1. Strengthen Bones and Teeth

Calcium is required for strong bones and teeth, and in nerve and muscle growth, both for mum and baby. An extra 300mg of calcium is required for pregnant teenagers as they are still growing as well as nourishing the baby. The perfect way to bump up calcium intake is to regularly drink smoothies – simply blend a banana with a cup of high calcium milk.

  1. Help Babies Grow

Extra protein is needed during pregnancy and breastfeeding to support the growth of the baby, and the production of breast milk. This is easily achieved by adding a delicious banana smoothie (a medium banana and 200mL of milk) to your daily diet.

  1. Boost Your B6

Uniquely, bananas are one of the richest fruit sources for vitamin B6. This powerful vitamin is important for cardiovascular, digestive, immune, muscular, and nervous system function. New or expecting mothers’ daily need for it increases by almost 50 per cent, making bananas a great solution.

Square Flour-less White Chocolate Slice with Orange Blossom and Banana
  1. Baby’s First Food

After six months, your baby’s exclusive exposure to the bottle or the boob is coming to an end. Their digestive system is now ready for solid food. Here are a few reasons why Australian Bananas make the ideal first food:

  1. Essential Nutrients

Bananas are soft, easy for an infant to tackle, and rich with essential nutrients, including vitamin B6, folate, vitamin C, magnesium, potassium, and natural sugars for energy.

  • Half a medium banana will give an infant:
    • Folate: 33 per cent of their daily needs
    • Magnesium: 25 per cent of their daily needs
    • Vitamin B6: 50 per cent of their daily needs
  1. Familiar Consistency

Mash a banana with breast milk or formula when introducing solids. It is more likely to be accepted quickly as a new food.

  1. Made For Tiny Hands

The banana is the ideal finger food. It can be nibbled, chewed, sucked and squished. Give your child a small amount at a time.

LadyFinger Bananas
LadyFinger Bananas
  1. Easing Teething

During teething, a cool or frozen banana can help relieve the pain of a tooth coming through.

Nature’s Long-Lasting Energy Snack For Toddlers

Australian bananas make the ideal snack for toddlers. Whether they are just starting to walk or speaking in sentences, children at this age need one fruit serve each day. This might be a medium banana, or half a banana and half of another fruit. While bananas are very popular with young children, it is also important to introduce them to other fruits, especially once they start getting teeth towards the end of their first year of life.

  1. Great Source of Carbohydrates for Energy

To fuel the activity of a toddler, they need carbohydrates at each meal. Bananas are an excellent source of the nutrient in the form of natural sugars and starch.

  1. Protein for Growth

Normal growth needs protein to help produce new cells. A small banana smoothie (150 mL milk and a half banana) as a snack or meal is an excellent source of both protein and calcium.

  1. Vitamin B6 for Blood Health

This vitamin is needed for making red blood cells, and carrying nerve impulses. A small banana will provide about one third of their B6 needs for the day.

Banana Guacamole for Kids
  1. Folate for Growth and Brain Health

The B vitamin folate is needed for proper growth and development. Half a banana will give a toddler about 15 per cent of their folate needs each day.

  1. Fibre for Digestive Health

Bananas are a great-tasting source of fibre, so even a small serving a day for a young child will help keep them regular.

  1. Convenience

Toddlers only want to eat when they are hungry, and they may not want to finish everything on their plate, making snacks like bananas so convenient. You can simply cut them in two and save half in the refrigerator in plastic wrap for later.

Glenn Cardwell is an Accredited Practising Dietitian with 35 years in clinical and public health nutrition, including 10 years as consultant dietitian to the National Heart Foundation, five years at the Children’s Hospital in Sydney, and was a major player in establishing the WA School Canteen Association in 1994.

For the latest news and information, ‘LIKE’ Australian Bananas on Facebook www.facebook.com/AustralianBananas and Instagram @australianbananas


Drooling over the Circular Flour-less White Chocolate Cake with Orange Blossom and Banana
Categories
Review

Osmo Pizza Co for Kids

Alexander loves his Osmo Pizza Co game and iPad Stand

I got sent an Osmo Pizza Co with an iPad stand, I must say that I wasn’t sure what to expect, but I am blown away.

Osmo is fabulous! It is so interactive and teaches kids when they are having fun playing.

Once I unwrapped the game and the iPad stand, I then set it up for Alex.
The Pizza shop was open for business. It is so interesting that the game is not just played on the iPad, it is also played with the pizza board, the pizza ingredients and the money to make change for the customers orders.

The customers do get angry and annoyed at you if you get their order wrong….however it is fun to see their happy faces when you get it right.

Customers then pay you with an amount of money that is listed on the iPad and you have to give them change. To give change to the customer you need to turn the pizza board over and use the black/grey side. Add the money to this side and then the customer is super happy.

I had to help Alex with the money part as he is still a little young for this part of it, but it won’t be long until he is telling me how much money the customer needs.

My boy did have a lot of fun creating the pizzas and also making pizzas that the customer didn’t order. He loved the fact that the game saw what he was doing with the ingredients.

Alex loved the castle game that I downloaded for him

Games that allow kids to learn while having fun is ideal in my book.

We loved our Osmo Pizza Co and I am keen to get Alexander some more Osmo games.

This game is so perfect for a Christmas gift or a special treat during the holidays. You can purchase Osmo games and iPad stands at the following places: BigW, Kidstuff, JB Hi-Fi, Amazon.com.au, Apple Store, and OfficeWorks.

I am sure you will love an Osmo game as much as we do.

Sign up for my Newsletter

Stay current with all the things that are happening on Mummy to Twins Plus One. Don’t miss a thing by signing up for my newsletter. This newsletter will list all giveaways and fabulous things that are happening.


Dec 18 2020

Categories
Beauty

DIY Pumpkin Beauty Products

Have you ever wondered how easy it is to create your own natural beauty products? How about making pumpkin beauty products?

I know I have and thought it would be hard, in fact it is super easy and fun. However, it can get a bit messy, so take care.

Autumn is here, and cooler weather means hearty food; Stews, casseroles, roast meat with vegetables and more.

Pumpkin is one of my favourites. What about you?

Some things I love to make with pumpkin are mash, roast pumpkin and pumpkin chips with a little bit of cheese melted over them. What is your favourite pumpkin dish?

Pumpkin all cut up and ready to be turned into mash.

I stocked up on pumpkins from my local greengrocer, The Veggie Patch at Blackheath.  Getting your fruit and veg from a local greengrocer is great.

Look at all these yummy pumpkins. Perfect for dinner and then to make some healthy and natural beauty products.

The best place for fresh fruit and vegetables at Blackheath, The Veggie Patch.

The Veggie Patch at Blackheath

The idea of using the left over pumpkin mash means that my body is getting the vitamins on the skin, it is all natural, there is less waste, it is good for me.

“Healthy food inside and healthy natural products outside”

How to make Pumpkin Mash?

Firstly, you need to cut up your pumpkin into smaller chunks. Making all the pumpkin into similar sizes means that it will be cooked quickly, and all the pumpkin will cook at the same rate.

Once all done put a cup or two of water into a saucepan and boil the water. Once boiling add the pumpkin and leave on the stove until it is all soft and ready to be mashed up.

If you are using the mash for eating you generally add some milk and butter, plus you could add other items to the mash, for example onions, and crushed up almonds or pumpkin seeds.

If you are using the pumpkin mash for beauty products, then just mash it up and put it in a sealed container until you are ready to create your own handmade works of beauty.

The pumpkin is all cooked and now ready to mash up to be mash!

What are the health benefits of pumpkin?

  • Great source of fibre
  • High in beta-carotene
  • May help with reducing diabetes, heart disease, and some cancers and also help delay ageing and body degeneration.
  • Pumpkins also have calcium, magnesium and some B vitamins.
  • Beta-carotene helps boost the immune system.
  • Pumpkins are high in antioxidants – Vitamin C, and Vitamin E.

Testing out the Pumpkin Body Butter. It is so wonderful on my skin and leaves it so smooth.

Why is it good for your skin?

Pumpkins are a great source of Vitamin A and Vitamin C. These helpful vitamins help soften skin while improving any damaged cells. What a powerful vegetable is the pumpkin!

What did I use to create my pumpkin beauty products?

All the items I needed for my homemade pumpkin beauty products. Some were good enough to eat!

  • Mashed Pumpkin
  • Brown Sugar
  • Coconut Oil
  • Olive Oil
  • Yoghurt
  • 1 egg
  • The Apple Cider Vinegar was for the Pumpkin Face Mask for oily skin, but I didn’t make this one. Read on to see the recipe for this face mask as well.
  • Honey
  • Measuring cups
  • Spoons
  • Containers to store the products in

Make sure to refrigerate your items after you make them. They are made with real vegetables and therefore will perish if not kept well. Use quickly and enjoy!

Testing out my pumpkin hair conditioner, it made my hair feel very soft afterwards.
Testing out my pumpkin hair conditioner, made my hair feel very soft afterwards.

What pumpkin beauty products did I make?

I’ve created a sheet so that you can have all the info in one spot, download all the pumpkin beauty recipes in one PDF printable.

  • Pumpkin Body Sugar Scrub
    Mix 1 cup of pumpkin mash with 1 cup of sugar. Add a tablespoon of olive oil and mix together until you make a paste.

    Making the Pumpkin Body Sugar Scrub
    Making the Pumpkin Body Sugar Scrub
  • Pumpkin Body Butter
    Mix 1 cup of pumpkin mash with 1 cup of coconut oil. You can make a smaller batch, but if you are like me you will love this and so will your skin.
    I ended up putting the mixture in my blender to get all the lumps of the coconut oil out. Smother over your skin during a shower.

    The Pumpkin Body Butter is my favourite product.

    Mixing up the ingredients for the Pumpkin Body Butter. It is sooooooooo good!
    Mixing up the ingredients for the Pumpkin Body Butter. It is so good!

    My skin gets so dry during Autumn and Winter, the cooler air zaps the moisture from my skin and means I need to be vigilant with the body moisturiser.

  • Pumpkin Face Mask for Dry Skin
    Mix 1/4 cup of pumpkin with 1 teaspoon of olive oil, 1 teaspoon of honey and 1 whole egg. Mix until all smooth, then you test it out. I left it on for 20 minutes.

    Trying out my new Pumpkin Face Mask for Dry Skin
    Trying out my new Pumpkin Face Mask for Dry Skin
  • Pumpkin Sugar Lip Scrub
    Mix 1 teaspoon or 1/4 teaspoon of pumpkin mash with a 1/4 teaspoon of olive oil (or you could use coconut oil), and add 1 teaspoon or half a teaspoon of fine sugar (I used brown sugar).
    Mix all ingredients together, and then rub on lips to exfoliate.

    The brown sugar I used in the pumpkin beauty products. Adding this made the Pumpkin Sugar Lip Scrub smell amazing!
    The brown sugar I used in the pumpkin beauty products. Adding a little bit of this made the Pumpkin Sugar Lip Scrub smell amazing!
  • Pumpkin Hair Conditioner
    Mix 1 cup pumpkin mash and 1 cup of yoghurt, plus a teaspoon of honey.  I couldn’t help myself as this mixture smelt amazing I had to have a taste, and it was so yummy!
    What other hair conditioner could you eat as well?
    Leave for 30 minutes. Have a shower afterwards to make sure it is all washed out.

    The Pumpkin Hair Conditioner is complete and ready to use.
    The Pumpkin Hair Conditioner is complete and ready to use.

    The The Pumpkin Hair Conditioner smelt so yummy I had to have a taste, and yes it was wonderful!
    The The Pumpkin Hair Conditioner smelt so yummy I had to have a taste, and yes it was wonderful!

I didn’t make the below pumpkin face mask. My skin is rather dry, so I wanted a mask that will help my skin feel more hydrated.

  • Pumpkin Face Mask for Oily Skin
    Here is the breakdown of how to make this other pumpkin face mask:
    Mix 1/4 cup of mashed pumpkin with 1 whole egg, add 1 tablespoon of Apple Cider Vinegar and mix together. Leave on for 20 minutes then wash off.

All pumpkin beauty products that I made. The one in the big bowl is the pumpkin face mask for dry skin, I was about to put it into my recycled yoghurt container.

What else can you make with pumpkins?

For the body: Soap, foot scrub, and other face masks.

To eat: Cakes, soups, pumpkin butter, pies, drinks, bake the seeds to eat later, muffins, smoothies, add to your breakfast cereal (oats), use the mash as baby food or addition in meals to help kids eat more veggies.

For fun: Halloween lanterns and bowls for a dip at parties.

I hope this post gives you some inspiration to make your own cheap pumpkin beauty products.

Sign up for my newsletter

Stay current with all the things that are happening on Mummy to Twins Plus One. Don’t miss a thing by signing up for my newsletter. This newsletter will list all giveaways and fabulous things that are happening.

Originally published April 14 2018

Categories
Sponsored Post

Bouncin’ around: A fun way to keep your kids occupied these holidays

Note: I was so taken with the quality of Vuly and how Vuly trampolines keep kids active and healthy. I’m an affiliate for Vuly, if you purchase any Vuly products from these links I get a little commission.

Keeping your kids entertained during the school holidays takes a little bit of imagination, creativity and (let’s face it) a dose of good luck!

Although our family tries to take regular outings to museums, theatres and even putt-putt – it’s not possible to do this every day. During our days at home, my kids need a little extra inspiration to stay away from computers and screens.

To help encourage my kids to get active in the backyard, we tested out the Ultra Medium Trampoline from Vuly Play.

To my absolute delight, the kids spent hours outside enjoying their new trampoline. In fact, they simply loved it… and as a busy mum, so did I!

Whether it was challenging one another to jump the highest, or creating their own little tricks and gymnastic routines; the Ultra Medium Trampoline was a holiday hit.

There were countless occasions when the kids came running inside (laughing and out of breath,) asking me to judge their latest acrobatic feats!   The trampoline also offered a fun way to include other kids from around the neighbourhood in our family’s holiday activities.

Personally, what I really love about having a trampoline is that I can be inside doing whatever I need to, while the kids are outside having fun in a safe environment.

For those parents who aren’t sure about the safety of trampolines, you need to take a look at Vuly Play. This Australian-based company prides itself on their state-of-the-art safety features and design quality. Vuly says they take safety seriously – and I tend to agree.

The Ultra Medium Trampoline includes a self-closing woven net ensuring kids can’t mistakenly jump out and has a true weight capacity of up to 150kgs. In addition, the springs of the trampoline are fully enclosed, with the entire trampoline designed to prevent contact with poles or any external parts of the structure.

My kids spent countless hours on the trampoline without any bumps or bruises!

Given Australia’s changing weather conditions, it was also important that our trampoline was made to last. Fortunately, the team from Vuly Play have thought of this too – and their trampolines are designed to be extra durable.

The Ultra Medium trampoline has been galvanised for rust resistance and has also been tested for performance in wet weather. Vuly trampolines have also undergone extensive testing to exceed Aussie manufacturing standards – and are easy to assemble with zero nuts or bolts. Our trampoline has already weathered a few storms, and it still looks brand new!

The Vuly Ultra Medium Trampoline was a hit with my kids these school holidays! For more info, check out: https://www.vulyplay.com/en-AU/trampoline/ultra


Note: Vuly sent us an Ultra Medium Trampoline to test out.  The kids are obsessed with their new trampoline and hubby and I are pleased that it keeps all three kids occupied. Thanks so much, Vuly Play for sending us this amazing item.


Sign up for my newsletter

Stay current with all the things that are happening on Mummy to Twins Plus One. Don’t miss a thing by signing up for my newsletter. This newsletter will list all giveaways and fabulous things that are happening.

This post contains affiliate links.

Originally posted July 29 2019

Categories
Recipes

Cakeover Magic: Transforming Store-Bought Sponge Cakes into a Dream Wedding Cake

Mission: To turn store-bought sponge cakes into a stunning wedding centrepiece.

Challenge accepted!

Armed with creativity, a vision, and a few store-bought sponge cakes from Woolworths, I ventured into the world of cakeovers to craft a delightful masterpiece fit for a dreamy wedding. Plus, with the help of gorgeous fresh flowers from Fine Flowers in Katoomba, the transformation was truly enchanting.

What is a “cakeover”?

A “cakeover” is a playful term used to describe the process of transforming an existing or store-bought cake into a more elaborate or personalized creation through decoration, embellishments, or alterations. Think of it as a cake makeover.

It involves taking a pre-made or basic cake and enhancing its appearance or flavour to suit a specific occasion or personal preferences better.

Cakeovers are often chosen for various reasons, such as time constraints, budget considerations, or simply to showcase creativity by customising a store-bought cake to suit a particular celebration, whether it’s a wedding, birthday, anniversary, or any other special occasion.

The Quest for Cake Perfection


Step 1: Cake Acquisition
A trip to my local Woolworths store presented an array of sponge cake options. Opting for simplicity, I chose plain sponge cakes – the perfect blank canvas for my cakeover project.

Step 2: Visionary Designs
Inspiration struck as I envisioned a multi-tiered cake exuding elegance. With a touch of whimsy in mind, fresh flowers were to be the pièce de résistance. The flowers allowed for a touch of colour and made the cake look so pretty.

Step 3: Assembly Time
Stacking the sponge cakes, I sandwiched them with layers of luscious cream and fresh Panama passionfruit from Todarello’s Katoomba Village Fruit Market. The passionfruit gave a great flavour and added a summer feel to the wedding cake.

Creating the white icing

Mix the below ingredients in a bowl. You can mix with a fork or a mixer to ensure you get fluffy icing.

  • 2 cups of icing sugar
  • 2 egg whites
  • A few drops of lemon juice
  • A teaspoon of vanilla essence

Once all cakes are staked then ice all the cake as smoothly as you can. Use a scraper to have the icing on the cake look smooth and if you have parts of the sponge cake showing that is fine, this will allow you to have the naked cake look. If you don’t want the naked cake look make sure to cover the cake with the white icing and smooth it out with the scraper. If you want a wavy pattern, you can have a scraper that will do that too.

The scrapers I used for my cakeover wedding cake.

Step 4: The Flourishing Finish
Here’s where the magic truly unfolded. Fresh blooms from Fine Flowers in Katoomba were carefully placed atop the cake tiers, infusing vibrant colours and natural beauty into the creation. The flowers were added with paper straws to make sure the stem wasn’t put into the cake. The flowers would then be easily removed to allow the cake to be cut for serving.

I put the flowers on one side of the top of the cake and then on an angle to have some flowers on the bottom of the cake. This allowed more decoration for the top of the cake if needed. I also added a gold “love” cake topper.

Flowers were put in paper straws to then add to the cake

I adore visiting Fine Flowers in Katoomba. They always have stunning flowers that put a smile on my face.

The Splendor of Cakeovers


Personal Touches
Though the base was store-bought, the personalised touch came through the decorations. The flowers’ choice, arrangement, and overall design spoke volumes about the couple’s style and taste.

Budget-Friendly Brilliance
By utilising ready-made cakes, the focus shifted from baking stress to creative embellishment, ensuring a stunning outcome without breaking the bank.

Time-Efficient Elegance
Crafting a cakeover was a swift process, perfect for those in need of a last-minute, yet spectacular, dessert for a special occasion like a wedding.

Lessons Learned & Tips Shared

  • Be Resourceful: Embrace store-bought items as a canvas for your creativity. A little transformation can yield exceptional results.
  • Freshness is Key: Utilise fresh flowers or edible decorations for an instant upgrade to the cake’s aesthetics.
  • Keep it Simple: Sometimes, simplicity speaks volumes. Focus on a few key elements for a striking overall effect.
  • Practice Patience: Attention to detail is crucial. Take your time arranging the decorations to achieve the desired look.

Conclusion


With a stroke of creativity and a sprinkle of resourcefulness, a store-bought sponge cake evolved into a mesmerizing wedding centerpiece. The cakeover journey not only showcased the potential of simple elements but also highlighted the beauty of personalisation and affordability in crafting a memorable dessert. So, whether it’s a wedding or any special occasion, remember, a store-bought cake can be the perfect canvas for your cakeover dreams!

Costs

So what are the costs associated with creating a cakeover wedding cake?


It might not surprise you that a cakeover will really save you money and still create a yummy and fantastic-looking cake for your special day.

You will see from the table below that creating a wedding cake from an existing cake is the cheaper option.

A simple search online found that if you had a cake that had four tiers and above you would generally pay between $420 – $650.

2 x Woolworths Double Unfilled Sponge 460g$12.00 ($6 each)
Icing$2.50
Flowers$13.00
Cream$2.80
2 egg whites$1.25 (based on 6 eggs that cost $3.75)
Panama passionfruit$4.60 ($2.30 each)
Icing scraper$4.40 (VIP Spotlight price)
Love cake topper decoration $11.20 (VIP Spotlight price)
Total:$51.75
The stunning cakeover wedding cake is decorated and ready for the cake topper

If you already had eggs, icing, the icing scraper or didn’t want the love cake topper decoration (all of this would take $19.35 off the amount above) the new cost of the cake would be: $32.40

As you see, you can make the cake cheaper if you wish.

The flowers make this cake look so pretty

“Pink chrysanthemums represent longevity, attraction, and romance, making them a great choice for a first date or a new love. In general, chrysanthemums are believed to represent happiness, love, longevity, and joy.”

https://blossmcart.com/blog/chrysanthemum-meaning-and-symbolism/

Pink Roses mean Happiness, Grace, and Thankfulnes

Perfect flowers for a wedding cake!

The cakeover wedding cake is all decorated and ready
for the big event

Sign up for my newsletter

Stay current with all the things that are happening on Mummy to Twins Plus One. Don’t miss a thing by signing up for my newsletter. This newsletter will list all giveaways and fabulous things that are happening.

This post has affiliate links

This post was originally published on December 19, 2023

Categories
Recipes

Make Slow Cooked Beef & Veggie Casserole

I love going to the Veggie Patch in Blackheath. As the name suggests they sell fresh produce: fruit and vegetables. However, they also sell pasta, sauces, and all sorts of yummy things.

The Veggie Patch at Blackheath. This greengrocer supplies lovely fresh produce with great service.
Pasta, sauces and other yummy things available at the Veggie Patch at Blackheath.

The produce always looks so fresh, the staff that work there are super friendly, and seem to really care about what they are doing. Everyone that works at The Veggie Patch treats the produce with such care.

The wonderful fresh produce from the Veggie Patch at Blackheath. They even have FREE delivery.


Another nice thing that makes me love this fruit and veg shop is that it is a small business and I am helping the local economy by shopping here.

I even purchased my meat from the local butcher (The Blackheath Butchers) and the crusty bread for this meal at the bakery (The Sourdough Bakery in Blackheath) both located in Blackheath, just doors down from the Veggie Patch. Hence, it makes all the shopping so convenient.

Sourdough with sunflower seeds. This bread is so yummy you just want to have more of it.

My slow Cooked Beef & Vegetable Casserole

I don’t have a slow cooker but I have a fancy looking casserole dish (It is a pretty blue and has white spots – very funky and retro looking).  Due to not having a slow cooker my casserole dish ends up acting like one instead. I add all the ingredients. Put it in the oven and let it cook for hours. Job done, and a delicious one too!

You might say that this is rather old school regarding slow cooking, and you are probably right.


I have looked at getting the new slow cookers but they are very big and will take up an enormous amount of space that I don’t have in my small kitchen with limited counter tops.

This recipe for slow cooked beef & vegetable casserole is perfect for those cool autumn nights and when it gets even colder in winter. You can have a nice piece of crusty bread with this dish, and a glass of red wine.  I’m sure you would not want much more after this. Aside, from having a roaring wood burning fire that is.


So how do you make my scrumptious casserole? Read on to find out how easy this really is.

All my ingredients for my slow cooked beef and vegetable casserole. I did leave out the capsicum so don't worry about that item.
All my ingredients for my slow cooked beef and vegetable casserole. I forgot the capsicum.


Before you get started, make sure to heat up the oven. Set it to 180  


INGREDIENTS:

  • 2 carrots
  • A big handful of beans
  • 6-8 small potatoes cut up finely
  • 3-4 pieces of broccolini
  • 1 onion chopped to small or bite sized pieces
  • 6-8 mushrooms roughly chopped up
  • 1 tin of Diced Italian Tomatoes with Basil, garlic, and onion. My tin was from Woolworths but you can have any really, it is up to you and what type of casserole you are making.
  • Beerenberg Taka Tala Sauce and Marinade – I added the whole jar (This sauce was also purchased at the Blackheath Butchers). It is up to you what sauce you use. You could use a red wine slow roasting casserole or any sauce for slow cooked meals. I know that this sauce is really a marinade but it works very well as a casserole or in a slow cooker.
  • You can serve this with mash potato or sometimes I like to add carrots or other vegetables to the mash as well. It gives lovely different colours and add to the flavour of the dish
  • If you decide that mash is not what you would prefer, then you can choose rice or maybe some leafy greens for a nice side to balance the meat and vegetables.

Note: You can substitute any vegetable or ingredient that you would rather. Also, if you have things in the fridge or cupboard that would work, use them, and have a tasty meal with items you already have.

I was going to have mash potato with this meal but decided against it due to adding potatoes to the mixture. Instead I’m having some rice and serving it with some crusty bread.

Another view of all the fabulous fresh vegetables.

METHOD:

  • Cut up all the vegetables and add the sauce as well as the tomatoes to the casserole dish.
  • Make sure to mix up all the ingredients before you add the meat.
  • Once the meat is added stir the ingredients again in the casserole dish.
  • Add the casserole into the oven and cook for a couple of hours. Check every 30 minutes or so to making sure to stir and to check if all is cooking okay and not sticking to the dish.
  • Once done the meat should be tender and the vegetables should be soft and melt in your mouth.
  • If you are having mash potato or other vegetables it is a good idea to get this ready now. You can take out the casserole from the oven as the dish would be extremely hot and keep the dinner warm.

I hope you enjoy my take on a slow cook casserole without using a slow cooker.

All cooked and finished. This slow cooked beef and veggie casserole is ready to eat.

Disclaimer: This post was written as an entry to The Fresh Awards 2017 Blogger Awards – Greengrocer Story. I go to the Veggie Patch regularly and love cooking with nice fresh produce.

The Veggie Patch have a community spirit and update their window to help local groups and causes.

Sign up for my newsletter

Stay current with all the things that are happening on Mummy to Twins Plus One? Don’t miss a thing by signing up for my newsletter. This newsletter will list all giveaways and fabulous things that are happening.


Originally published March 29 2017

Categories
Review

Review: Anywhere Can Be a Cinema with LUMOS AURO v2 Projector

So, 1st Blackheath Scouts had a movie night at the Scout hall, and we needed a solid data projector to show the movie. We’ve used a very old Epson projector in the past, but this time, we got our hands on the brand-new LUMOS AURO  v2 Home Cinema projector. Big shoutout to LUMOS for letting us try out their latest model. Spoiler alert: It was a game-changer.

Unboxing and Setup

The kit arrived in two boxes: one for the stand and one for the projector. Setting up the stand was a piece of cake – join the two poles, attach the base plate, and top it off with the 360-degree ball head. It took less than five minutes, and voila! A rock-solid stand ready for action.

Unboxing the LUMOS AURO  v2 was like opening a present. Inside, there was the projector, a remote control, a power cable, and an HDMI cable. The only thing missing? Two AAA batteries for the remote. No biggie, though.

Setting up the projector was just as easy. I attached it to the ball head adapter on the stand, plugged in the power cable, and switched it on. That’s it. Simple as that.

Projection Magic

I initially placed the projector in the middle of the Scout hall, thinking I needed some distance to fit the screen I had set up. Boy, was I wrong! The image filled the entire back wall of the hall, which is 9m wide and 3m high. Next time, I’m bringing a bigger screen to take full advantage of this beast’s capabilities. It can project up to a massive 200-inch screen if you have the space!

Once I adjusted the projector’s distance to the screen, it went into an auto-focus routine that left me in awe. In just a few seconds, the image was pin-sharp. Super impressive.

Testing and Performance

The LUMOS AURO  v2 is Wi-Fi enabled, so I quickly connected it to my phone’s personal hotspot. Streaming YouTube videos was a breeze, and the preloaded officially certified apps (YouTube, Netflix, Prime Video, and more) worked flawlessly. Just log in, and you’re good to go.

The image resolution is top-notch – super sharp, with vibrant colours and great contrast. Even with the hall lights on, the brightness was incredible. A quick peek at the manual revealed why: 1080p native resolution and 6000 lumens. No wonder it was so bright!

The audio was equally impressive. Despite its compact size, the AURO v2 pumped out loud, clear sound with decent bass. Its certified Dolby Audio Dual (2) Speaker system had rich, strong bass and immersive sound. It was more than enough for a home cinema setup, though I added extra speakers in the large Scout hall to combat the inevitable Scout chatter and popcorn fights.

Next, I tested a film loaded onto a USB stick. Again, the AURO  v2 didn’t disappoint. The image quality, colour vibrance, and contrast depth were superb. The Scouts started arriving, popcorn was popped, bean bags were prepped, and we were ready to roll.

The remote control was a pleasant surprise too. Easy to navigate in the dark and worked all the way from the back of the hall. A big win in my book.

Additional Features and User Experience

The projector’s user interface was a breeze to navigate. Everything was intuitive and easy to find, with no confusing menus. The remote control was just right – no unnecessary buttons, making it easy to use even in the dark.

The AURO  v2 was silent during operation, a delightful contrast to the noisy old Epson. And it stayed cool throughout the movie, just lukewarm at the end, so we could pack it away immediately without waiting for it to cool down.

One standout feature was the automatic keystone and focus adjustment. Move the projector, and it quickly and accurately adjusted itself. Super handy and very impressive.

Final Thoughts

Overall, the LUMOS  AURO  v2 Home Cinema projector is an impressive piece of kit. The build quality is solid, the image and sound quality are mind-blowing, and it’s incredibly easy to use. At $498, it’s a steal compared to other projectors that cost three times as much. The Scouts loved the viewing experience, and so did I. It’s five stars from me.

Top marks, LUMOS. You’ve got a winner here.

Grab A Discount

If interested, you may use the promo code “MUMTPO25OFF” for a special -$25 off any purchase during website checkout. 

Categories
News

Thrilled to Be a Finalist for the 2024 Fresh Content Award!

Hey there, wonderful readers!

I have some exciting news to share—I’m a finalist for the 2024 Fresh Content Award! 🎉 This is my third time being nominated, and I couldn’t be more thrilled. The excitement is even sweeter this year because my twin girls will be by my side to celebrate this special night.

Meet the other Finalists

I’m in great company with these amazing creators:

Gorgeous Easy No-Bake Oreo Blackberry Mousse Tart

As mentioned before, I was lucky enough to be a finalist two years in a row (a major highlight for me!). Check out my upcoming posts to see what I entered and read about my never-ending quest for the perfect outfit:

The stunning Easy No-Bake Oreo Blackberry Mousse Tart is a sight to behold, with its rich Oreo base complemented by the vibrant blackberry mousse and delicate flowers.

The Fresh Awards Gala Night is just one week away, and I can’t wait to don my stunning outfit—finally found thanks to Temu (who would have thought!)—and join my fellow finalists for an evening of celebration and recognition. Knowing that my daughters will be there cheering me on makes this moment all the more magical.

I’ve spent what feels like an eternity hunting down the perfect outfit. The mad dash from shop to shop, trying on duds that made me look like a fashion disaster, was beyond exhausting. I’m sure you’ve been there too! It really fried my brain and zapped some of the fun out of the event prep. But hey, I finally found a great outfit (I think so, and that’s what counts), and now I’m getting excited about the occasion again!

My latest online order—it’s a total winner! Everything looks absolutely fantastic.
Image sourced from boredpanda.com.

Celebrating Passion and Creativity

Being a finalist for the third time is incredibly exciting! It showcases the dedication and creativity I pour into each post. Being recognised for my hard work is truly gratifying. I love celebrating fresh produce and flowers and sharing that joy with you all through my blog and social media brings me immense happiness! 🌸🍇

My amazing wedding cakeover was affordable and easy to create, adorned with fresh flowers from Fine Flowers Katoomba.
Adding a different top to a crumble creates interest – this Pretty Pastry Apple and Rhubarb Crumble looks great with the different flower-type pastry shapes.

I love playing with ingredients, finding clever ways to make dinner parties or gatherings a breeze, and whipping up tasty treats for everyone to savour and share!

I had a blast creating these for my 2024 Fresh Awards entries:

The girls and I are gearing up for a fun day in the city, prepping for the big event and soaking in all the excitement. We’ll be dressed to impress in our cocktail finest, ready to savour the night with the other finalists and celebrate our shared love for deliciously fresh content.

It’s going to be a treat sharing this event with my girls, giving them a taste of what it’s like to attend an awards night and showing them that hard work is the secret ingredient to being in such fabulous company with all the other finalists.

Wishing Everyone the Best of Luck

Sending my best wishes to my fellow finalists—Vincent, Lorraine, and Katie. It’s a true honour to be among such talented creators, and I’m excited to see what the night holds for all of us!

Thank you to my readers and community for your unwavering support, and I’m looking forward to an unforgettable night at the Fresh Awards Gala Night! 🌿🍎🌸

Categories
Education

How to Create an Impressive Gobi Desert Diorama

Hey there, adventurous parents and young explorers! Today, we’re diving into the fascinating world of the Gobi Desert. If you’ve ever wondered what it’s like to wander through this unique landscape, buckle up because we’re about to embark on a journey of discovery!

It’s diorama time at school for grade 3, and everyone is off-creating their own dioramas. My little boy chose the Gobi Desert for his project, but the possibilities are endless for your diorama.

You might decide to explore the lush, vibrant ecosystems of a rainforest, the vast, open grasslands of the savanna, or another unique desert environment from around the world, like the Sahara or the Mojave. Each habitat offers its own fascinating plants, animals, and landscapes, allowing you to tailor your project to whatever environment captures your imagination the most. It doesn’t feel that long ago that my girls were doing this same project. Thanks to a homework project, it has sparked an interest in the habitat of the Gobi Desert.

What is the Gobi Desert?
The Gobi Desert is a vast, arid region in Asia, covering parts of northern and northwestern China, and southern Mongolia. It’s renowned for its extreme temperatures, from scorching hot summers to freezing winters, making it a challenging yet captivating environment to explore.

Plants and Animals of the Gobi Desert

Plants: Despite its harsh conditions, the Gobi Desert is home to resilient plant life such as saxaul trees, which have deep roots to find underground water, and various types of grasses and shrubs adapted to sparse rainfall.

Animals: Some of the most iconic inhabitants include the Bactrian camel, known for its ability to survive on sparse vegetation and store fat in its hump for energy; the Gobi bear, a rare and endangered species adapted to cold desert conditions; and the jerboa, a small hopping rodent that has adapted to the desert’s sandy terrain.

Soil and Geography
The Gobi Desert features a vast expanse of gravel plains, rocky mountains, and sand dunes. Its soil is often sandy and nutrient-poor, contributing to the challenging conditions for plant growth.

Additional Resources and Activities
For more fun and learning about the Gobi Desert, check out these resources:


Creating Your Gobi Desert Diorama


Now, let’s bring the Gobi Desert to life with a fun and creative 3D diorama!

Materials Needed:

  • Shoebox or any small box as your diorama base
  • Sand or craft sand for the desert floor
  • Small pebbles or rocks
  • Artificial plants like desert grasses
  • Plastic animal figurines (camels, bears, jerboas)
  • Paint and brushes (optional, for coloring the backdrop)
  • Glue, scissors, and tape

I found images of animals and plants from the Gobi Dessert and cut them out to stick into the diorama. On the back we listed what is in the diorama and suggested for people to see if they can find them.


Steps to Create:

  • Create your backdrop: We used the Gobi Desert Colouring page from Twinkl to give our diorama a nice sense of place. It allowed all the animals and plants to look at home in the Gobi Desert habitat.
  • Prepare the Base: Line the inside of your shoebox with sand to create the desert floor. Add small pebbles and rocks to mimic the rocky terrain.
  • Add Vegetation: Place your artificial plants strategically around the diorama. Saxaul trees can be represented with small twigs or painted craft sticks.
  • Include Animals: Position your animal figurines in their natural habitats. The Bactrian camel might be wandering across the sand, while a Gobi bear rests near a rocky outcrop.
  • Decorate: Use paint to create a backdrop for your diorama if desired. You can paint distant mountains or a clear blue sky to enhance the desert atmosphere.
  • Final Touches: Once everything is in place, secure all items with glue or tape to ensure they stay put.

Hamilton Island Holiday Homes - Winter Sale Offer

Let the Adventure Begin!
Voila! Your Gobi Desert diorama is ready to amaze and inspire. Take a moment to admire your creation and imagine the stories that unfold in this harsh yet beautiful desert landscape.

Whether you’re a parent guiding your child through this project or a young explorer eager to learn more about the world, creating dioramas like this is a fantastic way to blend education with creativity.

Explore more desert environments like the Sahara or the Australian Outback with Twinkl’s desert resources, or venture into lush rainforests and expansive savannahs for more exciting diorama ideas!

Ready for your next adventure? Share your diorama creations with us in the comments below!

P.S. Need more ideas on building dioramas? Check out Twinkl’s tips!

Sign up for my newsletter

Stay current with all the things that are happening on Mummy to Twins Plus One. Don’t miss a thing by signing up for my newsletter. This newsletter will list all giveaways and fabulous things that are happening.


This post has affiliate links

Categories
Creative

Create Autumn & Winter Pictures

This creative activity was first posted on Kiddipedia – https://kiddipedia.com.au/creative-activities-for-kids/

The weather is colder and the leaves are falling from the trees, some leaves are so pretty and colourful it is a shame to just have them fall on the ground.

If you are wondering what to do with the kids then this craft activity is for you.


This task is super easy and fun and one that will occupy all age groups.

So what do you need?

  • Paper
  • Paint
  • Crayons/Pencils/Textas
  • Autumn Leaves
  • Coloured craft paper
  • Glue Stick
  • Clear contact paper if you wish to do a see-through option to stick on a window

Method

Collect your colourful leaves and anything else you wish to stick to your picture. Draw or paint the branches and other items if you like. Now with the glue stick add glue to the areas you want to add the leaves and create your autumn/winter picture.

I know it is now winter but when I did this it was officially still autumn.

If you don’t want to do it on paper as we did simply add craft paper for the branches for the trees and then add the leaves, making sure to stick them all on clear contact paper. Once your picture is complete add a final top layer of see-through contact paper and then you can put on your window. Attaching this creation to your window will allow light to come in and shine on the colours in the picture.

This isn’t an expensive task and one that will be fun for everyone, and you will be the proud owner of new artwork for your walls and windows.

Enjoy and make sure to subscribe to my YouTube Channel 

Sign up for my newsletter

Stay current with all the things that are happening on Mummy to Twins Plus One. Don’t miss a thing by signing up for my newsletter. This newsletter will list all giveaways and fabulous things that are happening.


This post has affiliate links

First published June 20, 2020

Categories
Family

It Was The Night Light

Note: This is a post from Wednesday, July 20, 2016. This was when my third child was still a baby.

The baby was sleeping through the night on some days and others waking up at 4am and screaming the place down. I did not understand what had made a sound sleeping baby suddenly become so upset. I also could not figure out why he slept all night some days and the others he would wake. The twins were sleeping through the night after they were three months old.

I firstly thought that it could be his nappy. Solved and new one put on.

Secondly thought it could be that he was hungry. No he did not want food and would rather scream at me and also to fidget, turn over and over (he loves rolling over and likes to do this every chance he gets) on my lap and not get comfortable! Yes this was very annoying.

I tried the formula again and he would not have anything to do with it. OH geez more crying (especially in my ear and so loud that you cannot hear anything afterwards) and wiggling is going to happen now. I had to cuddle him until he passed out again and to make sure he was snoring before I could make the attempt of putting him in his cot.

Could it be bad dreams?????? Who knows and at this stage, I was trying to think of anything that could be waking up our baby.

My sleepy little boy. I finally figured out why he was waking up at 4am. It was really simple actually. Read on to find out.

Fast forward to after we came home from Vivid (June Long Weekend), it was a Sunday afternoon. We came home earlier than expected from the city due to one of the twins being ill. Hubby fed the baby at about 3pm and he fell into a deep sleep and then the baby was wrapped up and put in his bed. All good.

11pm came around on the same Sunday evening. Hubby and I were watching television and I said when did we feed the baby? He thought about it. It was around 3pm. Gosh I thought. The baby has been asleep for a long time. I told hubby that I think we need to check that all is okay with Alexander and that there was nothing wrong.

He cautioned me… He said, “If you wake him it is your problem to sort out”. I told him fine as I was getting worried due to the fact that he had been asleep so long.

I carefully opened his door and heard breathing and the baby turn over. All good. However, due to the fact that it was afternoon when the baby was put down for a nap his night light was not switched on. Normally we keep it on to help Alexander not get upset if it is too dark. The twins had a night light when they were babies and we noticed that when Alexander was little he wanted the reassurance of the light.

However this could be the reason that he was waking up at 4am and being so out of sorts. He must have been half asleep and then the light woke him fully. Without the night light when he wakes even a little, he rolls over and goes back to sleep. 

How simple the answer was. Turn off the night light! Ever since coming back from Vivid we have left the babies night light off and suprise, he has slept through the night.

Yep genius here…. Turn off the light and the baby will sleep! You heard it here. Sounds really obvious doesn’t it. The light woke him up.

I told my nana this and she said, really it was just a light and all you needed to do was turn it off. I said yes and she laughed and laughed at me. Yes it sounds silly and so simple but when you are so used to your routine and thinking that it is needed you just do it. You don’t question it.

Have you found there was something so simple and obvious that has made the world of difference with your kids or baby? Was it as simple as turning off the night light? Let us know.

Categories
Family

Camping Birthday Cake

The girls love being outdoors and are keen scouts, so what better cake for kids who love an outdoor adventure – a camping cake!

I made it simple and used packets for the cake mix….yep I didn’t mix it myself. Don’t get upset if you use a packet mix it is what you do with it that counts.

How did I create this cake?

Firstly I made sure that the oven was on so it was ready to cook the cakes.
I needed 3 cakes so that I could get the height for the mountain, my idea was to have a river and waterfall of the edge of the mountain and to do this I needed to have the height of more than 1 cake.

I mixed all packs of cake and added them to the pan, and then the oven.
Once cooked they cooled to allow me to assemble the cake.

The cake ready to decorate. I had the bottom layer of the cake chocolate,
the middle layer vanilla and the top chocolate.

As you can see I mixed up the layers with chocolate cake on the bottom, vanilla cake in the middle and chocolate cake on the top. My little boy doesn’t like chocolate so I wanted him to have a little cake that I knew he could eat. However, since it was the girls birthday cake I made sure it was something they wanted which was chocolate.

Now onto making the camping scene.

What did I decorate first?

The river was the firs thing that I created. I mixed up a big batch of blue icing and started creating the river. I made sure that the river was on an angle as this way it would give me enough room to add the tent and the camp fire.

The river was bordered with chocolate rocks and geez they looked very real.

Once the river was completed I then mixed a huge batch of green icing and decorated the rest of the cake.

Look how amazing the camping cake looks. It is a real life camping scene.

Once all iced I used the following decorations to make it look like an outdoor scene.

Apple Belts all ready to decorate the Camping Cake
  • Lolly flowers
  • Apple Belts
  • Apple Sours
  • Lady Bugs
  • Witchetty Grubs
  • KitKat for the tent
  • I used a cut off skewer to help hold the tent up – I couldn’t find a straight pretzel anywhere!
  • Lolly rocks around the campfire
  • A lot of candles to make the campfire – you might only need a few as once lit this made a lot of fire. (it was okay but maybe not a good idea)
Chocolate Rocks, I think they look so real

I hope this inspires you for your next birthday party. The girls loved their camping cake and I loved creating it.

Let me know if you decide to recreate this cake or do something different. Post some pictures on Facebook or Instagram and tag me!

Sign up for my newsletter

Stay current with all the things that are happening on Mummy to Twins Plus One. Don’t miss a thing by signing up for my newsletter. This newsletter will list all giveaways and fabulous things that are happening.


This post has Affiliate Links

This post was originally posted on Tuesday, December 8, 2020

Categories
Family

Download The Mother’s Day Code

I created “The Mother’s Day Code” to help you with pressie ideas and treats for mum/mom. Feel free to download the images below.

I have one British/Australian version and the other is the US version.

As a mother, you don’t expect to have expensive gifts, although I would love to go on a trip around the world and be whisked away to a day spa for a holiday by myself, I know this is not going to happen. Well, it could if I magically have heaps of money. (I can live in hope, can’t I??)

In reality, some nice flowers and lunch with hubby and the kids are fine. Or even better is a gift the kids made themselves.

So if you are like me and just wish to be given some nice gifts from your loved ones this downloadable code might come in handy.

Download both versions of the Mother’s Day Code here:

Have you got your mum something special for Sunday? Are you organising breakfast in bed? A nice plant to cheer up the house or the garden? Or taking Mum out for a long and relaxing lunch? Whatever you have planned I hope you have an amazing day.

I hope the Mother’s Day Code helps you out.

Sign up for my newsletter

Stay current with all the things that are happening on Mummy to Twins Plus One. Don’t miss a thing by signing up for my newsletter. This newsletter will list all giveaways and fabulous things that are happening.


This post has affiliate links
Categories
News

May is MY Month

May is a HUGE month, well for my family it is.

It is the one month in the year where it has many birthdays (including mine), including Mother’s Day.

Since this month is hugely popular and is the time of the year we celebrate Mums I thought why not make the whole month of May dedicated to women.

The whole idea is that the month of May is your month. It is for you to do something each day just for you.

I know that many of you are super busy working at being a mum or working at a job or possibly both.  I’ve created a list of 31 things that you can do. Just simply pick one that you wish to do or you might wish to do a couple on the same day, it is up to you. Remember it is up to you and May is your month to do things for you, just make sure to not overwhelm yourself with things on a list that you might not get to.

There are 31 days in May so plenty of time to do a little of something each day.

Simply getting a cup of coffee at a local cafe after dropping kids off at school or care can be a boost for the soul. Or even taking yourself to a movie to finally watch a show that you have been desperate to see.

Some items on the list might not be super fun but after you’ve done them you will be happier. De-cluttering is a bit of work but the outcome of having a tidier and more organised space means less stress and more time for you and the family.

Also getting all the health checks is a bit boring but a must do. I like to make sure I stay on top of things like skin checks, pap smears, and a regular check-up at the doctors once a year to ensure that I am in good health. Having it done at a certain time each year means I don’t have to think about it, I just organise the times and go to the appointments.

You will see some fun things on the list as well.

For those that don’t want to download the graphic here is the whole list of the 31 items for May:

1. Get coffee at a cafe by yourself or with friends (kid free)

2. Go for a walk

3. Go swimming/exercise at the gym

4. Explore a new area

5. Start a course

6. Meet with friends for a night out/lunch out

7. Read a book/finish the book you’re reading

8. Take a trip away by yourself or with family

9. Save for something special or add extra to your retirement savings

10. Watch your shows on TV

11. Get food delivered so that you get time out

12. Take time away from computers/phones/tablets

13. Invest in adventures (experiences) rather than things

14. Watch less TV and work on things that interest you

15. Take up a hobby, sewing, craft  or write that book

16. Get a massage

17. Get all your health checks done

18. Go to the hairdressers and get a fab new do

19. Invest in some quality makeup

20. Purchase some good moisturiser for your face and body

21. Visit family more

22. See more movies at the cinema

23. Get some new clothes

24. Meditate more

25. Relax

26. Spend time with the kids and just be

27. If you paint, draw, or do photography enter a competition or show your work

28. Learn a language/get pedicure & a manicure

29. If a foodie take lessons on how to cook certain styles of food

30. De-clutter to enjoy more free time not having to do housework

31. Prioritise you to be a happier person

Join in my month-long campaign to do more things for me (you)
and share your stories on Instagram and Facebook.

Make sure to share with the hashtag #mayismymonth

Sign up for my newsletter

Stay current with all the things that are happening on Mummy to Twins Plus One. Don’t miss a thing by signing up for my newsletter. This newsletter will list all giveaways and fabulous things that are happening.

Categories
Creative

Amazing Smelling Raspberry Play Dough

Do you want to make some fabulous-smelling and amazingly soft play dough for the kids?

This play dough smells so good!!!  Also if your kids accidentally eat it, it won’t matter. It would just be a little salty.

I do have a secret ingredient that makes this play dough super awesome.

It’s raspberry jelly crystals

The recipe is below:

  • 1 1/2 cups of flour
  • 1 cup of salt
  • 1/4 cup McCormick® Cream of Tartar
  • 2 cups of hot water to melt the jelly crystals
  • 2 tablespoons vegetable oil
  • Jelly Crystals – instead of food dye

BE CAREFUL WITH THE HOT WATER, ONCE MIXED WITH THE FLOUR THE PLAY DOUGH WILL BE NICE AND WARM


Method:

Mix all ingredients and knead to make a dough. Might need more flour if too sticky.

After you play with the play dough put in air tight containers or in a resealable plastic bag.

Enjoy and have fun with this great new smelling play dough.

Sign up for my newsletter

Stay current with all the things that are happening on Mummy to Twins Plus One. Don’t miss a thing by signing up for my newsletter. This newsletter will list all giveaways and fabulous things that are happening.


>

First published 14th April 2019

Categories
Party ideas

Batman 4th Birthday Cake

Alexander asked for a Batman cake and one that had blue icing and is white. He is a child that really doesn’t like chocolate so white means Vanilla cake.

Yes, my little boy really doesn’t like chocolate and would rather have vanilla cake and gummy sweets.

So vanilla and a blue iced cake was made, plus making it Batman themed.

The cake finally all done and ready for Alexander's birthday party.
The cake finally all done and ready for Alexander’s birthday party.

As I don’t have a mixer I got a new handheld Sunbeam MixMaster , in the video above I unboxed the new Sunbeam Mixmaster and used it for the first time.  I must admit that this was not what I thought I was getting for Christmas but it has come in handy. I have baked cakes, made pancakes and more!

The Sunbeam Mixmaster looks like the one my mum had in the 70’s and I love the fact that it is super easy to use as you can easily hold the mixer and stop and start it when needed.

I loved the sense of humour on the Sunbeam Mixer box.


To make the cake I needed:

  • 2 vanilla cake mixes
  • 4 eggs – 2 for each cake mix
  • 160ml of milk
  • 3 Tablespoons of oil (I used olive oil)
  • I also added some lemon juice into each cake mix
  • Soft icing sugar
  • Butter for the icing – I just add a few lumps and then add more icing
  • Blue food dye
The layered cake getting decorated with blue icing


Before I made the cake I created the decorations, this meant that when everything was ready I could instantly add everything to the iced cake.

Decorations

  • Dark chocolate for the buildings
  • Silver candy balls
  • Coloured candy for the building’s windows
  • I used 2 silicone pot holders for window shapes
  • Superhero candles
  • Edible Batman picture for the centre of the cake

I made it super simple and purchased some vanilla cake mix. As I needed it to be a taller cake for the Gotham buildings.

Each cake was mixed separately, then added to a tin to be baked in the oven.

Batman Cake with Gotham buildings


I hope this inspires you for your next birthday party.  Maybe you too could make your own take on a batman cake.

Sign up for my newsletter

Stay current with all the things that are happening on Mummy to Twins Plus One. Don’t miss a thing by signing up for my newsletter. This newsletter will list all giveaways and fabulous things that are happening.


This post contains affiliate links

Originally published February 13, 2020

Categories
Recipes

ANZAC Biscuits

I used the ANZAC Biscuit recipe from the Wiki Cookbook – ANZAC Biscuits, however, if you wish to do the more traditional method it is available from The Australian War Memorial Recipe for ANZAC Biscuits

Ready to add the coconut

Ingredients

  • 2 cups plain (non-self raising) flour
  • 1 cup white or brown sugar
  • 4 tablespoons golden syrup (cane syrup) or honey
  • 1 cup desiccated coconut
  • 1 teaspoon baking soda
  • 2 tablespoons of water
  • 2 cups rolled or instant oats
  • 225 grams butter or margarine

All the dry ingredients

I melted the butter and golden syrup in the microwave. The recipe wanted you to do it in a saucepan but I think you could do it either way.

Method

  1. Mix the dry ingredients in a bowl, and melt the syrup and butter in a saucepan. Add the baking soda and water to the syrup mix.
  2. Mix the wet and dry ingredients, adding water if necessary.
  3. Separate and roll the mixture into small balls, and flatten them on oven trays.
  4. Bake at 150°C (300°F) for about 20 minutes or until golden brown.

The finished biscuits are quite chewy and crisp, and have a long shelf-life.

Kids helped me make this batch. All ready to go in the oven.

All cooked and ready to eat. They were very yummy! We did not have a huge dinner due to the ANZAC biscuit afternoon tea.

Did you make ANZAC Biscuits? Were they yummy? Did you make heaps? I have a huge box of them and I think they will be treats in lunches for weeks to come.

Let us know your thoughts. Why not continue the discussion on our Facebook and Twitter pages.

Categories
Recipes

Passionfruitty Goodness

Passionfruit is a distinct and flavoursome summer fruit, and one that I really like a lot—yes, I do like a lot of fruit!

Yummy passionfruits – pity you could not smell my kitchen, it was amazing!

I grew up in North Queensland and as a kid, I had bananas, mangos, paw paw, and of course passionfruits growing in my garden, plus loads more. It was a garden filled with everything you needed. I loved the fact that you could just go outside and pick something yummy to eat. It took me a while to adjust that in the city people don’t have the same as I did as a kid. I was spoilt for choice and it did allow me to try more food. I wonder if we had more growing in my garden, would it mean that my kids would eat more food?

Are you the type of person that wonders what else you can do with an ingredient? If so, you are not alone, I do this too.  I test things out and give things a go to see if they will work. And my latest project has been seeing what more I can do with passionfruit.

I usually add passionfruit to my breakfast, fruit salad and icing for cakes. However, with the abundance of passionfruit this season I was thinking, “What else could I make with passionfruit that isn’t cake or slices?”

A simple search on the internet for passionfruit recipes produces a myriad of layered cakes and slices, however, I wanted to do something totally different, or at the very least something that not everyone would do.

A bunch of passionfruits, don’t they look delicious

A little bit more about passionfruit

Passionfruit is in season in Australia from Summer to Winter. I had no idea that they are available during winter.  Due to our temperate climate in Australia and the fact that most of the passionfruit vines are in a tropical climate passionfruit is available nearly all year round. 

There are a few different varieties: Misty Gems, Sweethearts and Panamas. 

Passionfruit not only tastes and looks amazing it is also good for you too. This yummy fruit has Vitamin A, Vitamin C, phosphorus, calcium, potassium, magnesium, and folate.

Passionfruit from Todarello’s at Katoomba.

Where do I get my fresh produce?

I shop at Todarello’s at Katoomba, they have the freshest fruit and vegetables and fabulous service to boot.

Todarello’s Fruit Market at Katoomba

Todarello’s has stunning colourful displays and they have so much on offer, not only do they stock all fresh produce, but Todarello’s also have pasta, sauces, snacks, meat, bread and other pantry staples.

Capsicums at Toderello’s Fruit Market

If you are also a passionfruit lover, you will love my recipes, you can get more passionfruit into your diet, and of course, have more passion!  

I’ve designed the recipes as a progression for a complete dinner – main meal, salad and dessert.

You can download the free eBook with all three passionfruit recipes here. Once your email has been confirmed your download will happen automatically.

Mango and Passionfruit Stir-Fry Sauce

Stir-fry dinners are simple and quick to make and are also something that can be a great addition to your dinner party. Adding passionfruit to your sauce brings the tangy passionfruit flavour and a bit of summer into your day. I found this recipe from gourmandelle.com/ and made it my own.

Ingredients

  • 80ml (⅓ cup) passion fruit juice (Maybe add a cup of passionfruit to make it more passionfruity – that should be a word, don’t you think?)
  • 1 large mango, peeled and cored
  • 1 clove of garlic, peeled
  • 1 tbsp soy sauce
  • 1 tbsp rice vinegar
  • 1 tbsp sesame oil
  • 2 tsp lemon juice
  • 1 tsp honey
Mango and Passionfruit Stir-Fry Sauce ingredients

Method

Place all your ingredients into a blender and process until smooth. Strain the sauce, cover, and set aside. You can use the sauce immediately or store it in the fridge for later.

I used the sauce as a marinade for my chicken stir-fry, the sauce can be used as a dipping sauce too.

The finished Mango and Passionfruit Stir-Fry Sauce

What did I use in the stir-fry?

  • Chicken
  • Broccolini
  • Mushrooms
  • Spanish onion
  • Yellow tomatoes
  • And the main ingredient, my very own Mango and Passionfruit Stir-Fry Sauce (the sauce was tasty, however next time I will add more passionfruit to make it more tangier).
Chicken and vegetable stir-fry with Mango and Passionfruit Stir-Fry Sauce

Passionfruit Salad Dressing

I have never seen a passionfruit salad dressing and wondered why. The passionfruit pulp and tangy taste are perfect for a salad, I looked around and found a recipe and gave it a go.  The recipe was inspired by https://curryandvanilla.com/

I made it different from the Curry and Vanilla version by adding more passionfruit pulp with the seeds for texture.

Passionfruit Salad Dressing Ingredients
>

Ingredients

  • 2 cups passionfruit puree
  • 2 tbsp honey/maple syrup
  • 1/2 cup extra virgin olive oil
  • 3 tbsp lemon
  • ½ teaspoon of salt
  • Crushed black pepper
Salad waiting for the Passionfruit Salad Dressing

Method

Blitz all ingredients in a blender, and strain the mixture to remove seeds and other lumps. I added extra passionfruit pulp (2 extra passionfruit) to the mixture as I wanted the extra passionfruit taste and the crunch of the seeds. You can remove the seeds if you wish and just have the juice and pulp. Once complete add to a container and refrigerate. You can serve it right away or store it for a few weeks in the fridge.

The dressing looked more like ranch dressing but not as thick. It gave a great tang and lift to the salad and was yummy and moreish. 

Salad with Passionfruit Salad Dressing

What did I add to the salad?

  • Red oak lettuce
  • Green oak lettuce
  • Mushrooms
  • Spanish onions
  • Capsicum
  • Yellow tomatoes – Sun Delight tomatoes
  • Broccolini
  • And of course, my very own passionfruit salad dressing
Salad with Mount Victoria Microgreens

On the stir-fry and salad, I used Mount Victoria Microgreens. The microgreens are grown in the Blue Mountains and are fresh and so tasty. If you want to add some extra taste and be healthier Mount Victoria Microgreens is the way to go. My favourites are the purple radish and the broccoli.

Passionfruit Flummery

My husband is mad about flummery and makes the raspberry flummery based on the Aeroplane Jelly Recipe. I thought why not make a passionfruit flummery instead. 

Flummery is a dessert that isn’t a popular menu item, you don’t see flummery anywhere. It has been said that the flummery goes back to the 1500’s in Scotland and the recipes that I remember say they are from the 1950’s or earlier. 

Passionfruit Flummery in my op shop glasses

As I was new to flummery from a cooking perspective (I have eaten a few before), I thought it would be fun to give it a go and used the Aeroplane Jelly recipe as well. 

Ingredients

  • 1 x 85 g Mango Passionfruit/Mango/Orange Aeroplane Jelly
  • 1 cup (250 mL) boiling water
  • 1 x 375 mL evaporated milk, chilled

Note: I bought two packs of Mango Passionfruit Lite Aeroplane Jelly, however, each pack only has about 20g, so I used all 4 packs for my flummery. Next time I will use an orange or mango aeroplane jelly pack that has the exact 85g.

Passionfruit Flummery with oodles of fresh passionfruit

Method

  • Mix Aeroplane Jelly crystals and boiling water in a medium bowl. Stir until dissolved. Cover and refrigerate until the consistency of a thick syrup (Approximately 1-2 hours).
  • Make sure that you keep an eye on the jelly as you don’t want to solid before you mix it with the evaporated milk.
  • Using an electric mixer, beat evaporated milk with slightly set jelly on high speed for approximately 5 minutes or until doubled in volume. Should be thick and glossy.
  • Spoon into serving bowls, cover and refrigerate for a further 2 hours or until set firm. Serve with yoghurt, ice cream and fresh passionfruit.

The glasses that I used were purchased from the local op shop. I just loved the blue stems with the square stand. I managed to acquire three Bombay Sapphire Gin glasses that were just perfect for a dessert.

Super yummy looking Passionfruit Flummery

POST FEAST REVIEW

Mango and Passionfruit Stir Fry Sauce
This was a simple recipe to make and tasted nice with the chicken and vegetables. I did think that the mango was a bit overpowering and to balance this out I would add more passionfruit next time. Even though I thought it needed more passionfruit it was delicious and both bowls were finished in record time.

Passionfruit Salad Dressing 
Another simple recipe that was very tasty and lifted a simple salad to new heights. As mentioned in the recipe I added extra passionfruit afterwards as it needed that extra flavour. It was a huge hit with my dinner guests, and I think that having some in the fridge always is a must!

Passionfruit Flummery
I had never made flummery before and was surprised at the reaction to the near jelly and evaporated milk. It doubles in size in record time. It tasted amazing with the fresh passionfruit over the fluffy dessert.

Passionfruit ready to be cooked

WOULD I MAKE THIS AGAIN?

Yes, I would make all three recipes again in a heartbeat. Although next time I would make a few little tweaks:

  • Mango and Passionfruit Stir-Fry Sauce 
    I would add more passionfruit and see if I could make it a little thicker
  • Passionfruit Salad Dressing
    I added more passionfruit to the end mixture and believe that it could be tangier but that could be my preference. The version I created was very tasty and was a huge hit.
  • Passionfruit Flummery
    This an amazing light and delicious dessert. The one change I would make is to have the flummery in smaller cups to serve. 

I hope you enjoy these passionfruit recipes.

The passionfruit was fresh and tasty.

Sign up for my newsletter

Don’t miss a thing by signing up for my newsletter. This newsletter will list all giveaways and fabulous things that are happening. Stay current with all the things that are happening on Mummy to Twins Plus One.


This post has Affiliate Links

Originally published March 5, 2022