Categories
Recipes

Make Choc Chip Pumpkin Bread

Have you wanted a tasty and healthy (well there are some healthy ingredients) treat for the lunch box or afternoon tea? How about adding pumpkin to a recipe, if you are worried it doesn’t taste like pumpkin at all just has the healthy benefits of pumpkin.

If you said yes, then I have a great recipe for you.

Choc Chip Pumpkin Bread - Yummy and all ready to eat!
Choc Chip Pumpkin Bread – Yummy and all ready to eat!

Make it easy and download the recipe card and instructions

INGREDIENTS

  • 2 cups (300g) self-raising flour
  • 50g butter melted
  • 2 Eggs
  • 2/3 cup (130g) dark choc chips
  • 1/2 cup (55g) chopped walnuts
  • Pepitas (pumpkin seeds) and sunflower seeds
  • 1 cup (220g) brown sugar
  • 1 cup (250g) mashed pumpkin (I made my own)
  • 1/2 cup (125ml) buttermilk

SET THE OVEN FOR  180°C   OR    356°F

My fresh made pumpkin mash all ready to make Choc Chip Pumpkin Bread
My freshly made pumpkin mash all ready to make Choc Chip Pumpkin Bread

METHOD

Step 1: Make your own Pumpkin Mash

I made my own pumpkin mash. I measured the correct amount of pumpkin needed. Then took off the skin. I added a little water to a saucepan and then added the cut-up pumpkin. I cooked until it was soft to make a mash. I cooled it a little to be not hot when it was added to the other dry and wet ingredients.

You don’t need to create your own mash, but it was super simple and easy to create, and it meant it was all fresh.  If you would rather not do your own mash you can buy canned pumpkin mash and then add it to the mixture.

Step 2: Mix all ingredients into a bowl and make sure they are mixed well.

How good does this look....I want a piece now. All cooked and amazing looking choc chip pumpkin bread.
How good does this look….I want a piece now. All cooked and amazing looking choc chip pumpkin bread.

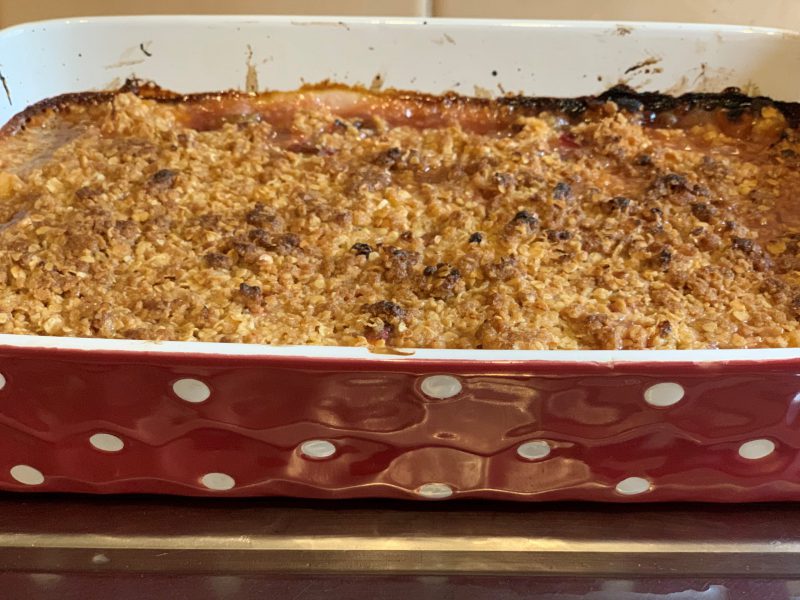
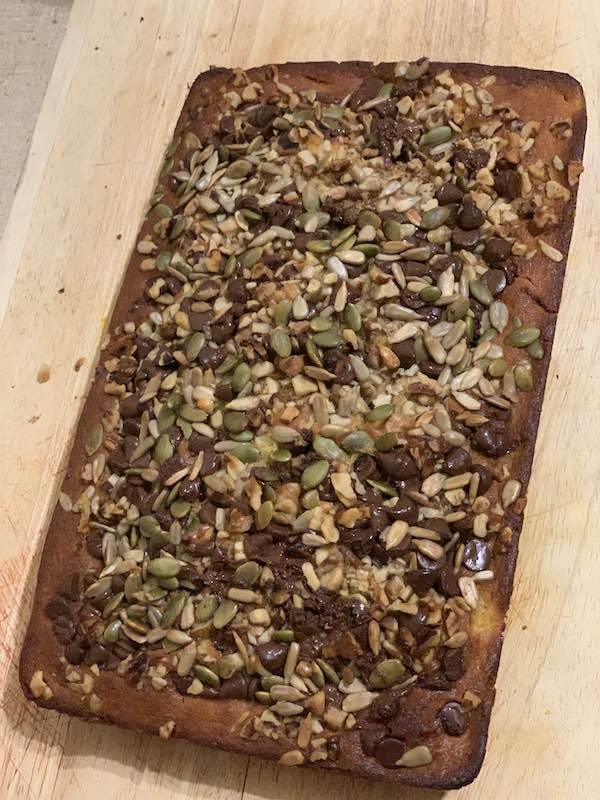
Step 3: In a buttered tin (I used a big rectangle one that is good for bigger cakes), put in all the mixture. Make sure that it is all level and the top of the cake looks smooth. If you need to use a knife to smooth out the top.

Step 4: Add the dark chop chips, walnuts, pepitas and sunflower seeds to the top of the cake. I found that since the mixture was a bit thicker than a standard cake the seeds and choc chips stayed on the top, whereas a standard cake means that these items would have fallen into the cake and stuck to the bottom.

You can add any seeds you wish, so if you prefer something else add those.

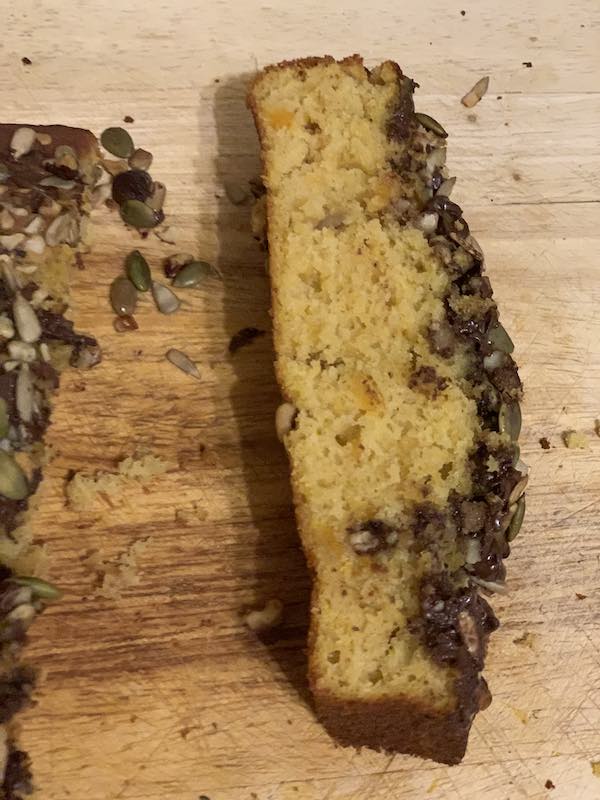
Step 5: Cook for about 1 hour or until a skewer comes out cleanly of the cake/bread. I checked often as I was unsure if an hour was too long. I think it got close to being in the oven for an hour.

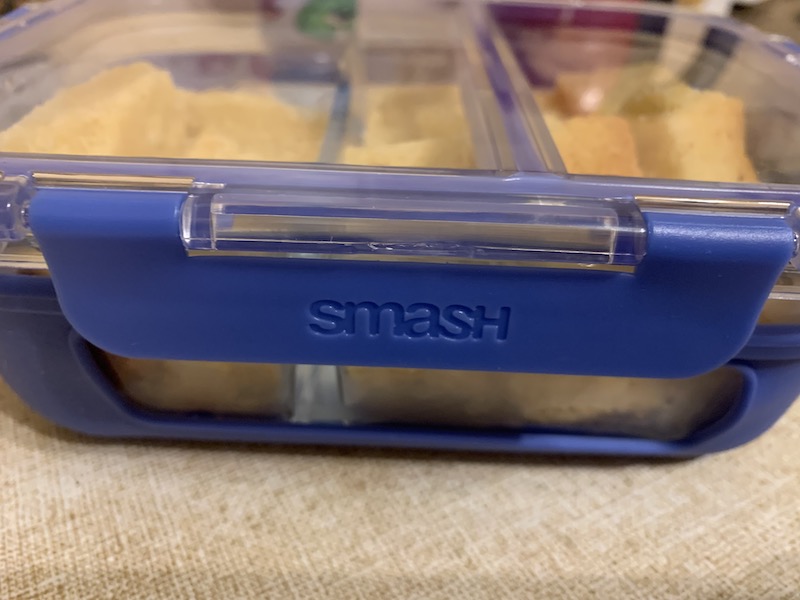
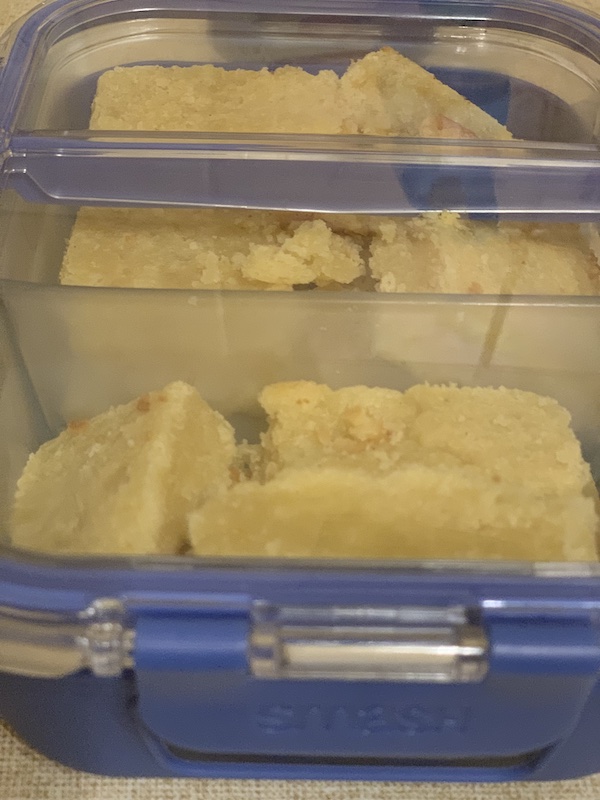
Step 6: Eat your yummy choc chip pumpkin bread – share with friends or just have it for yourself for afternoon tea.

Yummy Choc Chip Pumpkin Bread all ready to eat

I hope you enjoy this yummy recipe.

Sign up for my newsletter

Stay current with all the things that are happening on Mummy to Twins Plus One. Don’t miss a thing by signing up for my newsletter. This newsletter will list all giveaways and fabulous things that are happening.


This post has affiliate links

Originally published October 11, 2019

Categories
Party ideas

Making Birthday Parties Easy with Coles’ Vanilla Pink Drip Cake

Have you ever thought that birthday cakes should be easier?

What if they can be and you can take all the glory for not doing that much at all? Coles has the perfect cake to make you look like the best parent in the world.

The Coles Vanilla Pink Drip Cake will help your next party be a HUGE hit.

If you are not a fan of the Pink Drip Cake, you can also get a Chocolate Drip Cake

Our summer-inspired Coles Vanilla Pink Drip Cake

Coles Vanilla Drip Cake Makes Birthday’s Easier

I like any mum who wants to make their child’s birthday party special. Each year I ask each kid what they would like for their birthday, and I go out of my way to make it happen.

Hubby is a bit over all the trouble I go to and keeps on saying I should just get a cake from the shop and make it look pretty.

So when I was asked to test out the new Coles Vanilla Pink Drip Cake I thought this might be the answer to making birthday’s easier.


What did the girls choose as decorations?

The kids wanted to make it a summer cake filled with tropical decorations.

I think they did an amazing job and had fun too.

I think next time I have a party I will make things easier for myself. As a mum, there is so much to do and to organise, if you can get more time back it is a win, right?

Will you be testing out the Coles Vanilla Pink Drip Cake?

Did you know that the Coles Drip Cakes was voted product of the year for 2020?

I can see why it won product of the year, it’s yummy and a stunning-looking cake.

COLES VANILLA PINK DRIP CAKE
The Coles vanilla pink drip cake is a stunning and cost-effective solution to creating the cake of your dreams! The white icing with a delectable pink drip puts this stunning dessert on par with the decadent, Insta-worthy cakes that are continuously popping up. This cake is light, fluffy and drizzled with a sweet pink topping and makes the perfect base for decorating and dressing as you see fit! Whether it’s for a bridal shower, kids’ birthday party or just for impressing your guests after dinner, the Coles pink drip cakes are perfect for every occasion.
RRP $28.00
Available at Coles.

I hope this gives you some ideas on how to make your next celebration fantastic with this super stylish cake.

Sign up for my newsletter

Stay current with all the things that are happening on Mummy to Twins Plus One. Don’t miss a thing by signing up for my newsletter. This newsletter will list all giveaways and fabulous things that are happening.

This page contains affiliate links

Posted first on Feb 21st 2020

Categories
Recipes

Mandarin & Rhubarb Crumble

Would you like to make a super yummy and easy dessert?

This crumble is so simple and tastes amazing, it will impress everyone.

If you are taking a dessert to a dinner party this is the thing to make, you can make a big tray of it and all you need to add after heating it up is some vanilla ice cream.

Many of these crumbles call for oranges, not mandarins, I love mandarins and look forward to mandarin season, so adding mandarins to a dessert is vital. Since I have never added mandarins to anything I have cooked before I thought why not give it a go.

All the ingredients ready to make Mandarin & Rhubarb Crumble


Download the recipe card for Mandarin & Rhubarb Crumble


Chopping up the rhubarb


Put oven on 180°C or  356°F to heat up
while you get everything ready

Ingredients

  • 6 cups chopped Rhubarb
  • (I used 1 big bunch of Rhubarb)
  • 1 1/2 cups sugar
  • I small bag of mandarins
  • 1 cup packed brown sugar
  • 1 cup quick-cooking oats
  • 1/2 cup all-purpose flour
  • 1/2 teaspoon salt
  • 1/2 cup cold butter, cubed
  • Ice cream to serve


Make sure to cut out the mandarin seeds


Method

Step 1: Cut up Rhubarb into small pieces

Step 2: Peel all the Mandarins and cut out the seeds

Step 3: In a large bowl, add the rhubarb and sugar let stand for 15 mins, stirring occasionally.

Step 4: In a large bowl, mix the brown sugar, oats, flour and salt. Cut in butter until mixture resembles coarse crumbs.

Step 5: Add Rhubarb and sugar mixture to a large baking dish

Step 6: Add the Mandarins on top of the Rhubarb – make sure they are evenly spread

Step 7: Add the crumble mixture on top making sure it fully covers the top

Step 8: Bake at 180° for 40 minutes or until the top is golden brown

Step 9: Eat the yummy mandarin and rhubarb crumble with some ice cream. ENJOY!

Mandarin & Rhubarb Crumble cooling down and getting ready to eat!

I hope you enjoy this yummy recipe.

Sign up for my newsletter

Stay current with all the things that are happening on Mummy to Twins Plus One. Don’t miss a thing by signing up for my newsletter. This newsletter will list all giveaways and fabulous things that are happening.


This post has affiliate links

Categories
Creative

Create Painted Rocks

Kids love being outdoors and I find that if kids don’t get the outdoor time they are hard to deal with.

How about searching for painted rocks at your local parks? Or other parks?

WEAR OLD CLOTHES AS THE PAINT MIGHT NOT WASH OUT

How to create your very own painted rocks

  • Rocks are essential to have, you can either find wild rocks that live in your garden or park, or you can buy smooth rocks from a craft shop (otherwise known as captured rocks). We used wild rocks that were living in our garden.
  • Acrylic paint in bright colours.
  • Sharpie pens – we used the metallic ones to add a nice shimmer and due to the twins wanting to do a space theme this looked great with their space and galaxy rocks.
  • Paint brushes.
  • Container with water to wash out paint brushes.
  • Baking paper to put rocks on to ensure they don’t stick to paper (You don’t want your kid to go to hours of trouble to then have paper stick to the wet paint on their rock)
  • Waterbased Sealer – Use Mod Podge as this is ideal for rocks. I couldn’t get any and the one I used was not perfect and some of the colour of the paint came off. Once dry was okay.

WARNING KIDS WILL GET MESSY AND NEED A SHOWER/BATH AFTERWARDS.

This post was also featured in full on Kiddipedia

Check out Facebook for a Rock Group in your area, they are all over Australia so you will be sure to find one.

Online you can get clues for where to find your next rocks.

Get the whole family involved and enjoy the outdoors.

Have fun and let me know what you create, send your photos to my Facebook Page

Sign up for my newsletter

Stay current with all the things that are happening on Mummy to Twins Plus One. Don’t miss a thing by signing up for my newsletter. This newsletter will list all giveaways and fabulous things that are happening.


This post contains affiliate links

 Originally published Tuesday, March 26, 2019

Categories
Education

April is Autism Awareness Month – Explore Twinkl’s Great Resources!

Autism Awareness Month isn’t just a date on the calendar for me—it’s personal. With a child on the spectrum, I’ve seen firsthand how understanding and acceptance can shape their world. The more we educate ourselves and those around us, the more we can create spaces where neurodivergent kids feel valued, included, and supported.

One of the best ways to make a difference is by starting conversations early. That’s why I love Twinkl’s Autism Awareness Week PowerPoint—it’s a fantastic way to introduce autism in a way that kids can relate to. It clears up misconceptions with a true or false discussion, helps children understand how autism affects communication, routines, and interactions, and encourages empathy.

Autism Strengths Poster from Twinkl

Here are some great resources to spark those conversations:

Twinkl has thousands of resources for teachers and parents to help kids learn about autism in a meaningful way. Awareness is just the first step—acceptance and inclusion are what truly make a difference.

So, whether you’re a teacher, a parent, or just someone who wants to help make the world a little kinder, take the time to start the conversation. It means more than you know.

SIGN UP FOR MY NEWSLETTER

Don’t miss a thing by signing up for my newsletter. The newsletter will list all giveaways and fabulous things that are happening. Stay current with all the things that are happening on Mummy to Twins Plus One.


Categories
Education

How to Create an Impressive Gobi Desert Diorama

Hey there, adventurous parents and young explorers! Today, we’re diving into the fascinating world of the Gobi Desert. If you’ve ever wondered what it’s like to wander through this unique landscape, buckle up because we’re about to embark on a journey of discovery!

It’s diorama time at school for grade 3, and everyone is off-creating their own dioramas. My little boy chose the Gobi Desert for his project, but the possibilities are endless for your diorama.

You might decide to explore the lush, vibrant ecosystems of a rainforest, the vast, open grasslands of the savanna, or another unique desert environment from around the world, like the Sahara or the Mojave. Each habitat offers its own fascinating plants, animals, and landscapes, allowing you to tailor your project to whatever environment captures your imagination the most. It doesn’t feel that long ago that my girls were doing this same project. Thanks to a homework project, it has sparked an interest in the habitat of the Gobi Desert.

What is the Gobi Desert?
The Gobi Desert is a vast, arid region in Asia, covering parts of northern and northwestern China, and southern Mongolia. It’s renowned for its extreme temperatures, from scorching hot summers to freezing winters, making it a challenging yet captivating environment to explore.

Plants and Animals of the Gobi Desert

Plants: Despite its harsh conditions, the Gobi Desert is home to resilient plant life such as saxaul trees, which have deep roots to find underground water, and various types of grasses and shrubs adapted to sparse rainfall.

Animals: Some of the most iconic inhabitants include the Bactrian camel, known for its ability to survive on sparse vegetation and store fat in its hump for energy; the Gobi bear, a rare and endangered species adapted to cold desert conditions; and the jerboa, a small hopping rodent that has adapted to the desert’s sandy terrain.

Soil and Geography
The Gobi Desert features a vast expanse of gravel plains, rocky mountains, and sand dunes. Its soil is often sandy and nutrient-poor, contributing to the challenging conditions for plant growth.

Additional Resources and Activities
For more fun and learning about the Gobi Desert, check out these resources:


Creating Your Gobi Desert Diorama


Now, let’s bring the Gobi Desert to life with a fun and creative 3D diorama!

Materials Needed:

  • Shoebox or any small box as your diorama base
  • Sand or craft sand for the desert floor
  • Small pebbles or rocks
  • Artificial plants like desert grasses
  • Plastic animal figurines (camels, bears, jerboas)
  • Paint and brushes (optional, for coloring the backdrop)
  • Glue, scissors, and tape

I found images of animals and plants from the Gobi Dessert and cut them out to stick into the diorama. On the back we listed what is in the diorama and suggested for people to see if they can find them.


Steps to Create:

  • Create your backdrop: We used the Gobi Desert Colouring page from Twinkl to give our diorama a nice sense of place. It allowed all the animals and plants to look at home in the Gobi Desert habitat.
  • Prepare the Base: Line the inside of your shoebox with sand to create the desert floor. Add small pebbles and rocks to mimic the rocky terrain.
  • Add Vegetation: Place your artificial plants strategically around the diorama. Saxaul trees can be represented with small twigs or painted craft sticks.
  • Include Animals: Position your animal figurines in their natural habitats. The Bactrian camel might be wandering across the sand, while a Gobi bear rests near a rocky outcrop.
  • Decorate: Use paint to create a backdrop for your diorama if desired. You can paint distant mountains or a clear blue sky to enhance the desert atmosphere.
  • Final Touches: Once everything is in place, secure all items with glue or tape to ensure they stay put.

Hamilton Island Holiday Homes - Winter Sale Offer

Let the Adventure Begin!
Voila! Your Gobi Desert diorama is ready to amaze and inspire. Take a moment to admire your creation and imagine the stories that unfold in this harsh yet beautiful desert landscape.

Whether you’re a parent guiding your child through this project or a young explorer eager to learn more about the world, creating dioramas like this is a fantastic way to blend education with creativity.

Explore more desert environments like the Sahara or the Australian Outback with Twinkl’s desert resources, or venture into lush rainforests and expansive savannahs for more exciting diorama ideas!

Ready for your next adventure? Share your diorama creations with us in the comments below!

P.S. Need more ideas on building dioramas? Check out Twinkl’s tips!

Sign up for my newsletter

Stay current with all the things that are happening on Mummy to Twins Plus One. Don’t miss a thing by signing up for my newsletter. This newsletter will list all giveaways and fabulous things that are happening.


This post has affiliate links

Categories
Creative

Create Autumn & Winter Pictures

This creative activity was first posted on Kiddipedia – https://kiddipedia.com.au/creative-activities-for-kids/

The weather is colder and the leaves are falling from the trees, some leaves are so pretty and colourful it is a shame to just have them fall on the ground.

If you are wondering what to do with the kids then this craft activity is for you.


This task is super easy and fun and one that will occupy all age groups.

So what do you need?

  • Paper
  • Paint
  • Crayons/Pencils/Textas
  • Autumn Leaves
  • Coloured craft paper
  • Glue Stick
  • Clear contact paper if you wish to do a see-through option to stick on a window

Method

Collect your colourful leaves and anything else you wish to stick to your picture. Draw or paint the branches and other items if you like. Now with the glue stick add glue to the areas you want to add the leaves and create your autumn/winter picture.

I know it is now winter but when I did this it was officially still autumn.

If you don’t want to do it on paper as we did simply add craft paper for the branches for the trees and then add the leaves, making sure to stick them all on clear contact paper. Once your picture is complete add a final top layer of see-through contact paper and then you can put on your window. Attaching this creation to your window will allow light to come in and shine on the colours in the picture.

This isn’t an expensive task and one that will be fun for everyone, and you will be the proud owner of new artwork for your walls and windows.

Enjoy and make sure to subscribe to my YouTube Channel 

Sign up for my newsletter

Stay current with all the things that are happening on Mummy to Twins Plus One. Don’t miss a thing by signing up for my newsletter. This newsletter will list all giveaways and fabulous things that are happening.


This post has affiliate links

First published June 20, 2020

Categories
Creative

Amazing Smelling Raspberry Play Dough

Do you want to make some fabulous-smelling and amazingly soft play dough for the kids?

This play dough smells so good!!!  Also if your kids accidentally eat it, it won’t matter. It would just be a little salty.

I do have a secret ingredient that makes this play dough super awesome.

It’s raspberry jelly crystals

The recipe is below:

  • 1 1/2 cups of flour
  • 1 cup of salt
  • 1/4 cup McCormick® Cream of Tartar
  • 2 cups of hot water to melt the jelly crystals
  • 2 tablespoons vegetable oil
  • Jelly Crystals – instead of food dye

BE CAREFUL WITH THE HOT WATER, ONCE MIXED WITH THE FLOUR THE PLAY DOUGH WILL BE NICE AND WARM


Method:

Mix all ingredients and knead to make a dough. Might need more flour if too sticky.

After you play with the play dough put in air tight containers or in a resealable plastic bag.

Enjoy and have fun with this great new smelling play dough.

Sign up for my newsletter

Stay current with all the things that are happening on Mummy to Twins Plus One. Don’t miss a thing by signing up for my newsletter. This newsletter will list all giveaways and fabulous things that are happening.


>

First published 14th April 2019

Categories
Party ideas

Batman 4th Birthday Cake

Alexander asked for a Batman cake and one that had blue icing and is white. He is a child that really doesn’t like chocolate so white means Vanilla cake.

Yes, my little boy really doesn’t like chocolate and would rather have vanilla cake and gummy sweets.

So vanilla and a blue iced cake was made, plus making it Batman themed.

The cake finally all done and ready for Alexander's birthday party.
The cake finally all done and ready for Alexander’s birthday party.

As I don’t have a mixer I got a new handheld Sunbeam MixMaster , in the video above I unboxed the new Sunbeam Mixmaster and used it for the first time.  I must admit that this was not what I thought I was getting for Christmas but it has come in handy. I have baked cakes, made pancakes and more!

The Sunbeam Mixmaster looks like the one my mum had in the 70’s and I love the fact that it is super easy to use as you can easily hold the mixer and stop and start it when needed.

I loved the sense of humour on the Sunbeam Mixer box.


To make the cake I needed:

  • 2 vanilla cake mixes
  • 4 eggs – 2 for each cake mix
  • 160ml of milk
  • 3 Tablespoons of oil (I used olive oil)
  • I also added some lemon juice into each cake mix
  • Soft icing sugar
  • Butter for the icing – I just add a few lumps and then add more icing
  • Blue food dye
The layered cake getting decorated with blue icing


Before I made the cake I created the decorations, this meant that when everything was ready I could instantly add everything to the iced cake.

Decorations

  • Dark chocolate for the buildings
  • Silver candy balls
  • Coloured candy for the building’s windows
  • I used 2 silicone pot holders for window shapes
  • Superhero candles
  • Edible Batman picture for the centre of the cake

I made it super simple and purchased some vanilla cake mix. As I needed it to be a taller cake for the Gotham buildings.

Each cake was mixed separately, then added to a tin to be baked in the oven.

Batman Cake with Gotham buildings


I hope this inspires you for your next birthday party.  Maybe you too could make your own take on a batman cake.

Sign up for my newsletter

Stay current with all the things that are happening on Mummy to Twins Plus One. Don’t miss a thing by signing up for my newsletter. This newsletter will list all giveaways and fabulous things that are happening.


This post contains affiliate links

Originally published February 13, 2020

Categories
Creative

Crystal & Diamond Mining

Are you looking at something fun and different to do with the kids?

Why not take them Diamond or Crystal mining, or maybe both?

Would it surprise you that my four-year-old and I found diamonds and crystals (AKA Rocks) at our local park? I think you would be rather impressed.

It was a great time at the local park. My little boy rode his bike to the park and while there we searched for valuable crystals and diamonds.

Alexander found a few and made sure to put them safely in his pockets or if they didn’t fit my pockets. We took them home to wash them to allow us to inspect our haul of treasures.

I know that we didn’t collect actual crystals or diamonds but the hunt and chase for the real thing was super fun, plus after we were home water was involved to clean the rocks and this meant that Alex was then covered head to toe in the water and of course spent hours playing in the water and investigating his special treasures.

This great outdoor activity was first published on Kiddipedia – https://kiddipedia.com.au/creative-activities-for-kids/

Sign up for my newsletter

Stay current with all the things that are happening on Mummy to Twins Plus One. Don’t miss a thing by signing up for my newsletter. This newsletter will list all giveaways and fabulous things that are happening.


This post has affiliate links

Originally published June 14, 2020

Categories
Review

Review: Natralus Australia Skincare

If you are like me you love receiving gifts and especially if they are ones that allow you to pamper yourself. I recently received a box of Natralus Australia skincare products to test out and share my thoughts with you my lovely readers.

My skin always gets so dry in autumn and winter so having a good quality moisturiser on hand is essential. The weather in the mountains during the colder months means my skin deals with harsh winds, cold temperatures, warm heating, and of course layers and layers of clothing too that don’t help with dry skin.

The wonderful smelling Hand & Body Lotion – Rose, Lilly Pilly & Berries

I was sent the following items:

  • SOFTENING HAND & BODY LOTION – ROSE, LILLY PILLY & BERRIES
    The body lotion smelt amazing and made my skin feel so soft and subtle. I loved the fact that the natural perfume lasted and made me smell fantastic throughout the day.
  • NATURAL DEODORANT – WILD ROSE
    This deodorant is so wonderful and makes me smell like a rose all day long. It is not a strong scent, in fact, it is more a subtle rose that makes you feel like you are on holiday or it is summer still. You can get natural deodorants in Cool Spice, Lemon Myrtle, Zesty Citrus, Citrus Spring, and Sea Berry.
  • NATRALUS NATURAL PAW PAW BALM
    This natural paw paw balm is so moisturising and stays on your lips for ages. It is thicker and really helps keeps my lips feeling good and also looking amazing. I think you will be super amazed at the quality of this paw paw balm and it will soon be a firm favourite for you too.

    This is my favourite item and a must-have for anyone… you seriously need to get yourself some Natrualus Natural Paw Paw Balm today!
All the amazing natural products from Natralus Australia
Natralus My Little One Gentle Cleanse Shampoo & Wash smells so good, so marshmallowy!

Natralus My Little One Range covers all stages of care for children, including lotions, cleansers, and shampoo/conditioners.  The creams and washes are so gentle, moisturising and soothing for babies’ and kids’ skin.

We loved the My Little One Gentle Cleanse Shampoo & Wash, it was like a big bunch of crushed-up marshmallows, My Little One Comforting Touch Massage Oil helps protect bubs skin, you can also use the massage oil during pregnancy and post-pregnancy for your skin too.

The oil is “enriched with paw paw to help nourish and protect delicate skin, Rosehip oil to deeply moisture and help support your little one’s skin natural elasticity, Jojoba oil, is gentle and easily absorbed, helps to prevent dryness and leaves skin silky-smooth. Calendula, known for its calming and soothing properties.”

Thanks to Naturalus Australia for sending me such amazing products to try.


I loved them and will definitely recommend them to friends and family. If you are looking for some amazing natural products, make sure to check out Naturalus Australia.

This post has affiliate links

Categories
Things to do

Climbing at Treetops Adventure Western Sydney

I wanted to take Alex somewhere fun, somewhere different from the usual park.

But where?

Why not Treetops Adventure at Western Sydney. You don’t have to visit the Western Sydney location, this is the one we visited. The Western Sydney Treetops are within the Western Sydney Parklands.

In fact, Treetops Adventures are available in 8 different locations in NSW, also in Victoria, Western Australia, Queensland and Tasmania.

I looked online for a great spot to take my active six-year-old and settled on Treetops adventure. I magically booked one of the last times for their adventures that day and of course, high-tailed it down the mountain to get there on time. I was however about 15 minutes late, but I soon discovered that was okay. Thank goodness for that!

>

He had the safety rope on the course to make sure he was safe even if he fell


We were in time for my little boy to join a group of other kids, he just needed to get his harness fitted and wait for the group to have their safety induction and their guide to tell them the rules of what to do and of course not do. If they needed help there were staff there with their harness on ready to climb to help out.

At first, my little boy was a bit shocked we didn’t end up at the park he thought we were going to…however, I did tell him we were off on an adventure to do something different.

See our YouTube video of our Treetops Adventure

Balancing to make sure he has the edge
Brave and keen to climb all the courses

Alex grew his confidence with the different courses.

One course had my six-year-old fall off the timber or logs that were there. He did have a harness and was also strapped on with the metal safety line, so no worry about falling. However, losing his footing was a bit scary and I had to talk him through how to get back on the logs.

I did get the attention of one of the staff there and they were on their way and then Alex managed to sort it all out himself.

These ones move and Alex took a bit longer making sure he put his foot on the next one correctly

The courses that had moving logs or missing parts where you would put your feet made my little boy a bit worried at first, he did get the hang of how to work the ones that were moving and then with the ones that had missing parts he favoured the area that had more timber for him to stand.

Getting across the course slowly but surely

He also was very focused on what he was doing and how he managed each course.

When Alex got to the Ziplines he was able to take off the zip fitting and put it on the metal line for the zip adventure himself. He got really good at it and even though he fiddled a bit sometimes getting it off the metal rope he yelled at me that he didn’t need help, he would say very loudly “I don’t need help!”

Was a bit worried about the gaps and the logs…at least they don’t move
Got the hang of the net

This was a great decision to take my little one to Treetops Adventure at Western Sydney, he loved it. In fact, he really didn’t want to leave.

Having heaps of fun climbing

I now really would like to take the twins to experience more Treetops Adventures throughout Sydney. For all kids to do a park together I would need to have courses for the bigger kids and many courses for the younger person too.

If you are looking at an activity for the holidays, weekend or any time climbing at TreeTops is something I would highly recommend. Not only is it great for kids as they are outdoors, it helps with their confidence and problem-solving abilities it is also fun and different from your standard park.

Alex had never climbed at Treetops before and was racing around and doing the courses multiple times, he seemed to be an expert after doing it many many times!

SIGN UP FOR MY NEWSLETTER

Don’t miss a thing by signing up for my newsletter. The newsletter will list all giveaways and fabulous things that are happening. Stay current with all the things that are happening on Mummy to Twins Plus One.


This post has affiliate links

Categories
Things to do

Portland Twilight Markets – June Bonfire & Cracker Night

We visited Portland Night Markets in April and had a great time, there were plenty of stalls, craft fun for the kids, and also food trucks. The markets and silos are managed by the Foundations at Portland.

The stunning mural on the Portland Silos

While we were at the Portland Twilight Markets in April we did the following:

  • Looked at the stalls and bought things
  • Ate food from the food trucks
  • Looked around at the silos
  • Enjoyed a bit of music
  • My youngest had fun creating art at the kid’s corner

We are keen to enjoy the cracker and bonfire night at Portland Silos. It is freezing here already so we will need to rug up as it is really windy.

If you are going see the details below and maybe I will see you there.

Checking out the silos at the Portland Markets
At the markets early before it was night
Looking at the stalls at the Portland Twilight Markets
Creating art at the Portland Markets

June 11th is Cracker and Bonfire Night at Portland

June long weekend at the Foundations in Portland

“Fireworks, a massive bonfire, over 70 market stalls, food trucks, and more on the night.

Lounge Katz will keep you entertained in the markets while out by the fire, local musicians and performers will keep you entertained while you warm up. For the kids, the STEAMWorks Craft Corner will be back, and we are welcoming Fizzics providing exciting engaging shows for kids of all ages throughout the night.”

Sign up for my newsletter


This post has affiliate links

Categories
Things to do

Family Trip to Manly

We are lucky to live in a city where we can be at a beach or the mountains. A few weeks back (in fact it was Mother’s Day), the kids, hubby, and I decided to take the ferry to Manly. We thought it would be fun to explore and spend the day at the beach.

Even Bark the Dog had fun on the ferry

Waiting for the Manly ferry at Circular Quay.

It was a stunning time on the harbour, the weather was great and it was lovely to have no rain for a day.
I am sure that it rained the next day and didn’t stop. I must say that the constant rain has been hard to live with, so when it was finally good weather we leapt at the chance and embraced the time out.

Playing with sand is so much fun. We had fun making sandcastles on Manly Beach.
Alexander loved playing at Manly Beach

My little boy had never been on a ferry before, so hubby and I thought it would be extra fun for him and also fun for the older kids too.

Some things we did while we were on our adventure to Manly:

  • Obviously, catch a ferry to Manly and back to Circular Quay
  • Teach the older kids about the sides and areas of the boat, Port (left), Starboard ( right) Bow (front), and Stern (back).
  • Walked around and looked at the shops
  • Spent time at Manly Beach
  • Had fun with our six-year-old playing on the beach and running away from the waves
  • Have an ice cream at Manly Wharf
  • On the ferry ride there and back, notice the houses, and boats on the harbour and explain to the kids why the waves get choppier when we get close to the heads (heads that go directly out to sea).

See how a simple ferry trip can be a fun adventure and allow you to explore new areas of your own city. It is also a cheap day out with the kids.

Why not grab fish and chips while you are in Manly and bring your swimmers to enjoy the beach. Hopefully, it will still be warm enough for a swim.

Happy kids and especially my little boy who had fun being on a ferry for the first time.
Offer: Save up to 40% over 3 boxes at EveryPlate Code: MUMMY422

This post has affiliate links

Sign up for my newsletter

Don’t miss a thing by signing up for my newsletter. This newsletter will list all giveaways and fabulous things that are happening. Stay current with all the things that are happening on Mummy to Twins Plus One.


Categories
Recipes

Make Mini Meat Pies

Would you like a super easy meat pie for your party? How about dinner or lunch? Or your Australia Day celebration?

Well, I have an easy recipe for you and it is very yummy too!

Preheat the oven: Heat the oven to 180°C or 356 °F

INGREDIENTS

  • 500 grams of beef mince (You can choose chicken, pork or turkey if you wish)
  • Frozen puff pastry sheets
  • 2 carrots grated
  • 2 big cups of chopped mushrooms
  • Soy Sauce – I added a sprinkle when cooking the mince
  • 2 spanish onions – finely cut
  • 1 brown onion – finely cut
  • 1 pack of Masterfoods Spicy Chilli Con Carne (this is used as sauce rather than a gravy)

METHOD

  • Take out 4 sheets of pastry to defrost
  • Cut up the onions and add them to the fry pan
  • Add the mince
  • Add the soy sauce
  • Add the grated carrot
  • Add the Spicy Chilli Con Carne sauce mix and then add the pouch with water to get all the sauce out and add to the sauce in the fry pan
  • Cook all ingredients until the water in the sauce has reduced a little but all as you need to have the sauce there to add to the mixture for the pie
  • Once all ingredients are cooked for the inside of the pie, turn off the fry pan
  • I used a muffin and friand tin to put my puff pastry in. I did find that the friand tin did it better. Also you will see that my pastry was not perfect and actually more rustic than I was hoping for.
  • Cut out a good square of pastry that will match the bottom and sides of the tin. I then pressed the pastry down to the bottom and the sides.
  • I then filled the pastry pie in the tin with the filling from the fry pan and finished off each individual pie with more pastry. This was measured by seeing if a big glass was a little bit bigger than the top of the pie width for each pie in the tin. I used a big gin glass to cut out a circle to then pinch closed on top of each indivual pie.
  • Bake for 30 minutes or until the pastry is very golden brown and looking crunchy.

I served the pies with a salad. It was very yummy and filling.

POST FEAST REVIEW

I thought that making pies would be easy and I was right. It really isn’t hard. However, I don’t really have a pie tin and made do with using a muffin and friand tin as a substitute. It worked out well with these tins but I did notice that the friand tin worked better.

The pastry was a bit clumsy and rustic but worked on the whole. A few pies had their bottom give out a little when I attempted to remove them from the tin.

I found that the pies were just the right size and a salad or vegetables for dinner. If you do decide to make this you can make a few different pies and then mix and match to have a few different ones on your dinner plate.

The pies were very tasty and the Spicy Chilli Con Carne sauce made it very tasty indeed as well as the chewy and melt in your mouth mushrooms.

I did read a few recipes but made it up as I went along, although this alarmed and annoyed my husband. He thought that I was following a recipe and got quite frustrated to learn I wasn’t. I then pointed out it was an experiment and he wasn’t cooking so it really didn’t matter.

WOULD I MAKE THIS AGAIN?

Yes, I would make this again. I think I need to get proper individual pie tins or make one big pie and have it as a slice of one pie for each person at dinner or lunch. It was rather quick and simple and for the remaining pies, I can have them in the fridge and just heat up for the next meal.

Sign up for my newsletter

Don’t miss a thing by signing up for my newsletter. This newsletter will list all giveaways and fabulous things that are happening. Stay current with all the things that are happening on Mummy to Twins Plus One.


This post has Affiliate Links

Categories
Recipes

Make Ted Lasso’s Biscuits

I’m a huge fan of the show Ted Lasso.

It is funny, has a nice message and is an interesting story of a man who is starting again in a new country.

The show is on Apple TV and is currently in season 2.

On the show, Ted Lasso brings biscuits to his boss to make a good first impression. The boss, Rebecca is taken with the biscuits and has no idea that Ted actually makes them. In other episodes, she calls around bakeries to see if they stock these exact biscuits.

Ingredients

  • 1 and a half cups of flour
  • Half a cup of almond flour
  • Half a cup of sugar
  • 1 lemon – juice and rind
  • 220 grams of butter
  • Half a teaspoon of salt
  • 1 tablespoon of vanilla extract
The ingredients to make Ted Lasso’s Biscuits

Make sure to have your oven on for 180°C or 350°F

Method

  • Add flour, almond flour and salt into a bowl or food mixer to combine all together
  • Add the butter and vanilla until it is looking like breadcrumbs
  • Add the the lemon juice and lemon rind, you might need a little extra flour to make sure it is not that sticky
  • Butter or oil a square pan and press the mixture down so that is all flat
  • Bake for around 30-35 minutes or until it is golden brown (so could be less depending on your oven)
  • I made sure to check in around the 25-30min mark and it did need a little extra as the addition of the lemon juice made the mixture a little bit wetter and dense.
  • Cool down the pan and then put on a cutting board to cut into fingers
  • Now the biscuits are ready to serve and enjoy.

If you would like to have a pink biscuit box as I have in my pictures, I downloaded the printable from Salt Harvest Creatives. Just remember to print the page double-sided.

This is me (yes that is my box of biscuits in front of the TV) giving Rebecca my biscuits, I hope she likes them. I think they are very much like Ted’s.
The biscuits are made and now in the pink box
>

Smash Blue Glass Bento Box was perfect for storing the rest of the Ted Lasso Biscuits

Post Feast Review

I did think that the biscuits are more like shortbread. I think next time I make these I will use a traditional shortbread recipe and add a few tweaks to see what will work, adding lime, more lemon rind, orange zest, or maybe chocolate drops (dark chocolate of course)

A friend said that he made it before and thought it needed something and that is why he strongly suggested that I add lemon – he did so and thought it made a huge difference. I made this recipe with lemon and haven’t tried it without but as it is basically just a shortbread recipe I can see that it might need something else to make to take it to another level.

I do wonder if there is a way to limit the amount of butter in this recipe…maybe it will take a few experiments to see if adding less still gives you the desired biscuit result.

Would I make this again?

Yes, I would. It was a nice biscuit but I would love to play with different tastes and ingredients and limit the amount of butter as well.

Sign up for my newsletter

Don’t miss a thing by signing up for my newsletter. This newsletter will list all giveaways and fabulous things that are happening. Stay current with all the things that are happening on Mummy to Twins Plus One.


This post has affiliate links

Categories
Family

Merry Christmas

It really doesn’t feel like it going to be Christmas Day tomorrow. I do feel extremely exhausted and hanging for the holidays, maybe this is due to all the stress and uncertainty that 2020 has brought.

The kids especially my four-year-old and very soon to be five years old is so excited for Christmas. He’s been singing made-up Christmas songs and doing fun dances around the house and also out in public. I am sorry to all the people that were at Woolworths the other day when my little boy went into Rudolph the Red Nose Reindeer at the top of his lungs! Yes, that was us… and cmon it is the festive time of year so this loud vibrant Christmas cheer should be forgiven right….. Well, there were a few people that were giving me horrible looks and tut-tutting at this situation.

Presents are under the tree, and we are waiting for Santa

I hope Santa brings you some wonderful surprises and you spend wonderful relaxing time with the family.

Happy Holidays.

Categories
Creative

LEGO Skittles

Note: This first appeared on my Kiddipedia article – Creative Activities for Kids

Making LEGO Skittles is so much fun and a great activity to keep little kids entertained.

Playing with LEGO helps kids with problem-solving, confidence, creativity, and problem skills.


  Steps:   

  1. Use LEGO DUPLO/LEGO  
  2. Start building towers
  3. Make 5 – 6 different towers or more it is up to you
  4. Decorate your towers with animals or other LEGO items
  5. Get a small ball and then see how many skittle towers you can knockdown
  6. If they break, build them again and keep on playing

Enjoy and have fun playing LEGO Skittles.

Sign up for my newsletter

Stay current with all the things that are happening on Mummy to Twins Plus One. Don’t miss a thing by signing up for my newsletter. This newsletter will list all giveaways and fabulous things that are happening.