Make this easy and cheap gift for birthdays, Mother’s Day, Father’s Day, Celebrating being a new mum/dad, or even Christmas. Capture the feet and hands of your little ones on canvas. Warning this is a messy activity.
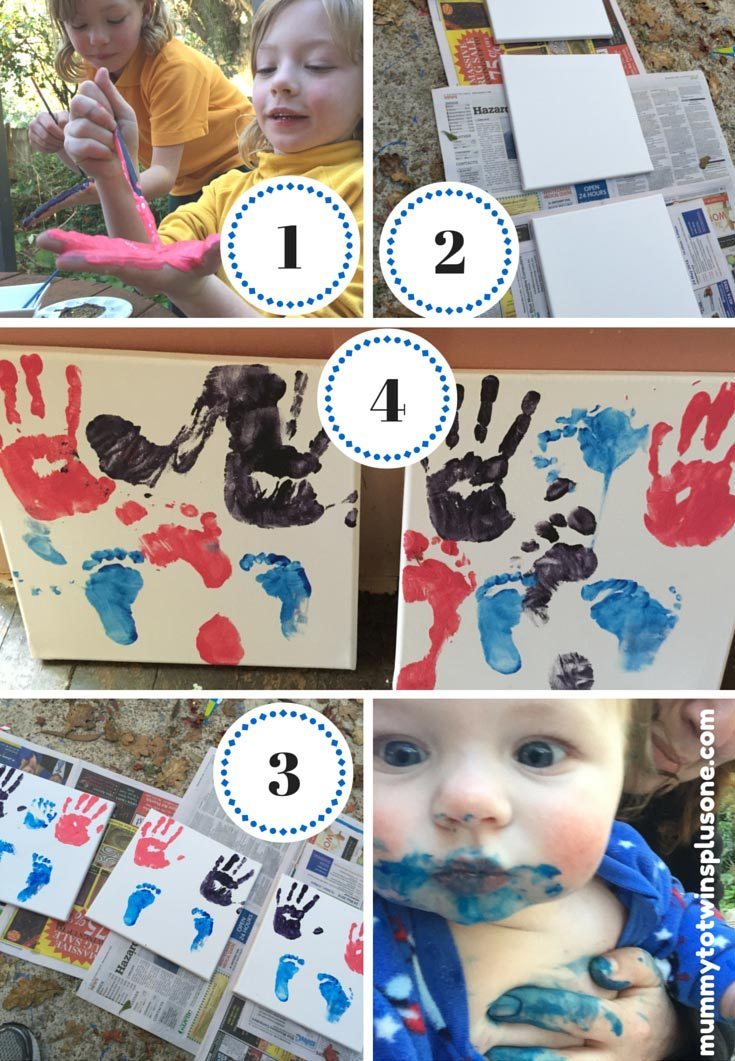
DIY: Hand & Foot Print Canvas
Continue reading
0 Comments