Categories
Creative

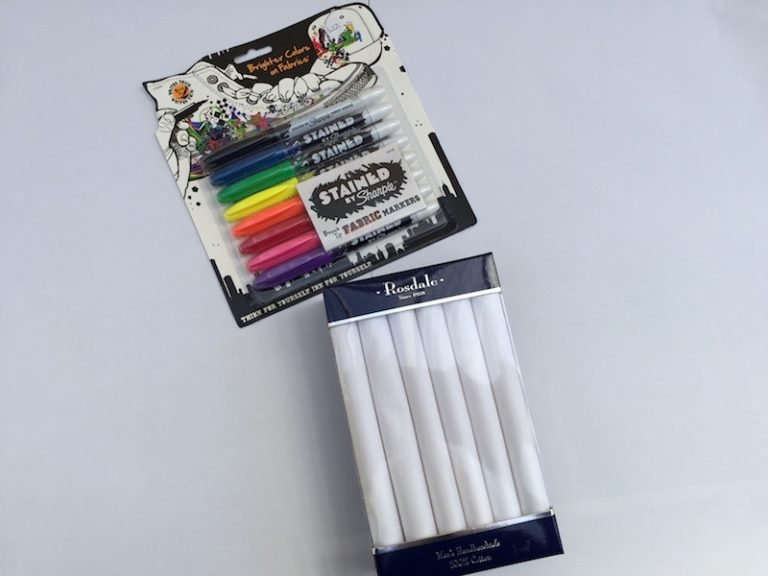
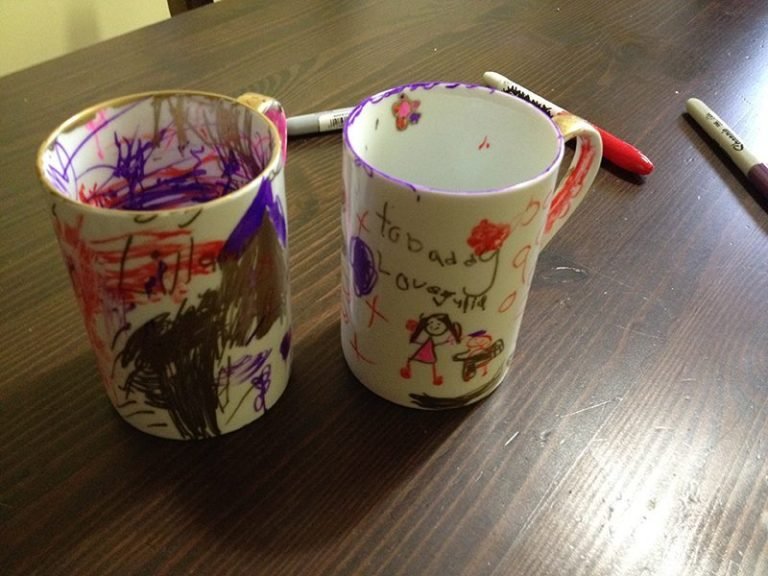
Decorate Handkerchiefs with Stained Sharpies

It is always nice to have gifts that are unique. A gift that has meaning, and of course is special to you and others.

Creating a gift that is a work of art is even better.

How about decorating a handkerchief for dad, mum, or anyone!

This gift idea is not only just for dads but can be for mum, grandparents, friends or even as a teacher gift.

Yes, this idea is easily adapted to whoever you wish to give it to. It just depends on your imagination.

This simple DIY gift is super easy to create and won’t cost the earth.

Equipment Need:

  • Handkerchiefs – You can purchase some or even make some if you are crafty at sewing. I purchased plain white ones. You can get different colours with patterns if you wish and incorporate this into your design.
  • A pack of Stained Sharpie Pens (Fabric Markers)
  • Cardboard or paper to put on desk to make sure that the pens don’t bleed onto the desk.

Before you get started with your design it is always advisable to think about what you would like to achieve.

Check out what I created below:

A Breakdown of my decorated handkerchief:

  • For my first attempt at decorating the handkerchief, I just stuck to patterns in one colour.
  • I alternated rows to give it a better visual effect.
  • As the handkerchief had a pattern on the border I decided to not decorate there and leave the pattern the way it was originally.
  • Once the patterns in the red colour were finished, I then added some text on one side of the handkerchief and did it on the other end, and it is upside down from each other. This was done on purpose to make sure the text can be read no matter which way you have the handkerchief.
  • I was going to iron the handkerchief afterwards to heat set but have read that this is not needed for the Sharpie pens.
  • One post that I read recommended leaving the decoration for an hour to set.
Lillian working on her masterpiece for daddy.

The twins have both decorated their own handkerchiefs for daddy and I think they look amazing.

If you need a quick gift I would give this a go. I’m sure he will not have anything like it and of course love the fact that it is such a personal gift.


Julia creating her own colourful handkerchief for daddy.

If you do create a handkerchief decorated with sharpies for Father’s Day it would be amazing if you could share your pictures on our Facebook Page. I am sure that we can gain inspiration from your creations.

My first attempt at using Stained Sharpie Pens to decorate a handkerchief for hubby.


Thanks for following another great craft idea from Mummy to Twins Plus One. Stay tuned for more on the blog soon.


Julia's finished artwork on a handkerchief for Father's Day.
Julia’s finished artwork on a handkerchief for Father’s Day.
Lillian's brightly coloured Sharpie coloured handkerchief for daddy.
Lillian’s brightly coloured Sharpie coloured handkerchief for daddy.

I hope you enjoyed this post.

Sign up to my newsletter

Stay current with all the things that are happening on Mummy to Twins Plus One? Don’t miss a thing by signing up to my newsletter. This newsletter will list all giveaways and fabulous things that are happening.

Categories
Nuffnang

Review: Crayola Color Alive

Brought to you by Nuffnang and Crayola

Do your kids love to colour? Do they love to draw and do art? Mine do and they create copious amounts of art it is not funny. The girls just love to be creative and any opportunity to be imaginative and push the boundaries.

Have you heard of Crayola’s ‘Color Alive’ books?

They are so cool! It is a fabulous way for kids to have their favourite characters come to life

  • The characters can be scanned so they are seen in 4D.
  • You can take selfies with your favourite character, tickle them, even have pretend fights with them (how amazing would this be. Not just your average colouring book!)
  • The Color Alive books come with their very own crayons and some crayons give the pictures virtual color effects. Some effects that you can create are: comic symbols for Marvel Avengers, ice sparkles for Disney Frozen, fire for Mythical Creatures and pixie dust for Enchanted Fairies.
The crayons and look a special one that is just for pixie dust.
Enchanted Forest Crayola 'Color Alive'
Enchanted Forest Crayola ‘Color Alive’

The twins just loved these new colouring books. They just loved the idea that the page comes to life. Yes you read that right…All you need is an iPhone, iPad, or Android/Windows Device.  Also after you have finished colouring the whole book you can download new pages from the app. Yes how great is that. Your little ones will be so happy to have more to do, it will be a win all round.

Color Alive app is compatible with iOS, Android, and Windows devices. It is available on the iTunes App Store, Google play, and the Windows Store. For specific device compatibility, visit Crayola.com/AppCheck.

Mythical Creatures Crayola 'Color Alive'
Mythical Creatures Crayola ‘Color Alive’

See how one of my girls scanned in the dragon from the Mythical Creatures Crayola ‘Color Alive’ Book


I was sent the following to review:

  • Crayola Color Alive – Disney Frozen
  • Crayola Color Alive – Marvel Avengers
  • Crayola Color Alive – Mythical Creatures
  • Crayola Color Alive – Enchanted Forest
Avengers Crayola 'Color Alive'
Avengers Crayola ‘Color Alive’

The above books are are priced at $7.99 each. So that is great value. My kids have had a blast with just the few that we have been sent so I can imagine the many more hours of entertainment that is left to be had. Each pack includes six Crayola Crayons, one Special Effect Crayon, 16 Action Colouring Pages and FREE app download.

See the special effects on the dragon from the Mythical Creatures Crayola ‘Color Alive’ Book

It has been cold and bad weather lately… yes we have had snow and it has been freezing. Why not be warm inside and have your favourite characters come to life. The twins loved this and cannot wait to do more and of course get more books. One of them on the must buy list is Monster High, the girls are imagining what the characters will do

Creative shot of a fairy in one of the girls hands.
Yes even I had a picture with the fairy.
I have named this picture, "Mother of Dragons" It was this girl that created the dragon so it is an apt title.
I have named this picture, “Mother of Dragons” It was this girl that created the dragon so it is an apt title.
One of the Avengers
One of the Avengers
How cool does this avenger look!
Even the baby had to have a selfie with the dragon.
Geez this fairy was in everyone's photo.
Geez this fairy was in everyone’s photo.

As you can see we all got in on the fun
with the Crayola ‘Color Alive’ books.

Our overview and opinion of the Crayola ‘Color Alive’ products was 100% favourable. They are a cheap, fun and a clever way for kids to spend some time. Also due to our wet and cold weather it is something for the kids to do where you know they will be okay, have a great time and have a unique experience.

It is a great gift idea and a quick item to have on hand for your child’s next play date.

For more information please visit the Crayola Website


Categories
Creative

DIY: Hand & Foot Print Canvas

Need a unique gift for a family member? Don’t have heaps of money? Well, this great project will give you a cheap gift and your family member will cherish the present for years to come.

This gift can be for birthdays, Mother’s Day, Father’s Day, Celebrating being a new mum/dad, or even Christmas.  So don’t worry it will be perfect for any occasion.

Create your own hand and feet print canvas, great gift idea. Be prepared for mess. It was a bunch of fun though, but the baby got the messiest. Enjoy!
Create your own hand and feet print canvas, great gift idea. Be prepared for a mess. It was a bunch of fun though, but the baby got the messiest. Enjoy!

Gather Your Materials

  • Washable Paint. If you have more than 1 child you will need different colours for each child. I purchased red, blue and white paint. I made purple paint and also pink out of these colours. I ended up having purple, pink and blue for the 3 kids to use.
  • Canvas (You can small sizes, large ones or enormous size canvas. It is up to you and the project you are making) I chose small square ones so that they would easily fit in the post and also on a wall.
  • Newspaper to cover the floor or outside area. This makes sure you don’t get too messy.
  • Towels – You might want to have towels set up on the floor to protect the path to the bathroom so that your very messy kids can not mess things up too much once they get in there to get clean. I do find that if my kids are head to toe covered in paint, the walls and doors get covered in it too. Therefore having a washable paint is ideal as all you have to do is to give the wall and floor a quick wipe and all is good.
  • Paintbrushes – We used paintbrushes to put the paint on hands and feet. You can just put your hands and feet in the paint but using the paintbrush made it a bit easier.

How To Create the Prints

Step 1: Have your paint ready to go. If you need to mix colours have it all organised before the kids get near it.

Step 2: Put the newspaper down and then lay the canvas on top.

Step 3: Make sure kids are in clothes that can get dirty and then paint a foot or a hand and press on the canvas. (You might want to figure out where each hand and foot is going to go on the canvas. You don’t want to figure it out with excited kids who are ready to paint everything and anything. Before we put anything on a canvas I spoke to the girls about where each person’s hand was going to go and we were going to save space for the baby as well.)

Step 4: Since I was making more than one canvas at the same time I did this 3 times for each person. I made one for my Mother in Law, one for my mum and also one for me!

Step 5: Once you have all the hands and prints on the canvas, it now needs to dry. It should dry well overnight and be ready to post the next day. I picked one up for my Mother in Law. It just needed some bubble wrap to protect it and it sat in the box with the other goodies for her birthday.


This is a good rainy day activity. I am sure it will keep the kids happy and having fun. Afterward, they can have a bubble bath and you get some peace and quiet after they are relaxed and tired.

Maybe after the bath put on a film for them to watch or read them a story…… I do live in hope that the kids will be super tired after activities.

Oh well, whatever you do enjoy. I hope this gives you some great ideas and a cheap gift idea to create.


Sign up for my newsletter

Stay current with all the things that are happening on Mummy to Twins Plus One. Don’t miss a thing by signing up for my newsletter. This newsletter will list all giveaways and fabulous things that are happening.


This post has an affiliate link

Categories
Creative Uncategorised

DIY: Hand & Foot Print Canvas

Need a unique gift for a family member? Don’t have heaps of money? Well this great project will give you a cheap gift and your family member will cherish the present for years to come.

This gift can be for birthday’s, Mother’s Day, Father’s Day, Celebrating being a new mum/dad, or even Christmas.  So don’t worry it will be perfect for any occasion.

Create your own hand and feet print canvas, great gift idea. Be prepared for mess. It was a bunch of fun though, but the baby got the messiest. Enjoy!

Gather Your Materials

  • Washable Paint. If you have more than 1 child you will need different colours for each child. I purchased red, blue and white paint. I made purple paint and also pink out of these colours. I ended up having purple, pink and blue for the 3 kids to use.
  • Canvas (You can small sizes, large ones or enormous size canvas. It is up to you and the project you are making) I chose small square ones so that they would easily fit in the post and also on a wall.
  • Newspaper to cover the floor or outside area. This makes sure you don’t get too messy.
  • Towels – You might want to have towels set up on the floor to protect the path to the bathroom so that your very messy kids can not mess things up too much once they get in there to get clean. I do find that if my kids are head to toe covered in paint, the walls and doors get covered in it too. Therefore having a washable paint is ideal as all you have to do is to give the wall and floor a quick wipe and all is good.
  • Paint brushes – We used the paint brushes to put the paint on hands and feet. You can just put your hands and feet in the paint but using the paint brush made it a bit easier.

How To Create the Prints

Step 1: Have your paint ready to go. If you need to mix colours have it all organised before the kids get near it.

Step 2: Put the newspaper down and then lay the canvas on top.

Step 3: Make sure kids are in clothes that can get dirty and then paint a foot or a hand and press on the canvas. (You might want to figure out where each hand and foot is going to go on the canvas. You don’t want to figure it out with excited kids who are ready to paint everything and anything. Before we put anything on a canvas I spoke to the girls about where each persons hand was going to go and we were going to save space for the baby as well.)

Step 4: Since I was making more than one canvas at the same time I did this 3 times for each person. I made one for my Mother in Law, one for my mum and also one for me!

Step 5: Once you have all the hands and prints on the canvas, it now needs to dry. It should dry well overnight and be ready to post the next day. I packed one up for my Mother in Law. It just needed some bubble wrap to protect it and it sat in the box with the other goodies for her birthday.


This is a good rainy day activity. I am sure it will keep the kids happy and having fun. Afterwards they can have a bubble bath and you get some peace and quiet after they are relaxed and tried. Maybe after the bath put on a film for them to watch or read them a story…… I do live in hope  that the kids will be super tired after activities.

Oh well, whatever you do enjoy. I hope this gives you some great ideas and a cheap gift idea to create.


Categories
6 years and beyond

A Star Wars Father’s Day

Today is Father’s Day. Today it was seven years ago I went off to hospital to have the twins. It was more like waiting a week to have them but it was on Father’s Day that it all happened. It makes me wonder when it will all happen with this baby? Will it be Christmas Day? New Year’s Day or will it be on time? Who knows. The only thing that has been happening is that whoever is in my belly is jumping around and is very active. I must have a trampoline in there?? It feels like that is the case at times.

The kids and I have secretly put all hubby’s surprises on his desk.

Father's Day Presents for Hubby
Father’s Day Presents for Hubby
Artwork to celebrate Father's Day
Artwork to celebrate Father’s Day

What did we get him you ask?

I decided to make him something as I did not see really anything that he could use or might want.  One of the girls who was with me picked out a special cookbook that came with cookie cutters.

Star Wars Cookbook that hubby got for Father's Day
Star Wars Cookbook that hubby got for Father’s Day

One of the girls helped me with picking something from the cookbook to make for daddy for Father’s Day. She picked Chewy Chocolate Cookies. We got all the ingredients and then made our big batch of cookies.  The reciepe made heaps of dough so I had heaps of cookies to make.

The kids are rather taken with Star Wars lately. They know many of the characters and like the action and the stories.

One child also purchased some Anzac Biscuits at the school Father’s Day shop. I think daddy will have plenty of snacks to eat and of course more to cook in his cookbook.

We are taking hubby out for lunch to celebrate Father’s Day. I have not booked anywhere so I hope we can get in. I did not think to make a reservation and just hope that we are lucky to get in for lunch where we like or at least somewhere else.

What are you doing for Father’s day? Did dad/hubby like their presents?


Categories
Creative

DIY: Get Creative with Sharpies

This post was originally created for a Father’s Day tutorial. However this could be applied for Christmas gifts, birthdays and anything at all. Use it to create some great presents for Christmas.


I do have something organised for hubby for Father’s Day. However I thought it might be nice for the twins to do something creative for daddy themselves. I have had some friends do things with sharpie pens and I have always been curious. Online I saw that you can decorate a mug/cup with sharpie pens, then bake it and all good to use. How amazing and interesting. Will it work? The only way is to give it a go.

createacupfordad_web

So I got the kids some sharpie pens from the shop and a white mug each and then each child had to decorate them.  I told them that they can do whatever design they wished to. One child was very expressive and creative and wanted to colour the whole mug in and the other was trying to draw and write more on the mug. Interesting the difference. It did not matter what they created, it was an expression of them to their daddy.

What do you need?

1. Sharpie Pens. I purchased mine individually as this worked out a little cheaper. You can get a pack of 12 for about $20. Packs I saw for less varied between $14 or more.

2. A cup or a mug to decorate. I choose to have white mugs as then the colours from the pens will show up more

3. An oven to bake the mugs in

Concentrating on her creation for daddy.

What is the process?

1. Once you have all your materials ready you can then start.

2. Decorate your mugs

3. Finalise your decoration and once happy you are ready to bake in the oven.

4. Bake in the oven for 30mins at 180°C or 356°F

Once baked you are good to use the cup. Might need to wait a bit and hand wash carefully to make sure it is all clean to use. As I have never done this before I am keen to see how they go. I would not put in the dishwasher.

Happy creating and this is a great cheap last minute gift for Father’s Day. Have fun!

Finished mugs ready to be baked

Note: Some colours after it was baked have changed. The gold seems to have turned into brown. Maybe I need to get different sharpies next time.

Categories
Creative

Gift Idea: Frame Your Kids Drawings

My kids create so many drawings and some have been just wonderful (Pre-school has told them that if they don’t put their names on their art it gets put in the recycling, I have been told they are prolific creaters and of course the  quantity they create).  It is great to see the girl’s drawings looking like people and actual things that they are saying they have drawn.

For Father’s Day this year I thought why not frame some of the girl’s drawings. I did ask them to draw daddy and they were good enough to oblige.  This gift idea is not just for one event it could be for birthdays, Christmas, Mother’s Day and as mentioned Father’s Day. So be creative and include your kids in the gift giving.

My artists work
My artists work

Having a nice framed art from the grandkids would be a lovely gift that is cost effective also. I got a deal with the frames. I think from memory I purchased 3 for $20 so a bargain. The paper we already had and of course the creative little artists had a myriad of pens, textas, and crayons to use for their art.

Once framed the drawings look amazing, it makes them looks great and important. One good idea is that if you don’t want to part with the drawings you can hang some on the wall and rotate the drawings. This is a nice way to showcase your kids art and proudly on the walls.

My creative little artists

So why not give a unique gift that will not cost the earth. It is also nice to have the kids help with the pressie giving and creation.  Why not give it a go and see the smile on your relatives and friends faces when they receive the wonderful art from your little artists. Send in your comments.