Categories
Recipes

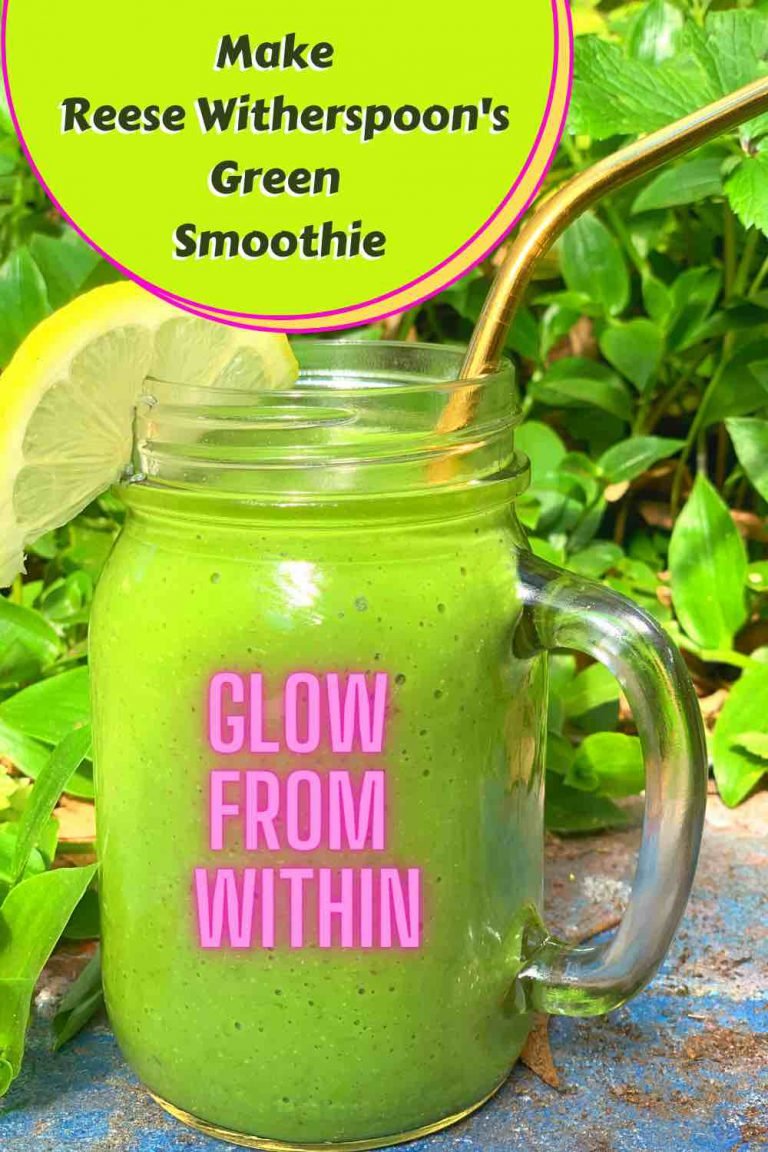
Make Reese Witherspoon’s Green Smoothie

Lately I have been at a loss to how to help my hair. It seems to be like straw, falling out and just looking horrible lately. It could be my age (yes well over 40), it could be hormones, or it could be that I am lacking a vitamin or two.

Or it could be just stress and being in desperate need of a holiday (however with the restrictions, lockdowns and border closures a holiday is not going to happen any time soon.

It is not just my hair that is of concern, I am wanting to improve my overall health. Greens, vegetables and fruit offer so many health benefits, and having them everyday will make sure I stay super healthy.

I am hoping that adding this go to green smoothie to my daily routine will make me feel better, have more energy and it will also help my hair and skin too.

“The recipe comes in around 270 calories and has a whopping 20 grams of fiber per serving from all that produce, which helps give it some staying power.” https://www.eatingwell.com/article/7823948/reese-witherspoon-drinks-this-green-smoothie-every-day-heres-the-recipe/

Glow from within with Reese Witherspoon’s Green Smoothie

I have tried many things to help me out, vitamins, sunlight (could it be vitamin D?)

So thought why not give this green smoothie that Kerry Washington and Reese Witherspoon swear by, a good go.

Ingredients

  • 2 heads romaine lettuce (I bought a huge mixed bag of Kale and spinach)
  • 1/2 cup spinach
  • 1/2 cup coconut water
  • 1 whole banana
  • 1 whole apple (core removed)
  • 1 whole pear (core removed)
  • 1 whole lemon (rind removed)
  • Celery (optional) ( I purchased the pre-cut celery sticks and added 2 of them)
  • Almond butter (optional) (I didn’t have almond butter but added 2 tablespoons of Macro Cereal LSA. It has Linseeds (50%), Sunflower Seeds (35%), Almonds (15%)
All the ingredients that I used other than the Macro LSA for the green smoothie

Method

I deviated from the method Reese uses to create her smoothie but rest assured it all ended up blended and mixed so I suppose it really doesn’t matter how you get there, as long as it is all zapped and ready to drink.

  1. I added the coconut water to the blender
  2. Then added half a bag of my kale and spinach leaves
  3. I made sure all was well and truely chopped and all liquid, then added the pear, lemon, banana, 2 sticks of pre-cut celery, an apple sliced (I didn’t take off the skin so had to blend a little longer), and then 2 tablespoons of Macro Cereal LSA
  4. I blended for a little extra time to make sure all ingredients were thoroughly mixed in well and there were no lumps.
  5. Now pour into a glass and add the reminder of the smoothie to the fridge for the next day.
Trying the green smoothie for the first time

“Reese also mentions that she originally heard of this recipe from her Little Fires Everywhere co-star, Kerry Washington, years ago: “I sat next to her at an awards show and I didn’t really know her but I said, ‘Your skin is so beautiful, what do you do?’ And she said, ‘I actually think it’s this drink… it’s just really changed my skin and it makes my hair and nails really strong’, so I was in.” https://www.eatingwell.com/article/7823948/reese-witherspoon-drinks-this-green-smoothie-every-day-heres-the-recipe/

Post Smoothie Review

My first batch was very tasty and rather thick that it was a bit of an effort to drink with my reusable straws. My second batch I used the reminder of the coconut water and added an extra pear to the mixture.

I am only on day four of having this green smoothie daily but I think it is giving me more energy and get up and go. I know it is early days yet and being on it for a month or two you will see more results with your skin, hair and rest of your body.

Are you a fan of green smoothies? Have they helped you? If so let me know.

Sign up for my newsletter

Stay current with all the things that are happening on Mummy to Twins Plus One. Don’t miss a thing by signing up for my newsletter. This newsletter will list all giveaways and fabulous things that are happening.


Categories
Recipes

Gin Cocktail Recipes

Yesterday was World Gin Day and I was looking forward to a Gin and Tonic with my new Roku Gin from Japan, however, I was so exhausted after exhausting my five-year-old. I just had dinner and went to bed. So I will be celebrating World Gin Day a day later…however, I really don’t need a special day to celebrate a nice drink of gin, do you?

Which was a pity due to the fact I do love a gin cocktail or two.

Cape Byron Distillery, which is the home of the beloved Brookie’s Gin sent some gin cocktail recipes for everyone to try.

CUPPA SHIRL

CUPPA SHIRL

Ingredients
45 mL Shirl the Pearl by Brookie’s
30 mL Lemon juice
15 mL Honey Syrup
60 mL Hot water
Burnt Orange Wheel to Garnish

Method
Combine all ingredients in a cup and stir, and garnish.

Drinking Instructions
Best served in a teacup and perfectly paired with a blanket, fluffy socks and book.

CASSIA NOVA

CASSIA NOVA

Ingredients
50 ml Brookie’s Byron Dry Gin15 ml Toasted green apple & Cassia Bark Syrup2 dashes Angostura BittersDehydrated cinnamon glazed apple wheel – to garnish

Method
Combine all ingredients in a cup. Stir & strain into glass and garnish.

Drinking Instructions
Best served in a Nick & Nora glass whilst you stare longingly out a window watching the rain.

MULLED SLOW

MULLED SLOW

Ingredients
50ml Brookie’s Slow Gin
50ml Cloudy Apple Juice
50ml Water
1x Teaspoon Honey
1/2 Cinnamon Stick
2x Cardamom Pods
1/2x Teaspoon Ground Ginger
1x Orange Zest
1/2x Vanilla Pod

Method
Add all ingredients (except Slow Gin) to pan. Medium heat till boiling then reduce & simmer down for 15 mins. Add Slow Gin & strain into a cup. Garnish with Orange Zest. Recipe for one serve/cup but we recommend cooking larger volumes to store in the fridge & enjoy as needed.

Drinking Instructions
Best served in a Teacup, for those cold nights at home.   

If you are a gin lover you might also love my post called, MAKE MUM A FEENEY’S G & TEA

Enjoy and I hope this gives you some new ideas for your gin cocktails.

Sign up for my newsletter

Stay current with all the things that are happening on Mummy to Twins Plus One. Don’t miss a thing by signing up for my newsletter. This newsletter will list all giveaways and fabulous things that are happening.


This post contains affiliate links

Categories
Recipes

Clone Scones for Star Wars Day

May the 4th Be With You!

Are you are a Star Wars fan? Do you celebrate Star Wars Day?  How about celebrating by making a yummy batch of Clone Scones!


How to make Clone Scones?

I found this great recipe in the Star Wars Cookbook, I got the cook book for hubby for Father’s Day years ago now.

Before you start anything make sure to preheat your oven to 200°c

Make some Clone Scones to celebrate Star Wars Day

Ingredients

  • Cups of plain flour – also more for dusting on the dough so it doesn’t stick
  • Half a cup of oats (I used rolled oats)
  • 1/3 cup of brown sugar
  • 2 1/2 teaspoons of baking powder
  • 1/2 teaspoon of baking soda
  • 1/2 teaspoon of salt
  • 3/4 cup of unsalted butter – make sure it is cold
  • 2 lemons juiced and rind included (the original recipe calls for 3/4 cup of raisins, I didn’t have any and they are not my favourite anyway)
  • 1 cup of milk, plus 1 tablespoon at room temperature for brushing on top of the scones
  • 2 tablespoons granulated sugar (I used caster sugar)
  • 1/2 teaspoon of ground cinnamon

Adding the milk to the mixture for clone scones

Made the recipe my own by adding lemon instead of raisins

Method

  1. Make sure you have preheated your oven to 200°c
  2. Get a large bowl and add the following ingredients: 3 cups of flour, oats, brown sugar, baking powder, baking soda, and salt and mix all together.
  3. Add the butter in slices to the mixture and blend together with the dry mixture
  4. Add raisins if you wish now. I added lemon rind and juice to my mixture instead and used 2 lemons.
  5. Mix everything together so that it looks like a coarse dough.
  6. Add 1 cup of milk to the mixture and combine until the dough holds everything together.
  7. Have trays ready with baking paper on them or you can butter trays to allow the dough not to stick
  8. Make sure that the dough is roughly about 1.5 centimeters thick and then cut out the shapes you want for your clone scones. I just used a circle shape and mine were a little too big, you might want to make them smaller. I wanted mine to resemble large scones that you might get at an afternoon tea.
  9. Cut out your clone scones and add them to the tray
  10. Cook for 12-15mins or until they are golden.
  11. When the clone scones come out of the oven you can now brush the tops with the tablespoon of milk mixed with the granulated sugar and cinnamon. This makes them look shiny on top and gives them a nice glaze (I forgot to do this to mine so my version doesn’t look shiny but didn’t impact on taste.)
  12. Serve hot and add cream, and jam or honey to enjoy your clone scones this Star Wars Day.


The clone scone dough all ready to cut into shapes and to bake

Cooked and cooling down to allow everyone to try some yummy clone scones


The Finished Product – SUPER YUMMY!

Ready to eat and with added honey

Great resources to make Star Wars Day fun:


Sign up for my newsletter

Stay current with all the things that are happening on Mummy to Twins Plus One. Don’t miss a thing by signing up for my newsletter. This newsletter will list all giveaways and fabulous things that are happening.

This post has affiliate links

Categories
Recipes

Vanilla, Banana & Chia Seed Cake

Do you want to make a super easy and super tasty, and healthy cake?

This cake is so tasty and no one will know it has secret ingredients that are actually good for you!

Just between you and me, the good ingredients are bananas and chia seeds.  Just don’t tell anyone!

Vanilla, banana & chia seed cake all ready to eat. Adding raspberries made it taste fabulous as well.


To make this recipe even easier I used a Vanilla cake mix from Woolworths.

Ingredients

  • Vanilla cake mix
  • 3 Bananas
  • 160ml of milk
  • 2 Eggs
  • Olive oil instead of butter
  • 1 Tablespoon of Chia Seeds

Vanilla, Banana and Chia Seed cake all cooked and ready to eat!


How long to cook for

Set oven for 180°C  and bake for 40-45 minutes or until a skewer comes out clean. (Sometimes I find 30mins is enough, depends on the mixture and your oven)


Enjoy and you can be happy knowing that the kids will be finally eating something healthy.


Have fun with this recipe and after you make your yummy cake enjoy it for some afternoon tea.


Sign up for my newsletter

Stay current with all the things that are happening on Mummy to Twins Plus One. Don’t miss a thing by signing up for my newsletter. This newsletter will list all giveaways and fabulous things that are happening.


Categories
Recipes

Make Vietnamese Spring Rolls

I’ve never made Vietnamese Spring Rolls before and thought they looked hard. However, they were super easy to create.

So what do you need to make Vietnamese Spring Rolls?

  • Rice Paper Wrappers
  • Carrot – Grated
  • Cooked Chicken – You can add prawns, beef or anything else that takes your fancy
  • Lettuce/bok choy
  • Bean shoots
  • Water Chesnuts
  • Soy Sauce, chilli flakes or a special spring roll sauce of your choosing.


All my ingredients for the inside of my spring rolls.


See diagram on how to fold the spring rolls. I didn't see this at first and my first ones were not as good. The other ones were better, but I think I need more practice.
See diagram on how to fold the spring rolls. I didn’t see this at first and my first ones were not as good. The other ones were better, but I think I need more practice.

Method

  1. Do each rice paper wrapper at a time. Wet the wrapper for a few minutes in water. Once done put it on a damp cloth/tea towel.
  2. Add the ingredients to the middle of the wrapper.
  3. Now fold the wrapper to make the spring roll. Fold over the sides and then roll tightly until it is rolled tight in a roll.
  4. Do it for all the spring roll wrappers and until you finish all your ingredients.
  5. Serve with soy and chilli sauce or a mixture of sauce that you love.

Make sure to work fast as the rice paper wrapper is prone to tear and stick to things. This is why it is a good idea to have the rice paper wrapper on a damp surface like a tea towel.

Spring Rolls ready to be served! They were yummy and super easy to make.

Give it a go and make your very own Vietnamese Spring Rolls. I hope you enjoy them.

Put in any ingredients you like and enjoy!


Sign up for my newsletter

Stay current with all the things that are happening on Mummy to Twins Plus One. Don’t miss a thing by signing up for my newsletter. This newsletter will list all giveaways and fabulous things that are happening.


This post contains affiliate links


Categories
Recipes

Entertaining is easy with the Philips Airfryer XXL

Do you have an airfryer? If you do, I’m sure you are like me and love yours as much as I do.

A while ago I was sent the Philips Airfryer XXL to test out and see what magic I could cook up. I’ve now had this amazing appliance for a few months and I wanted to share with you all the great recipes that I’ve been able to cook in the airfryer. I also recently received the Philips Baking Master Kit, an extra addition to trying out new things.

Philips Baking Master Kit for the Airfryer XXL
Cakes always come out perfect in the Philips Airfryer Cake Tin

What type of things have I been cooking? 

  • Cakes – Chocolate, Vanilla, Chocolate Blueberry and Orange & Poppy Seed Pound Cake 
  • Cupcakes – Chocolate and Vanilla 
  • Roast Chicken and Salad 
  • Steak and Vegetables 
  • Sausages and Lamb Chops
Cupcakes cooked in the airfryer, super easy and so simple. Always comes out of the silicone molds in one piece.
Cupcakes cooked in the airfryer, are super easy and so simple. It always comes out of the silicone moulds in one piece.

Cakes

Cakes are super simple to cook in the airfryer.

I’ve made it even more easy and used packet mixes from the supermarket (You can make from scratch or use packet mixes)

Method

• Make the cake mixture
• Grease the cake tin with a little butter or oil
• Pour mixture into the tin
• Set the airfryer to cake setting, 180 degrees for 28 mins
• Leave to cook for the full 28 minutes and then wait till the airfryer beeps to tell you it is all done.
• Once all cooked, take out of the airfryer carefully as it will be extremely hot (make sure to have an oven mitt to take out without burning yourself)
• Leave for a bit and then take out of the tin to cool on a cooling rack.
• Once cool, ice and decorate or serve warm with ice cream.

Halloween cake cooked in the Philips Airfryer


Orange & Poppy Seed Pound Cake

Orange and Poppy Seed Pound Cake cooked in the Philips Airfryer

Cupcakes

Method

  • Mix cake mixture
  • Fill 2/3 full in a silicone mould
  • 120 degrees for 22 minutes on the cake setting (Cake setting defaults to 180 so just press the temp icon and change it to suit)
  • Cook for the required time limit
  • Once cooked take out and allow to cool
  • The cupcakes will come out easily of the silicone moulds and you will not need butter or oil in them (So this is even better)
Chocolate cupcakes straight out of the airfyer

Steak and Vegetables

Cooking steak and vegetables in the airfryer is so quick and easy. I’ve been amazed at how well it cooks steak and in fact any meat, it seems to keep the meat so moist.

I served the Steak and Vegetables with homemade Beetroot and Orange Spiced Chutney.

Ingredients

  • 2 Scotch Steak Fillets
  • Olive Oil
  • 3 Carrots
  • 4 Potatoes
  • Chilli Flakes
  • Italian Herbs

Marinade

Soy Sauce and Honey – I added a tablespoon of honey and a good splash of soy.

Method

  • Cut up the carrots and potatoes roughly, small enough to cook quickly and be like bite-sized chip sizes.
  • Put carrots and potatoes in a bowl and add 1 tablespoon of olive oil. Mix so that all vegetables have the oil on them.
  • Add a tablespoon of chilli flakes and a tablespoon of Italian herbs. Mix well together.
  • Add the vegetables to the airfryer basket.
  • Put airfryer on the M (Mixed Setting)
  • Set the temperature for 200 degrees and cook for 20 minutes. Make sure to stop at the 10-minute mark to stir and to make sure that they are cooking okay. If you don’t like your veggies crispy you might want to take them out at the 10-minute mark.
  • Once the veggies have completed the second 10 minutes of cooking time, take them out and keep warm.
  • Now make up the marinade if you haven’t done so already. Once the honey and soy marinade is complete put in the steaks so that they can be fully coated with the marinade.
  • Put the steaks in the airfryer basket
  • Set the airfryer to the meat preset
  • Set the temperature to 180 degrees and cook for 12 minutes. No need to stop to turn over, just let the meat cook.

Sausages and chops

Before I cooked the Steak and Vegetables, I did lamb chops and sausages for the kids’ dinner.

It was very simple and very quick. I just had to clean up the tray and basket before I cooked the steak and veggies.

Alexander’s Dinner
Alexander’s Dinner

Note: Before I cooked the sausages and chops, I sprayed the basket with a little bit of olive oil.

The following went into the airfryer:

  • 2 chops
  • 4 sausages

They were cooked at 200 degrees on the meat setting for 12 minutes.

So yummy it’s all eaten!

Roast Chicken and Salad

I saw the roast chicken recipe video on the Philips website and wanted to give it a go. I did mine with a twist, I purchased an already marinated and stuffed chicken from the supermarket.

However, my chicken was a little bigger than it should have been so I was lucky that it fit okay into the airfryer. My chicken was 1.7kg and I was hoping to get a chicken that was 1.5kg at the biggest or maybe 1.2kg but the smallest was 1.7kg at the shops. It didn’t look that big, so I gave it a go.

Philips Airfryer Roast Chicken with Salad

Ingredients

1 whole chicken either marinated and stuffed by others or you can create your own.

Salad – I picked up a salad kit at the supermarket to make dinner even easier.

You can add vegetables, rice or other things to the chicken if you don’t want a salad.

Method

  • Spray the airfryer tray with some olive oil
  • Add the chicken to the airfryer tray
  • Set the airfryer to 180 degrees and choose the poultry setting
  • Cook for 60 minutes

I’ve previously made Homemade Chips and hubby wanted to give the airfryer a go and made Lamb chops & vegetables with rice.

Homemade airfryer chips - they were a huge hit.
Homemade airfryer chips – they were a huge hit.

Entertaining is so easy with the Philips Airfryer XXL. You will create some super yummy and tasty meals and impress your family and friends.

Another benefit is that the airfryer uses less oil and is a healthier way to cook, with up to 90% less fat. Plus, it is a super quick way to create some family favourites.

Find more recipes with the Philips Airfryer App, available at the App Store and on Google Play

You can also see further recipes on the Philips Chef website.

More Airfryer recipes and ideas on the blog soon!

Do you have an airfryer? What is the best recipe you have created in yours? Share so we can all try your delicious recipes.

Sign up for my newsletter

Stay current with all the things that are happening on Mummy to Twins Plus One. Don’t miss a thing by signing up for my newsletter. This newsletter will list all giveaways and fabulous things that are happening.

This page includes affiliate links.

Categories
Recipes

Healthy Energy Bars

I have always wanted to make my own energy bars but had no way of mixing all the ingredients. I’ve had equipment failures with my blender and food mixer.

Currently, I don’t have a food mixer and have managed to do all this recipe with my new Breville Blender.  Hubby bought me The Kinetix® Control from Breville. It’s great and so easy to use and to clean.

Making my energy bars in my new fab blender.

I’m on a lookout for a new food mixer. If you are a brand that has a snazzy new mixer that I can use that would be awesome.

I know this is a long shot, but you have to put it out there in the universe. You never know right?

Okay, so what did I make?

I reworked a raw chocolate, coconut and seed energy bar recipe from Taste.com.au.

Ingredients

  • 35 grams of shredded coconut
  • 80 grams of unsalted cashew nuts
  • 30 grams of organic cocoa powder (I buy mine from the local health food shop, and it is so yummy. Adding this cocoa powder makes it taste like dark chocolate)
  • 2 tablespoons of pepitas
  • 150 grams of figs stem removed
  • 250 grams of dates pitted
  • 2 tablespoons of Zen Green Tea Matcha
  • 80 grams of cranberries
  • You will need to add some water during the process of mixing all the ingredients. Just add a bit and see how it goes. If you add too much the mixture might not come together as it should.

Note: I found that the mixture tasted a bit bitter and really needs the cranberries or another fruit.  After adding the cranberries it was so yummy!

Method

  1. Put in the dates, figs, into the mixer (Or in my case the blender. If you are doing it in a blender you might need to do it in batches. This helped me as it meant that the blades would spin easily for each part of the process.)
  2. Add the other ingredients one at a time to mix it all together. If you need to, take them out to free up some space in your mixer. At this stage, you might need to add a bit of water to allow the mixture to blend together.
  3. Once all done to put on a sheet of baking paper and roll out. Add to a plastic container and then add to the fridge/freezer. Once set for a day or so, cut up the energy bar into bite-sized pieces.
  4. Enjoy your yummy healthy snacks

The energy bar mixture is all ready to go into the fridge/freezer. Cannot wait to eat one.

Ideas to decorate your energy bars – Sprinkle a little green tea matcha over the top of your bars, add some extra pepitas/seeds/nuts to the top of the bars.

The healthy energy bars are now ready to eat. They are so yummy!

I hope this inspires you to create your own yummy and healthy energy bars. If you wish you can substitute any ingredients with others that you love more.

You might find that you prefer sunflower seeds or wish to have almonds instead. Also, cranberries might be your favourite either. If so add the fruit that is the best for you.

Experiment and make a bar that is right for you and the family.

Sign up for my newsletter

Stay current with all the things that are happening on Mummy to Twins Plus One? Don’t miss a thing by signing up for my newsletter. This newsletter will list all giveaways and fabulous things that are happening.


Categories
Recipes

Matcha Green Tea Frozen Yoghurt

Zen Green Tea sent me some Green Tea Matcha to try.  They had no idea that I just love green tea… actually it is so yummy the smell of the matcha powder made me want green tea ice cream.

However, I am trying to watch what I eat and thought why not create Matcha Green Tea Yoghurt.  A healthy alternative to ice cream.

Yummy Zen Green Tea Matcha

Matcha has great health benefits

  • Matcha’s whole-leaf stone-ground powder gives you 100% of the health benefits of green tea: from boosting energy and concentration to fighting cancer. Helping your body fight anything is good in my book.
  • Due to drinking the whole leaf – one cup of matcha delivers 137x the antioxidants of a cup brewed with a green tea bag. How amazing is this and great for you!

Did you know?

“The L-Theanine amino acid in matcha is known for its ability to increase alpha waves in the brain and promote calmness and alert concentration giving matcha users a great “Zen” state.”


The ingredients I used to make the Matcha Green Tree Yoghurt.


Ingredients

  • 3 cups of yoghurt – I used Jalna creamy honey vanilla yoghurt.
  • 3 tablespoons of Zen Green Tea matcha green tea powder (You can change amounts if you don’t like it being strong)
  • 1 Tablespoon of honey (whatever you have available) Note: you can add more honey if you like it sweeter.

Adding the Matcha Green Tea powder to the mixture.

Method

  • Put all ingredients in one bowl
  • Mix ingredients together with a stick mixer or put in a blender.
  • If you have mixed in a blender pour into an airtight container and freeze.
  • Freeze for 2 nights and then eat!

To serve: Take out of the freezer and wait a bit for the frozen yoghurt to be soft. Once a bit softer you can use an ice cream scoop to put some in a bowl to eat.

Ready to eat and smells so yummy! This Matcha Green Tea Yoghurt is a great summer afternoon treat.

Enjoy your yummy Matcha Green Tea Frozen Yoghurt.

One finished bowl of Matcha Green Tea Yoghurt.... or should I say what is left of the yoghurt.
One finished bowl of Matcha Green Tea Yoghurt…. or should I say what is left of the yoghurt.

This super easy and quick dessert is a great treat and also super healthy.

Store it in the freezer and just use it whenever you need it. Its an excellent after dinner dessert. You can add berries, nuts and anything else you would prefer to make it your own.

I hope this has inspired you to make your own frozen yoghurt with Green Tea Matcha Powder.

If you wish to purchase the Zen Green Tea Matcha Powder you can shop online at the Zen Green Tea Website

A HUGE thank you to Zen Green Tea for sending me some samples to try.

Coming soon are things to make with Turmeric Matcha Green Tea Powder, plus more recipes for the Green Tea Matcha Powder.

Sign up for my newsletter

Stay current with all the things that are happening on Mummy to Twins Plus One? Don’t miss a thing by signing up for my newsletter. This newsletter will list all giveaways and fabulous things that are happening.

Categories
Recipes

DIY Ice Cream or Ice Blocks

Summer has been extremely hot and finding ways to stay cool is tough. It has been very difficult in nearly 50 degree heats that some areas have faced in the current heatwave. Yes you read that right, some areas got to 47 degrees.

Ice cream and ice blocks have been a good way to try and reduce the temperature although a temporary fix, it is a yummy and fun solution that adults and kids enjoy.

Make your own ice blocks and ice creams. See what I did to create some yummy healthy treats.

As you might imagine we have consumed more ice creams and ice blocks than we usually do and that was due to the fact that this summer has been a scorcher.

How do you make having a cool treat not bad for you?

One thing you could do is to make your ow, and this way you know that the ingredients are all good and natural.

I decided to create a Banana Yogurt and Watermelon Ice Cream. I don’t know if it is 100% an ice cream but I’m using this term due to the creamy nature of the banana yogurt mixture.

You can put whatever you want into your ice creams/blocks it is up to your tastes and what you have available.

Some ideas are:

  • Fruit juice ice blocks (you can even cheat and put store bought juice into the moulds). If you make your own juice just put the juice in the ice blocks molds and then you have a frozen orange one or apple one.
  • Mango purée and yoghurt.
  • Blueberries and strawberry purée if you wish you can add yoghurt or just leave it as the fruit mix and freeze these.
  • Pineapple and Yoghurt or just the pineapple juice and pulp. This would be so refreshing.

You will need an ice block mould so that you can put your mixture in. They are easy to get hold of and very cheap. Check out the supermarkets or a shop that supplies kitchen products.

The fruit I added to the ice creams I created.

Ingredients

  • 2 very ripe bananas
  • 1 cup of watermelon de-seeded.
  • Yoghurt 2-3 tablespoons, depending on how you like it. I did not want to over power the banana with the yoghurt but wanted it to help the creamy texture of the ice cream.  I used Jalna Yoghurt but you can use whatever you like or have available.

This is the yoghurt that I added to the banana mixture. I just love this Jalna yoghurt. It is so yummy and creamy.

Method

  1. Mash up bananas with a fork. I made sure they were mashed up pretty good but wanted to keep the texture of them. After they were well and truly mashed up I added some yoghurt.
  2. Add the yoghurt to the banana mixture. I added 2-3 heaped tablespoons and then mixed it all in.

    The bananas and the yoghurt together.
    The bananas and the yoghurt together.


  3. I cut about a cup of watermelon and made sure that the seeds were removed.
  4. Mash up the watermelon. I used a potato masher as I did not just want juice but also the flesh as well.

    The watermelon all mashed up and ready to go into the ice block mold.
    The watermelon all mashed up and ready to go into the ice block mold.


    I used a potato masher to mash up the watermelon. This gave me some nice fleshy bits of the watermelon with juice as well.
    I used a potato masher to mash up the watermelon. This gave me some nice fleshy bits of the watermelon with juice as well.


  5. I added the banana yoghurt mixture to the bottom, then added the watermelon mixture to middle and finally on top finished off with more banana mixture. You might find that you have more mixture over and therefore can do another batch. If so put some glad wrap over the container and put it in the fridge for the next batch.

    Adding the banana and yoghurt mixture to the ice blocks moulds.
    Adding the banana and yoghurt mixture to the ice blocks moulds.

    Adding the watermelon mixture to the ice block moulds.
    Adding the watermelon mixture to the ice block moulds.

    All the mixture is in the ice cream mould. Now the rest of the lids need to go on and into the freezer to set.
    All the mixture is in the ice cream mould. Now the rest of the lids need to go on and into the freezer to set.


  6. Once all molds have the mixture in them put on the lids and pop into the freezer. Freeze overnight and then the next day you be able to enjoy your home made ice cream or ice block.

    All ready to go into the freezer. Soon we will have 6 mini ice creams.
    All ready to go into the freezer. Soon we will have 6 mini ice creams.

After the ice creams set in the fridge for 24 hours, now I can finally sample one of my creations. They were very yummy and really hit the spot.


I hope this has inspired you to create your own ice blocks or ice creams at home. It was so easy to make and they tasted so yummy. I am now keen to try more flavours for my next creation.

Enjoy and happy eating your yummy ice creams.

Categories
Recipes

Mocktail Recipes

I had such great entries for the Maggie Beer Mocktail Giveaway. I wanted to have a breakdown of each entry so that you can make their creation if you wish to.


1. @mocked_ Created a wonderful orange fizz mocktail.
Tropical juice, freshly squeezed orange, sugar and a squeeze of lemon. (You can add some soda/mineral water if you wish. This is my addition to mocked_’s  creation)

Thanks to mocked_ for this lovely mocktail creation. Don't you think it looks yummy.
Thanks to mocked_ for this lovely mocktail creation. Don’t you think it looks yummy.

2. @mandachic84 created a super yummy and bright looking Lemon, Lime and Bitters.

I have taken how to make a Lemon, Lime and Bitters drink from wikipedia, see below:

Lemon, Lime and Bitters is a mixed drink made with lemonade, lime cordial, and Angostura bitters. The lemonade is sometimes substituted with lemon squash instead. Wikipedia

Main alcohol: Bitters

Ingredients: 1/2 oz Lime juice cordial (aka sweetened lime juice), 1/2 oz Lemonade, 4-5 dashes of Angostura Bitters

Preparation: Rim the inside of the glass with 4 to 5 dashes of Angostura Bitters then pour lemonade and lime cordial into glass. Garnish with Lemon if desired.

This glass of Lemon, Lime and Bitters from @mandachic84 looks so refreshing. It also looks very bright and just the thing for summer fun.

3. @donkey1212z created a tasty and yummy looking cranberry mocktail.

Add cranberry juice, carbonated water, orange juice, a pinch of powered ginger, orange zest. Mint to decorate. No set measurements, just as per your taste.

I love cranberry juice, and this yummy creation from @donkey1212z will definitely be something I will try.

3. @tamboarillo created a tomato chilli cocktail. Something different and healthy as well.

Tomato juice, add some chilli (depending on how hot you like it you might add more, or less if you just want a little kick). Make sure you add ice to make it really chilled. Added extras can be lemon juice, or pepper. Really depends on your tastes.

Strawberry was added as a garnish. If you prefer something other than a strawberry then add a raspberry or other item.

Thanks to @tamboarillo for this unique mocktail.

4. @belindamoxey created a pear mocktail that made me feel that I was on an exotic getaway.

Combine 2 parts pear juice with 1 part lemon juice and 1 part sugar syrup (more or less depending on your sweet tooth) in a cocktail shaker and shake with lots of ice. Pour into a glass and add soda water. Jazz it up with a cute little umbrella and garnish and you’ll definitely not feel like you’re missing out


5. @threeandme59 had a great mocktail created with pomegranate juice and cranberry juice. A very yummy looking mocktail.

All you need is equal quantities of pomegranate juice, cranberry juice and Soda water, deliciously good and SO EASY on a hot day, or any day! I throw in a few blueberries for yumminess, colour and antioxidants, and fresh mint leaves when available.

@threeandme59 healthy and vibrant looking mocktail. YUM!


6. @figs_and_honey created a brilliant looking and sounding mocktail. Raspberries, apple juice and all with a slither of homemade toffee!

Fresh raspberries mixed with a little lemon juice, sugar and chilled apple juice and ice cubes..blended with a wedge of lemon and slither of homemade toffee!

Vicki from Figs and Honey Catering and Events was taken with the reaction to this mocktail that she has added it to her list of items for the grazing platters and more. Ask her for one when you order some of her lovely food. Or if you wish to know how she makes it… not sure she will share her secrets but you can ask.


@figs_and_honey and the raspberry, apple juice and homemade toffee cocktail.

I hope you liked these different mocktail creations. Thanks so much for all the amazing and clever entries.

If you would like more inspiration check out Maggie Beer’s Drink Recipes

This list will give you some great recipes so that you can get ready for the weekend or have one for Friday drinks.

Categories
Recipes

I’m a Steggler for An Easy Dinner

When I left the Kids Business Bloggers Brunch Steggles gave me a chicken for dinner. Yes I left with dinner all taken care of. How amazing is that.

Due to such a big day with a super early start (I was up at 4am) I decided to do the chicken dinner on the Saturday night rather than the Friday night which was the same day as the brunch. The chicken was in a nice cool bag with some cool bricks to ensure that it lasted on my drive  home. Once home I put it straight into the fridge to allow me to use it the next night.

The chicken in the cute cool bag from Steggles.

The chicken that Steggles gave me.

Important: Before any cooking can begin. You need to make sure to heat up the oven. Put your oven on to 180ºC.

Part 1 – Cut up the chicken

I have cut up cooked chickens before and it has all been good and worked well. I thought it would be similar. It was not really hard but I did not have a smooth run at it. I must say part of the way in cutting up my chicken I thought I have no idea what I am doing and need some help. At this point I was nearly done so just continued and considering I did a pretty good job. I had the drumsticks, wings and other parts all ready to swim in the marinade mix.

If you would like to learn how to properly section a whole chicken this video below from the New York Times is an excellent resource.

The lovely people at Steggles even included a recipe card. However due to not having some appliances to make the job easy and also being a tired mamma I opted for the easy solution. A bottled marinade by Nandos and some soy sauce was added to flavour the chicken.

Part 2 – Marinate the chicken

The marinade that I used. Plus I added some soy sauce.

The cut up Steggles chicken in the marinade.

The chicken got put in a dish that is oven proof and then the marinade got added. I made sure to mix the marinade over all the chicken and then covered the dish to put in the fridge so it had some time for the flavours to infuse. I left the chicken in the fridge for about 2 hours.

Part 3 – The vegetables to go with the roast chicken

I cut up the following:

  • Potatoes
  • Carrots
  • Pumpkin

Once I had an adequate supply for four people (noting that hubby and I were mainly going to be eating the vegetables) I boiled them for a bit so that it did not take too long to bake in the oven.

The vegetables boiling away. This way they don't take too long in the oven.
The vegetables boiling away. This way they don’t take too long in the oven.

Part 4 – Put chicken in the oven & add the vegetables

The oven should be very ready and hot to now cook this very yummy looking chicken. Put the chicken on the top part of the oven and let it cook for about 10-15mins. After about 15mins check on it and if need be turn over all bits of chicken. Mix the chicken around in the marinade and anything else you have added to the mixture. How about some onions or what about some mushrooms.

It is about now that I put the vegetables in the oven to cook also. I added them to the bottom tray to start of with. Once the chicken was done the vegetables got moved to the top of the oven and continued to get crispy and yummy.

I added some olive oil spread to the dish with the vegetables and a little bit of salt for taste.

The baked vegetables after they came out of the oven.

Leave the chicken for another about 15mins and then check again. Make sure all parts are cooked all the way through. If not cooked all the way through turn over and put back to carry on cooking.

I noticed that the chicken cooked before the vegetables were done. However the vegetables did not require that much extra time. To make sure the vegetables were cooked I removed the chicken and put tin foil over the top to keep the meat hot and tender. It then allowed the vegetables to cook and to not spoil the meat.

The Steggles chicken all cooked and ready to be served up for dinner. YUM!

Part 5 – Ready to eat

The twins had the same meal we did. The chicken was a hit. Pity the kids were not fans of the vegetables.

Our baked chicken dinner thanks to Steggles. It was very yummy and an easy dinner to make.

#StegglerFor

#FamilyRoast

Do you love Steggles chicken as much as we do? Share your best ideas for your roasts or dinner inspirations. I do love a roast dinner that the family all sits down to. It is also getting cooler so a roast dinner is a great idea.

Maybe this has inspired you to give a roast a go. If so, let us know how it went.

Would you like some recipes to give you a few ideas and inspiration? Well Steggles have that covered also. Steggles have a whole recipe section that covers not just roasts, they have turkey, mince, and much more.

Did you know that Steggles is canteen approved for school lunches, I did not know either.

You can download the Steggles eBook of recipes for school lunches and give them a go. I think I will do this as it will give me more variety for the twins school lunches.

Thanks so much to Steggles for our baked chicken dinner. With this post I’m entering a competition to win a Steggles prize pack. Wish me luck.

Categories
Recipes Uncategorised

I’m a Steggler for An Easy Dinner

When I left the Kids Business Bloggers Brunch Steggles gave me a chicken for dinner. Yes I left with dinner all taken care of. How amazing is that.

Due to such a big day with a super early start (I was up at 4am) I decided to do the chicken dinner on the Saturday night rather than the Friday night which was the same day as the brunch. The chicken was in a nice cool bag with some cool bricks to ensure that it lasted on my drive  home. Once home I put it straight into the fridge to allow me to use it the next night.

The chicken in the cute cool bag from Steggles.

The chicken that Steggles gave me.

Important: Before any cooking can begin. You need to make sure to heat up the oven. Put your oven on to 180ºC.

Part 1 – Cut up the chicken

I have cut up cooked chickens before and it has all been good and worked well. I thought it would be similar. It was not really hard but I did not have a smooth run at it. I must say part of the way in cutting up my chicken I thought I have no idea what I am doing and need some help. At this point I was nearly done so just continued and considering I did a pretty good job. I had the drumsticks, wings and other parts all ready to swim in the marinade mix.

If you would like to learn how to properly section a whole chicken this video below from the New York Times is an excellent resource.

The lovely people at Steggles even included a recipe card. However due to not having some appliances to make the job easy and also being a tired mamma I opted for the easy solution. A bottled marinade by Nandos and some soy sauce was added to flavour the chicken.

Part 2 – Marinate the chicken

The marinade that I used. Plus I added some soy sauce.

The cut up Steggles chicken in the marinade.

The chicken got put in a dish that is oven proof and then the marinade got added. I made sure to mix the marinade over all the chicken and then covered the dish to put in the fridge so it had some time for the flavours to infuse. I left the chicken in the fridge for about 2 hours.

Part 3 – The vegetables to go with the roast chicken

I cut up the following:

  • Potatoes
  • Carrots
  • Pumpkin

Once I had an adequate supply for four people (noting that hubby and I were mainly going to be eating the vegetables) I boiled them for a bit so that it did not take too long to bake in the oven.

The vegetables boiling away. This way they don't take too long in the oven.
The vegetables boiling away. This way they don’t take too long in the oven.

Part 4 – Put chicken in the oven & add the vegetables

The oven should be very ready and hot to now cook this very yummy looking chicken. Put the chicken on the top part of the oven and let it cook for about 10-15mins. After about 15mins check on it and if need be turn over all bits of chicken. Mix the chicken around in the marinade and anything else you have added to the mixture. How about some onions or what about some mushrooms.

It is about now that I put the vegetables in the oven to cook also. I added them to the bottom tray to start of with. Once the chicken was done the vegetables got moved to the top of the oven and continued to get crispy and yummy.

I added some olive oil spread to the dish with the vegetables and a little bit of salt for taste.

The baked vegetables after they came out of the oven.

Leave the chicken for another about 15mins and then check again. Make sure all parts are cooked all the way through. If not cooked all the way through turn over and put back to carry on cooking.

I noticed that the chicken cooked before the vegetables were done. However the vegetables did not require that much extra time. To make sure the vegetables were cooked I removed the chicken and put tin foil over the top to keep the meat hot and tender. It then allowed the vegetables to cook and to not spoil the meat.

The Steggles chicken all cooked and ready to be served up for dinner. YUM!

Part 5 – Ready to eat

The twins had the same meal we did. The chicken was a hit. Pity the kids were not fans of the vegetables.

Our baked chicken dinner thanks to Steggles. It was very yummy and an easy dinner to make.

#StegglerFor

#FamilyRoast

Do you love Steggles chicken as much as we do? Share your best ideas for your roasts or dinner inspirations. I do love a roast dinner that the family all sits down to. It is also getting cooler so a roast dinner is a great idea.

Maybe this has inspired you to give a roast a go. If so, let us know how it went.

Would you like some recipes to give you a few ideas and inspiration? Well Steggles have that covered also. Steggles have a whole recipe section that covers not just roasts, they have turkey, mince, and much more.

Did you know that Steggles is canteen approved for school lunches, I did not know either.

You can download the Steggles eBook of recipes for school lunches and give them a go. I think I will do this as it will give me more variety for the twins school lunches.

Thanks so much to Steggles for our baked chicken dinner. With this post I’m entering a competition to win a Steggles prize pack. Wish me luck.

Categories
Recipes

Easter Baking With IGA

IGA sent me a bag of goodies to say Happy Easter. It was a lovely bag that I can reuse and it was filled with baked goods to make a special treat.

Choc Cornflake Slice to be precise! I have never made this before but thought since it is Easter and due to relatives coming for lunch tomorrow a treat is in order.


Now how did I make this amazing slice for the Easter Long Weekend?

Well, it is was super simple and it did not take long at all. The only thing that was hard was waiting for the slice to cool down.

Ingredients

  • 275g milk chocolate, chopped
  • 75g copha
  • 1 tbsp honey
  • 1⁄4 cup sugar
  • 80g unsalted butter
  • 3 cups of cornflakes
  • 1⁄2 cup shredded coconut
  • 1⁄4 cup dried cranberries
  • 35g milk chocolate, extra
  • 15g copha, extra


The chocolate and Copha ready to melt for the base of the slice


Method

  1. Preheat oven to 150C. Line the base and sides of an 18cm square cake tin with baking paper.
  2. Melt the chocolate and copha in a heatproof bowl over a saucepan of boiling water, stirring regularly. Remove from heat and pour over the base of the tin. Set aside.
  3. Meanwhile, in a large saucepan, melt together the honey, sugar and butter, stirring until sugar has dissolved.
  4. Place the cornflakes in a bowl with the coconut and cranberries and pour over the honey mixture.
  5. Spoon the cornflake mixture over the chocolate base. Bake for 10 minutes, remove and cool slightly before refrigerating until firm.
  6. Melt the remaining chocolate and copha together. Drizzle over the slice then cool fully before slicing into squares.
  7. Cool in the fridge for 45 mins. Once set you can slice it up to eat!  (I have left it out a bit to cool down before putting the tray in the fridge)

The copha and chocolate melted and spread on bottom of pan for the base of the slice.
The copha and chocolate melted and spread on bottom of the pan for the base of the slice.


TIP: If you don’t like cranberries, try a different fruit. You can also try white chocolate or dark. Why not add some nuts or other tasty things as well. Make it unique to your families likes.


The recipe card from IGA for Choc Cornflake Slice

Did you know that IGA has a great site full of tasty and easy to make recipes? It is a brilliant resource for a busy parent. Check it out and be inspired.

Sign up for my newsletter

Stay current with all the things that are happening on Mummy to Twins Plus One? Don’t miss a thing by signing up for my newsletter. This newsletter will list all giveaways and fabulous things that are happening.


Categories
Recipes

Make Stuffed Capsicums

Do you need a healthy idea for dinner or a side dish? This recipe can either be a main or a little something extra.

As you know I am undertaking the 12 week program from Body Beyond Birth, and wanted to try some of their tasty looking recipes.

I decided to make the following, Rice & Bean Stuffed Capsicums

Stuffed Capsicums ready to go into the oven.


NOTE: Just so you know I realised after purchasing all the ingredients that the online recipe can be altered for the number of people who you would be cooking for. I only used 2 capsicums cut in half to not make too much for an individual meal. However I did end up with a lot left over and that went in the fridge for the next night’s dinner.

The following ingredients are for 4 people. If you need to change this. Click on the number and change it with the up or down arrow on the link above for the recipe.

Making the stuffing: Cooking the beans, rice, and with all the other ingredients.


Ingredients

  • 1 1/3 cup cooked brown rice
  • 1 1/2 small zucchini diced
  • 3/4 small red onion diced
  • 4 red capsicums
  • 1 cup kidney beans drained & rinsed
  • 3 1/2 tablespoons of heaped fresh coriander finely chopped
  • 1 1/2 teaspoon lemon rind
  • 3 1/2 tablespoons pine nuts
  • Salt & pepper
  • 2 tablespoon olive oil + splash for cooking


I substituted the following: Instead of coriander I used parsley, due to hubby hating it. Instead of purchasing pine nuts I used almonds due to having them already. I added some parmesan cheese to the top of the capsicum so that it would add to the flavour and give a nice consistency.

I used almonds instead of pine nuts. I already had almonds at home and thought it would be cheaper to use what I already had.

Jackie from Body Beyond Birth told me that you need to pick food choices that work for you. If you don’t make things from scratch all the time it will be hard to keep up. Eat well and incorporate it into your every day life.  Make it easy for you.

Instructions

  1. I put my oven on to 180 degrees as my oven is gas is old and funny. The instructions on the recipe say 150 for an electric oven. Make sure to your line your baking tray.
  2. I halved and cleaned out my capsicum pieces. I like to make sure that they are ready.
  3. Cook brown rice, drain, pour back into pot & cover off heat for 10 minutes.
  4. Cook zucchini & onion in a fry pan with a splash of olive oil on medium-high heat for a few minutes
  5. Once softened & starting to brown, take off heat & set aside.
  6. Combine all ingredients together except capsicums.
  7. Spoon mixture into capsicums.
  8. I added parmesan cheese and left off the olive oil drizzle in the recipe.
  9. Bake for 30-40 minutes until soft & cooked through
  10. Serve immediately

The capsicums ready to be stuffed.


I know I added some things to this dish and it was not exactly as listed. It tasted amazing and the addition of the lemon rind made it have an extra burst of flavour. Having the almonds made it have a nice texture and it was a great addition to a fabulous and easy dish.

Making it a main meal option

If you would like to make this as a main meal you can.

You can add mince or meat if you are not vegetarian. One good tip is to make sure that the capsicum pieces are a little bigger if it is a main meal, or have a few more if smaller.

You can play with what you add to the stuffing for the capsicums, and have different fillings for different menus. You could have a totally vegetarian dish and then switch it up by maybe adding some cheese in the stuffing mixture, or say shredded chicken and other root vegetables. The choices are endless and you can be as creative as you like.

Rice & Bean Stuffed Capsicums ready to eat. Yum. Just right for a side dish or for a main meal.


I hope this helps with some dinner ideas or maybe for lunch? You can have it for both. This is super easy dish and helps to make sure that you are getting more vetables in your diet. Well I suppose it depends on what you put in the stuffing.

Happy cooking!


Categories
Recipes

San Choy Bau

This was to celebrate Chinese New Year but can be made at any time.

This is a fast and quick recipe to make, it is also healthy and also very yummy.

sangchoybau_web

Ingredients

  • 500 grams of chicken/pork/beef/turkey  (It does not matter what type of mince you choose it is up to you and what you like)
  • I brown onion
  • 2 Spanish onions
  • 3 large mushrooms
  • A cup full of bok choy
  • Half a cup of diced cucumber
  • 2 grated carrots
  • Soy Sauce
  • A teaspoon of garlic paste
  • A couple of squirts of lime juice

You can add what ever vegetables that you would like. Bean shoots, oyster sauce, water chestnuts, and chilli flakes.  I did not add these as I made it for the kids. I’m going to add the chilli for my meal.

Even though it was missing the other sauces and chilli, it was very tasty and moreish.

Chopped veggies ready to be cooked

Method

  • Chop up all the vegetables
  • Wash the lettuce so that you can get some nice lettuce cups
  • Cook the mince and then add the vegetables to the pan.
  • Serve the mixture into a lettuce cup and eat!


The finished product, ready to eat! San Choy Bau.

I have not mastered getting enough lettuce bowls out of a head of lettuce. This is a skill that I need to learn. Do you know a trick to ensure you get more than 3 or 4?  Are yours a perfect size and shape. Mine looked a little straggly but tasted wonderful!


Categories
Recipes

Red Velvet Cupcakes

For Christmas my mother in law gave me a box set of cupcake recipes. I have been wanting to try them out and especially the Red Velvet Cupcake recipe. I have never had red velvet cake or cupcakes so was very keen to give it a go.

Red Velvet Cupcake Recipe

As I have never cooked this before and had no idea what the outcome would be. I collected all ingredients to create my cupcake masterpiece and enlisted my two cute little helpers to help make a big mess in the kitchen. You can image the kids would be messy but it was me that was the problem. I managed to put a mixture of beetroot, water, lemon juice and vanilla extract onto the walls of my kitchen. Not only did I give my walls a nice purple addition, the kids got some of it as well. I was very happy that it all came off and no one is the wiser. Well they are now, since I have told you about it. (So be careful if you give it a go)

redvelvetcupcakes2,1

The girls were very taken with the fact that we were adding beetroot. I was wondering if you would taste it? In the recipe you do add cocoa and other things that will help take the edge off the beetroot taste. I was also keen to see if they looked a deep red like the recipe told me they would. Only time would tell… I had to continue making them to see if the instructions were right.

The kids helping me cook the red velvet cupcakes

After all the mixing and adding the wet ingredients into the dry, the moment of truth was upon us. Will the mixture taste any good? As you can imagine the kids had to dip their fingers in for a taste. Lillian decided to go and have a spoonful and took a couple of goes and like it until it got a bit much for her. I tasted it and it was a bit sweet, but I thought due to cooking it might not be as sweet. Julia did not like the mixture and let me continue my test batch of red velvet cupcakes.

Trying the mixture.
Trying the mixture.

In the recipe it did mention that you can add more cocoa, and I did think of this but wanted to see how the recipe came out when you followed all instructions.

Cooked Red Velvet Cupcakes

So what was the outcome?

I was not taken with them, but think I might need to try different ways of making red velvet cupcakes. Maybe more chocolate would take away the tartness or sweetness from the beetroot. Maybe less beetroot?

Do you love red velvet cupcakes? Do you add more cocoa to take the edge off the beetroot? What is your favourite recipe? How do I get them to be bright red?  Send in your tips and tricks.

Continue the discussion on our Twitter and Facebook Pages.

Categories
Recipes

Review: Chef Series from Wine Selectors

The lovely people at Wine Selectors sent me a mixed box of wine. Three white and three red. I must say I am partial to a nice glass of wine and getting a box sent to me was just wonderful. I love presents in the mail, don’t you?

I was also blown away that it came with tasting notes and recipes. Also with suggestions of what bottle to have for each meal. It certainly has taken the guesswork out of mealtime.

Wine Selectors Chef Series

I was sent a box of the Wine Selectors Chef Series below are the ones that I received:

• Alastair McLeod Riesling 2010
• Ben O’Donoghue Pinot Gris 2011
• Ian Parmenter Gewürztraminer 2012
• Ben O’Donoghue Shiraz 2011
• Frank Camorra Tempranillo 2010
• Grossi Barbera 2011


The Shiraz

The wines so far have been so yummy and matched the meal that I have cooked, and also for one that I did not. Ben O’Donoghue’s Shiraz melted in our mouths and of course, my hubby had to help me taste them. He has also loved all the fancy cooking this week. The Shiraz was rich in flavour and did not taste like it was only made in 2011 it had strength beyond its age. Very impressed with this drop of wine.

The recipe card for Ben O’Donoghue’s Shiraz 2011 was “Grilled Miso Cured Wagu Beef

Grilled Miso Cured Wagu Beef, cooked by me. It was so yummy I was told to do it again by hubby!

I did add some beans to the meal. I know it was not on the recipe card. So if you are this way inclined too, it worked a treat!

Picking a wine for your meal

Have you thought about what do I cook for dinner? What wine would go with what meal? Well, the lovely suggestions from wine selectors have taken the guesswork out of it all. Search Wine Selectors for recipes and get suggestions for wine suggestions for your meal.

The Riesling

I wanted to try out a meal not from the recipe cards to see if the wines matched and it did. I cooked chicken parcels wrapped in bacon & stuffed with pumpkin, feta & spinach. I teamed this dinner up with Alastair McLeod Riesling 2010, and again the wine really matched the meal and was finished off between hubby and me.

The Riesling was fruity and crisp, just right for these hot days and nights we have been having.

Another fancy meal, hubby is getting used to this. Chicken parcels wrapped in bacon & stuffed with pumpkin, fetta & spinach. Wine is Alastair McLeod Riesling 2010
Another fancy meal, hubby is getting used to this. Chicken parcels wrapped in bacon & stuffed with pumpkin, feta & spinach. Wine is Alastair McLeod Riesling 2010.

Get 15% off your next case of wine

Wine Selectors is offering a 15% discount for a box of 12 bottles of wine.  

Buy 12 bottles, get 15% off


Wine Selectors offer Convenience and a Great Selection

I have used Wine Selectors before. They have a great selection and it all gets delivered to your door. No going to the post office. This is great if you are busy and have kids. You don’t want to be carting around a box with all your other shopping, ideal to have it shipped to the house.

Hubby and I are enjoying our lovely wine and thanks again Wine Selectors for giving us such a great box to taste. I especially loved the recipes and will cook them all in time.

Note: This was a sponsored post for Wine Selectors. I was sent a box of wine to try and to give my thoughts on. All opinions are my own and from a mummy that has tried the products.

Sign up for my newsletter

Stay current with all the things that are happening on Mummy to Twins Plus One. Don’t miss a thing by signing up for my newsletter. This newsletter will list all giveaways and fabulous things that are happening.

This post has affiliate links

Categories
Recipes

Yummy Banana Bread

I made banana cake ages ago and it did not turn out just right. Today I ended up having so many over ripe bananas and thought, what can I do with these? Make banana bread? Banana cake/muffins? I did not want to just throw them out, so I gave it another go.

A new recipe was found and I have to disclose that I used Donna Hay’s recipe for Basic Banana Bread (I have not been paid to endorse this recipe or Donna Hay just tried it and thought it was great to share) and it was in fact very easy to follow and do with kids as well. My girls wanted to help me cook and one in particular was very fussy today and wanted to help mummy and stay close.

Over ripe bananas, just ready to be made into banana bread.

Before I knew it Lillian had jumped up onto the counter tops and was ready to help me make the banana bread. I helped Julia up as one could not just be up there. I was still organising all ingredients and did it while I followed the recipe as it made it easier.  The girls helped me.

The girls helping prepare the ingredients & sifting flour

The recipe called for the following(You can find this also on the link to the recipe above):

  • 125g butter, softened
  • 1 cup (175g) brown sugar
  • 1 teaspoon vanilla extract
  • 2 eggs
  • 2 cups mashed banana
  • 1¾ cups (255g) plain (all-purpose) flour, sifted
  • 1 teaspoon baking powder, sifted
  • 1 teaspoon bicarbonate of (baking) soda
  • 1 teaspoon ground cinnamon
  • ⅓ cup (115g) golden syrup
  • butter, extra, to serve

The girls sifting flour

The girls wanted to add an extra ingredient. What do you think they wanted added? Yep you guessed it chocolate. Hubby thought that banana bread would not be proper with chocolate bits, but I thought what the hell, why not give it a go.

One major failing was that I did not put in the golden syrup like the recipe asked for. This was neglected as I was too busy making sure super eager kids were not doing something they should not have! I only realised this fact after the tin with the mixture had gone into the oven. Oh well, I hope it tastes o.k.

I had a long wait until after dinner and then had to taste my banana bread. Will it be o.k? Will it be something that really needed the golden syrup, would the chocolate bits work? Who knew? It ended up being very yummy and I did not miss the golden syrup that I had missed out adding. Maybe when I make it again, I will add it. This way I will know what the taste should be and if I like it better without or with it.

The banana bread was delicious and the missing ingredient and the added chocolate worked so well. How good am I, and of course my wonderful assistants.
The banana bread was delicious and the missing ingredient did not seem to matter, and the added chocolate worked so well. How good am I, and of course my wonderful assistants.

Have you made a winning banana bread recipe? Did you change it to suit you and the family? Or did you accidentally forget something that made it different and more you? Send in your comments. Thanks to Donna Hay for the wonderful recipe and giving us a yummy desert tonight.